INSTRUCTION MANUAL To download this manual or others, go to: www.demoncarbs.
INTRODUCTION Demon Carburetors™ have many unique features that make them the ultimate choice for performance enthusiasts, like yourself. Whether it is everyday driving or just getting the most out of your hot rod, Road Demon™ will give you the necessary edge over others. This manual will discuss the special points and unique features of the carburetor, and the correct procedures for their proper installation and tuning.
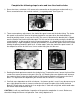
Figure 2 3. Slop in the linkage can be adjusted out by either tightening or loosening the lock nut. This will control the length of the compressed spring. Slightly bend the cam follower to adjust for linkage that bottoms out. Remember, it may take a balance of both cam follower and spring adjustments to get the system working best for the application. Different cam profiles are available which can alter the timing, volume, and duration of the pump shot.
Figure 4a Figure 4b Curb Idle Mixture Screws The curb idle mixture screws (total of 4) are located on each side of the metering block (Fig. 5 & 6). These screws control the amount of idle fuel mixture that will be discharged into the plenum from the curb idle ports located in the baseplate. These screws have been set during wet-flow testing at the factory and it is recommended that they remain in place as delivered for initial start-up.
nuts are installed on the studs and hand-tighten before beginning the final torque sequence. Use an alternating pattern to tighten each nut a little at a time. Do not over tighten the nuts. Only 5-7 foot pounds of torque are required to secure and seal the carburetor base to the manifold. Once the nuts are evenly torqued, check the carburetor linkage for smooth operation to wide open throttle, and then closed again. WARNING: Baseplates that are cracked during installation are not covered under warranty.
Connecting the Fuel Lines Do not use thread lockers, sealing compounds, or Teflon tape on AN flare fittings. When installing fuel bowl inlet fittings, use only the sealing washers or o-rings provided with the fitting. In most cases, a drop of oil to prevent thread galling is all that’s necessary when installing pipe threaded fittings. However, if a thread sealant is used on pipe fittings, use extreme caution to prevent any tape or compound from entering the internal flow area.
Vacuum Lines All Road Demon™ carburetors have three vacuum sources on the baseplate that can be used for PCV, distributor vacuum, diagnostics, or any other vacuum operated accessories (Fig. 10). The large fitting on the back of the baseplate, and the second fitting of the two small fittings on the side of the baseplate, are direct (below the butterfly) manifold vacuum sources.
process once again. Each engine may require a different number of throttle shots to ease starting. Determine what is best for your engine. Set the engine to a fast idle during the warm up period. If you change the adjustment of the idle speed setting screw for the warm up period, make a note of the screw setting so that it may be returned to its original position after warm up. This will prevent any drivability problems that could be caused by incorrect butterfly position.
Changing the float level is accomplished by loosening the locking screw and rotating the adjuster nut on the top of the bowl (Fig. 13). To prevent fuel leakage during the course of adjustments, only loosen the locking screw enough to allow rotation of the adjuster nut. Rotating the adjuster nut clockwise will lower the float level setting; conversely, rotating the adjuster nut counter-clockwise will raise the float level setting.
Complete the following steps to wire and tune the electric choke: 1. Run a wire from a switched +12V source to the connection on the pod cover marked with a (+). Run a second wire from the terminal marked (-) to a good ground. See Figure 14. Figure 14 2. There are two primary adjustments: the choke idle speed screw and the choke timing. The choke idle speed screw controls how far the primary butterflies are open when the choke butterfly is closed or partially closed. It sets your fast idle.
Fuel Pressure Most gasoline powered race engines usually require between 6 and 7-1/2 PSI fuel pressure. Gasoline carburetors can be run either at idle or wide open throttle at these pressures. Be sure your fuel delivery system is properly adjusted and able to maintain volume flow at these pressures. Improperly adjusted or inadequate fuel delivery will result in poor performance and possible engine damage.
Figure 17 Main Well Jets Main jets, located along the bottom edge of the block on the side opposite the bleeds, control the amount of fuel that enters the metering blocks, and for that matter, the amount of fuel moved by the carburetor. If the engine appears to be running rich through the entire powerband, a reduction in jet size will lean the fuel curve out. Jets are numbered, and the larger the number, the greater the amount of fuel that will be able to enter the fuel circuits.
will open. The lower the number, the more the vacuum has to drop for the valve to open. When the engine is under a big load, it produces decreased manifold vacuum along with an increased demand for fuel. When the manifold vacuum is less than the rating on the power valve, it opens and allows extra fuel to enter the main circuit of the metering block. It is a good idea to have a power valve rating that is lower in number than the vacuum produced by the engine at idle.
Tuning the Vacuum Pod Tuning the vacuum pod mainly involves spring changes to vary the opening rpm and rate. This is achieved by using a tuning kit such as Demon Carburetion™ part number 120083, which includes springs that vary in the amount of pre-load and spring rate in order to fine-tune the carburetor for every application. The Quick-Change Pod allows for tuning with different springs without the need to remove the pod body from the carburetor main body. 1.
FORD KICK-DOWN LINKAGE All new manufactured Road Demon Carburetors™ come with a Ford kick-down linkage. If running a Ford automatic and the kickdown linkage is needed, a spring and perch kit (P/N 421445) is required. Note spring mounting location on the linkage.
Return Address & Contact information: Demon Carburetion™ 1801 Russellville Road Bowling Green, KY 42101 Ph: 270-901-3346 www.demoncarbs.com © 2012 Demon Carburetion. All rights reserved.