
Operating instructions


50
Advanced Setup – Part 1 Advanced Setup – Part 1
• If a monitor is connected with an HDMI cable but the monitor
is not compatible with HDMI audio signal playback, only the
video signals are output to the monitor from the AVR-987.
• Audio signals input from the analog and digital terminals are not
output to the TV.
•With HDMI, the video and audio signals are transferred
simultaneously. When HDMI is assigned to an input source, the
digital audio input assignment switches to HDMI along with the
video input.
When this setting is made for input sources to which a digital
audio input (COAXIAL or OPTICAL) is previously assigned, the
digital audio assignment is set to HDMI.
In this case, reassign the digital input using the procedure
described at “Digital In Assign” ( page 47).
• It is not possible to make the “HDMI In Assign” settings for the
function assigned at “iPod Assign”.
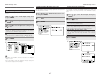
Setting the Component In Assignment
This assigns the component video input terminals for the
different input sources.
Press
DD HH
to select “Component In Assign”, then
press ENTER.
1
2
3
4
5
Compatible with HDMI1 and HDMI2.
1
Press ENTER.
• Signals input to the component video input terminal are output
simultaneously from component video monitor output
terminals 1 and 2.
• It is not possible to make the “Component In Assign” settings
for the function assigned at “iPod Assign”.
3
Press
DD HH
to select the input source, then press
FF
GG
to set.
2
1-RCA, 2-RCA, 3-RCA:
Assign the “1-RCA” (or “2-RCA” or “3-RCA”) input terminal
to the input function.
1
2
• If the resolution of the input component video signal is
something other than 480i/576i, down-conversion from the
component video signal to S-Video or video signals is not
possible. If you do not want to use the component video output
terminal, connect the player to the S-Video or video input
terminal ( page 14, 15).
• When a non-standard video signal from a game machine or
some other source is input, the video conversion function
might not operate. If this happens, please set the conversion
mode to “OFF”.
• When the video conversion function has been used,
information such as that of text broadcasts which has been
added to the video signal might not be output. If this happens,
please set the conversion mode to “OFF”.
Setting the Video Convert
Press
DD HH
to select “Video Convert”, then press
ENTER.
Press
DD HH
to select the input source, then press
FF
GG
to set.
ON, OFF:
Select “ON” to use the video conversion function, “OFF” if
you do not want to use it.
Press ENTER.
This sets whether or not to use the video conversion function.
1
2
3
1
2