
Operating instructions


58
Advanced Setup – Part 2 Advanced Setup – Part 2
Press
DD HH
to select the speaker, then press
FF GG
to set.
3
Press ENTER.
4
1
2
3
Set the volume of the various speakers so that the sound output
from the speakers and the subwoofer seems to have the same
volume level.
Press
DD HH
to select “Channel Level”, then press
ENTER.
Press
DD HH
to select “Test Tone Start”, then press
FF
to select “Yes”.
Press
FF GG
to set.
When “Auto” mode is selected:
Press
FF GG
to adjust the volume.
•Test tones are output automatically, in the order shown
below.
Auto:
Adjust the level while listening to the test tones produced
automatically from each speaker.
Test tones are automatically emitted from each speaker.
Manual:
Adjust with the speaker from which the test tone is output
switched manually.
FL
SW
C
FR
SR
SBL
SL
SB
SBR
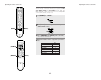
Setting the Channel Level
The volume can be adjusted within the range –12 dB to +12
dB.
When “Manual” mode is selected:
Press
DD HH
to select the speaker, then press
FF GG
to adjust the volume.
Press ENTER.
1
2
3
4
-1
4
-2
5
(2 speakers)
(1 speaker)
1
2
3
4
-1
4
-2
•To cancel the setting, press
HH
and select “Level Clear”, then
press
FF
and select “Yes”.
•To adjust the channel level separately for the different play
modes after setting the channel level, perform the operation on
page 34.
•Press
DD
to select “Step”, then press
FF GG
to change the
amount of variation if so desired.
• The distance changes in units of 1 foot (0.1 meters) or 0.1 foot
(0.01 meters) each time the button is pressed. Select the value
closest to the measured distance.
• Please note that the difference of distance for every
speaker should be 20 ft (6.0 m) or less. If you set an invalid
distance, a CAUTION notice, such as screen right will
appear. In such cases, move the appropriate speaker to the
position of the displayed value.
..... L1
..... L2
..... L3
..... L4
..... L5
..... L6
..... L7
..... L8