
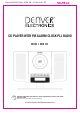
Instructions


ADJUST VOLUME
Press VOL.+ button to increase the volume.
Press VOL. Ð button to decrease the volume.
RADIO OPERATION
1. Press the STANDBY Button to switch on the unit.
2. Press the FUNCTION Button to the RADIO Function.
3. How to use the buttons for radio
i. Manual Tuning
Press the or button to search for desired frequency. Higher frequency can be
selected by pressing the button while Lower frequency can be selected by pressing
button
ii. Automatic Tuning
a) Press & hold the or button until the display frequency starts run
b) When a station of sufficient strength has been found Tuning will stop or you can stop the
automatic tuning by pressing or button.
4. To turn off the radio, Press the STANDBY button.
PRESET TUNING
1. Select your desired station according to the normal tuning procedure.
2. Press the MEMORY button on the remote, ÒP-01Ó will appear and flash on the display, Then
use M-UP or M-DN- button on the remote or press the M+ / M- button on the unit to change
the number where the station will be stored. (P01 to P20) to change the number where the
station will be stored. (P01 to P20)
3. Store the current frequency by pressing MEMORY button on the remote again when you get
the desired number.
4. Repeat the same procedure to set other desired frequencies into Memory No.1 to No.20
Note: The unit can be preset up to 20 stations.
MEMORY RECALL
Recall the stored frequencies by pressing M-UP or M-DN BUTTON on the unit, or press the M+ /
M- button on the unit to select 1 to 20 stations as desired
NOTE: As stored frequencies can only be stored for long time with the power supplying. The
station you stored will be lost and can not be recalled in case that you cut off the power.
HANDING A COMPACT DISC
(S^H`ZWYV[LJ[HKPZJHNHPUZ[ZJYH[JOLZZVPSK\Z[HUKL[J0MHKPZJPZ[YLH[LK^P[O
reasonable care, wiping off the disc with a soft cloth should be the only maintenance needed
to retain its excellent sound reproduction. Discs should be retained in their original case
during periods of non-use.
/HUKSLHKPZJVUS`I`P[ZLKNLZ+VUV[[V\JO[OLZ\YMHJLVYYHPUIV^JVSVYLKZPKLVM[OLKPZJ
/HUKSLHKPZJHZZOV^UPU[OLPSS\Z[YH[PVUZPU[OPZZLJ[PVU
<ZLHZVM[JSV[O[V^PWLHKPZJJSLHU+VUV[\ZLILUaLUL[OPUULYVYV[OLYJOLTPJHSJSLHULYZ
to clean the disc as damage may result. A disc should always be wiped in a straight line from
its center to its edge. Never wipe a disc in a circular motion.
+VUV[L_WVZLHKPZJ[VKPYLJ[Z\USPNO[OPNOO\TPKP[`VYOPNO[LTWLYH[\YLZMVYL_[LUKLK
periods of time. Do not place the Disc on other equipment or near any heat source.
+\Z[VU[OLWPJR\WSLUZJHUSLHK[VLYYH[PJVWLYH[PVUHUKPU[LYY\W[PVUVM[OLZV\UKK\YPUN
play. To clean the pickup lens, open the disc compartment and blow the dust off . Using a
camera lens blower(available at most camera stores)
5V[L!+VUV[[V\JO[OLZ\YMHJLVM[OLSLUZ+VUV[HSSV^HU`SPX\PKZVU[OLPUZPKLVM[OL
product.
;VJSLHU[OL*+WSH`LYJHIPUL[\ZLHZVM[HUKKHTWJSV[O[V^PYLVMM[OLL_[LYPVYZ\YMHJL
ENG-6