Important safety instructions to be kept with the product Please read attentively To prevent fire and electric shock, do not expose this receiver to rain or moisture. In order to avoid any possible risk of electric shock, never attempt to open the unit. In case of breakdown, reparation should be made by qualified technicians. No part of this unit should be repaired by users. WARNING! Presence of dangerous tension inside apparatus! Do not open. Risk of electric shock! No part should be repaired by users.
- This device must be connected to a 230V ~ 50Hz electrical network. - The plug must remain readily accessible after the installation of the product. Welcome Section Congratulations on choosing to buy a DENVER product. By doing so you now have the assurance and peace of mind that comes with purchasing a product made by one of the leading manufactory. Main features: z Slim size (230mm) z MPEG-2, MPEG-4(H.264) decoding z USB2.
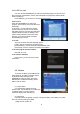
1. Installation of STB....................................................................................................... 2 1.1 Front Panel ....................................................................................................... 2 1.2 Rear Panel........................................................................................................ 2 1.3 Connection ....................................................................................................... 3 1.4 Remote .........
1. Installation of STB 1.1 Front Panel 1. Power: Switch between Standby mode and active mode. 2. CH+/CH-: Channel +/-,Move cursor up/down 3. on/off: Power lamp, red color in Standby mode, green color in active mode 4. IR sensor: Receive the remote control signal. 5. CI: Common Interface, to decode digital cable pay TV channels, Open the CI slot door on lower part of the front panel from right side, insert CAM module into CI slot correctly, insert smart card into the CAM module correctly.
7. HDMI Connecting to the HDMI input on the TV set. 8. USB It is used for playing wma,m4a, aac, JPEG,BMP,PNG,AVI, XVID,MKV and USB PVR(USB stickers, mobile HDD with external power supply and FAT32 format). USB harddisc on products with PVR function: Please notice that we recommend using a hard disc with OWN power supply on this unit. This is to ensure that it has enough power to work properly.
1.4 Remote : Switch between operation and standby modes. : Press to temporarily cut off the sound. 0-9: Enter number or select a channel number to watch. RCL: Switches to Last channel viewed. TV/R: Switch between TV and Radio mode. MENU: Displays the main menu. EXIT: Return to the previous menu or escape from the item OK: Confirm. : Move cursor up/down/left/right, page up/down, Volume +/-.Chanel +/FAV: Press to display the TV favorite list.
2. Installation Guide After all connections have been made properly, switch on TV and make sure the receiver is connected to the Main Power. Press Power button to switch receiver on. If you are using the receiver for the first time or restored to Factory Default, the Main Menu will appear on your TV screen.
for the EPG to load”. You can use the UP/DOWN key to select the preferred program. If there is more than one page of information, use the YELLOW button for page down and the BLUE button for page up. Press “OK” key, you can view or record program by timer Timer record Press the UP/DOWN key to select one program, press OK key, the event add menu will display.
[576P]: for PAL system TV. [720P]: for NTSC or PAL system TV. [1080I]: for NTSC or PAL system TV. (3). TV format If the video does not appear correctly, you need to change the settings. This should match the most common setting for TVs in your country. [NTSC]: for NTSC system TV. [PAL]: for PAL system TV. (4). Video Output You can set the video output mode. 3.3 Channel Search To access the menu, press MENU and select [Channel Search]. The Menu provides options to adjust the Channel Search settings.
3.3.4 Standby Loop Through You can select Standby Loop Through On or Off. Default setting is Off, when you connect the Loop Out port on the back of the box to TV or VCR etc, signal will be distorted on your TV/VCR when the box is in standby mode. You need to select ON, to let normal antenna signal looped through. 3.4 Time To access the menu, press MENU then select [Time]. The menu provides options to adjust the time settings. Press UP/DOWN to select an option and press RIGHT/LEFT to adjust the setting.
the channel you will need to enter either the default password '000000' or your own password. (2) Set Password Set or change the password for locked programs. Enter your old password or the default password '000000'. You will then be asked to enter your new password. To confirm re-enter your new password. Once it is confirmed, press EXIT to exit the Menu. (3) Restore Factory Default Reset your Set Top Box to the Default Factory Settings.
3.7.2 Photo Configure You can set Slide Time, Slide Mode and Aspect Ration. 3.7.3 Movie Configure In this menu, you can set Subtitle Specific, Subtitle BG and Subtitle Fontcolor. 3.7.4 PVR Configure This menu contains Record Device and Format. Record Device: you can view record device information. Format: you can format the device. 3.8 Audio key The program might have multilingual audio language and the audio broadcast on different audio mode such as Stereo, Left or Right.
3.9 TV Channel and radio Channel list Press OK key to display all TV channel or all Radio channel. Follow the help information at the bottom of the window to select preference channel. 4. Other functions introduction 4.1 Program information If you press the INFO button once, a banner is displayed on the upper part of the screen, and if you press the button again before the upper banner is disappeared, the banner will show the details of the currents channel. 4.
4.3 Volume Control z z Adjust volume: Press “V+/V-” or “Left/right” key on the remote controller at No menu state. Mute: Press “Mute” key on the remote controller at No menu state 4.4 Record program In channel playing mode, you can record program by pressing REC key. In recording, press ■ key to stop.
5. Troubleshooting There may be various reasons for the abnormal operation of the receiver. Check the receiver according to the procedures shown below. If the receiver does not work properly after checking it, please contact the dealer. Don’t open the receiver cover. This may cause a dangerous situation. Symptom The LED display on front panel does not light up. No picture or sound Cause The power cord is not plugged in. Remedy Check that the power cord is plugged in to the wall outlet.
Electric and electronic equipment and included batteries contains materials, components and substances that can be hazardous to your health and the environment, if the waste material (discarded electric and electronic equipment and batteries) is not handled correctly. Electric and electronic equipment and batteries is marked with the crossed out trash can symbol, seen below.