
User`s manual


Operation
8
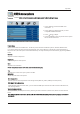
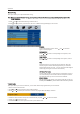
Color systemColor system
Select a corresponding color system, such as PAL/SECAM/PAL60/AUTO/NTSC.
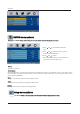
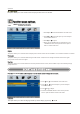
VGA menuVGA menu
Press the button on the front panel or on the remote control to display the main menu.LCD MEN U Press the button on the front panel or on the remote control to display the main menu.
1. Press and to select SETUP in the main menu.
2. Press and to select the option you want to adjust
in the SETUP menu.
3. Press and to adjust.
LanguageLanguage
This option allows you to select the language of OSD (on screen display) by pressing and .
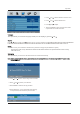
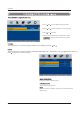
Position
This option allows you to adjust the position in PC mode. In SETUP menu. Press and to select Position, then press
to enter into the sub menu as below:
.
Position
Adjust screen settings automatically to optimize picture position.
Phase
Remove any horizontal interference.
Phase
Remove any vertical interference.
V (Vertical) Position
Adjust screen vertical position.
V (Vertical) Position
Auto Sync Auto Sync
ClockClock
H (Horizontal) Position
Adjust screen horizontal position.
H (Horizontal) Position
Replace Phase, Clock, V Position and H Position with the
factory default values.
ResetReset
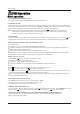
-Phase This function allows you to remove any
horizontal noise and clear or sharpen the
image of characters
-Clock This function is to minimize any vertical bars
or stripes visible on the screen background.
And the horizontal screen size also will change.
-Position This function is to adjust the picture to Left/Right
and Up/Down as you prefer..
4. When you are satisfied with your adjustment, press
LCD MENU to return to the previous menu or press
EXIT to exit the main menu.
Auto Sync
Clock
Reset