Instruction Manual GL L60 LED Version 1.1, English Monday, 18 April 2011 GL L60 LED PROJECTOR INSTRUCTION MANUAL ___________________________________________________________________________ info@derksen.com | DERKSEN USA | www.derksen.
Instruction Manual GL L60 LED Version 1.1, English Monday, 18 April 2011 Thank you for deciding to buy this high quality product. The GL L60 LED projector is built exclusively in Germany and therefore incorporates the typical German high standards of quality and safety. W e hope you enjoy many fascinating hours with your new projector! To use the machine effectively and safely please read the instruction manual carefully first.
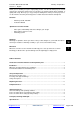
v ent i l at i ons l ot s mount i ngbr acket f i x i ngl ev er f l oor/wal l/cei l i ngmount i ngpl at e f oref f ectopt i ons oper at i oni ndi cat or mai nswi t ch l i necor d mai nf use
Instruction Manual GL L60 LED Version 1.1, English Monday, 18 April 2011 1. Installation What you should note before installation: 1. The projector can be set up on a flat, level surface using the optional mounting plate or it can be fixed to a wall or ceiling. 2. A permanent fixture should only be made by qualified personnel. 3. Take care that the appliance is ventilated sufficiently! The ventilation slots and the fan on the rear side of the projector must not be obstructed.
Instruction Manual GL L60 LED Version 1.1, English Monday, 18 April 2011 2. Set Up and Operation Placement of the glass gobo Individual glass gobos can be created according to your own design and ordered directly from Derksen USA. Glass gobos are made from heat resistant, metal coated glass and dichroic color filters. They hold their colors for a long time even when in constant use and come with a manufacturer’s 5 year guarantee. 1. Only use gobos that have exactly the correct measurements: diameter: 70.
Instruction Manual GL L60 LED Version 1.1, English Monday, 18 April 2011 Focusing the projected image The GL L60 LED projector is suitable for projecting images over distances ranging from 0.5 to 8 meters increasing in darkness up to 20 meters. 1. Switch the projector on. Release the fixation levers and position the light beam onto the backdrop. 2. When the projector is adjusted correctly, fasten the fixation levers hand-tight. The fixation levers can be rotated freely when you pull them out. 3.
Instruction Manual GL L60 LED Version 1.1, English Monday, 18 April 2011 5. Safety Precautions Safe surroundings and operating conditions - - - - The machine should only be used in dry, closed rooms or spaces. There must be at least a distance of 0.5 m between the projectors lens and flammable materials or surfaces Allow the machine to cool down, before changing a gobo or transporting it. The light source has an average lifetime of 30,000 working hours and can only be replaced by the manufacturer.
Instruction Manual GL L60 LED Version 1.1, English Monday, 18 April 2011 Care to be taken when connecting to the power supply - - - Ensure the voltage of the electricity supply system and the voltage of the machine compatible. To this end take note of the typed stickers on the machine. The power cable must not be damaged. Ensure no strain or pressure is put on the cable. The cable shouldn't be twisted, bent, frayed or clamped.
Monday, 18 April 2011 Instruction Manual GL L60 LED Version 1.1, English 6. Specifications item: GL L60 LED case material: color: weight: Main switch: input voltage: power consumption : light source: projection distance under room light conditions: projection distance in darkness: average lifetime of the lamp: color temperature: luminosity of the light source: gobo size / image size: connectors for effect options: main fuse: fuse for RCA connectors: temperature fuse: aluminum silver-grey 2.