VENTED DECORATIVE GAS LOG HEATER OWNER’S OPERATION AND INSTALLATION MANUAL HARDWOOD ORIGINAL HCA-18-RFN HCA-24-RFN HCA-18-RFP HCA-24-RFP CALIFORNIA MAPLE HCM-18-RFN HCM-24-RFN HCM-18-RFP HCM-24-RFP KENTUCKY ELM HKE-18-RFN HKE-24-RFN HKE-18-RFP HKE-24-RFP WARNING: If the information in this manual is not followed exactly, a fire or explosion may result causing property damage, personal injury or loss of life.
WARNING: Improper installation, adjustment, alteration, service or maintenance can cause injury or property damage. Refer to this manual for correct installation and operational procedures. For assistance or additional information consult a qualified installer, service agency or the gas supplier. WARNING: This appliance is for installation only in a solid-fuel burning masonry or UL127 factory-built fireplace, constructed of noncombstible material and connected to a working flue.
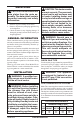
SAFETY INFORMATION WARNING: This product contains and/or generates chemicals known to the State of California to cause cancer or birth defects or other reproductive harm. WARNING: Keep flue open when operating unit. IMPORTANT: Read this owner’s manual carefully and completely before trying to assemble, operate or service this log set. Improper use of this log set can cause serious injury or death from burns, fire, explosion, electrical shock and carbon monoxide poisoning.
SAFETY INFORMATION Continued Children and adults should be alerted to the hazard of high temperature and should stay away to avoid burns or clothing ignition. 1. This appliance, as supplied, is only for use with the type of gas indicated on the rating plate. This appliance is not convertible for use with other gases. 2. Do not place propane/LP supply tank(s) inside the structure. Locate propane/LP supply tank(s) outdoors (propane/LP units only). 3.
UNPACKING CAUTION: Do not remove the data plates from the grate assembly. The data plates contain important warranty and safety information. 1. Remove log set assembly from carton. 2. Remove all protective packaging applied to log set for shipment. 3. Check all items for any shipping damage. If damaged, promptly inform dealer where you bought appliance.
INSTALLATION PLACEMENT OF APPLIANCE Continued VENTING SPECIFICATIONS FOR INSTALLATION The fireplace chimney flue and vent must be drafting properly. To check the vent for proper drafting: Light a tightly rolled newspaper on one end and place it at the inside front edge of the fireplace. Observe the smoke and be sure the vent is properly drawing it up the chimney. If the smoke spills out into the room, extinguish the flame and remove any obstruction until proper venting is achieved.
INSTALLATION Continued The appliance gas inlet connection is 3/8" NPT at the regulator, located at the rear of the appliance. IMPORTANT: Hold appliance regulator with a wrench to prevent movement when connecting to inlet piping. CAUTION: Use only new, black iron or steel pipe. Internally-tinned copper tubing may be used in certain areas. Check your local codes. Use pipe of 1/2" diameter or greater to allow proper gas volume to heater. If pipe is too small, undue loss of volume will occur.
INSTALLATION Equipment Shutoff Valve Continued 4. Check all joints of gas supply piping system. Apply noncorrosive leak detection fluid to all joints. Bubbles forming show a leak. 5. Correct all leaks at once. 6. Reconnect heater and equipment shutoff valve to gas supply. Check reconnected fittings for leaks. Test Pressures Equal To or Less Than 1/2 PSIG (3.5 kPa) 1. Close equipment shutoff valve (see Figure 5). 2.
INSTALLATION Continued 3. Place fiber log pieces randomly on lava rock and ember material around unit (see Figure 10). 4. Use remaining lava rock to blend the floor media together. Your finished effect should resemble Figure 11. WARNING: Failure to position the floor media as shown in Figures 8 through 11 or failure to use only parts specifically approved with this appliance may result in property damage or personal injury.
OPERATING HEATER LIGHTING INSTRUCTIONS Continued FOR YOUR SAFETY READ BEFORE LIGHTING WARNING: Keep flue open when operating unit. WARNING: If you do not follow these instructions exactly, a fire or explosion may result causing property damage, personal injury or loss of life. A. This appliance has a pilot which must be lighted with a piezo ignitor. When lightning the pilot, follow these instructions exactly. B. BEFORE LIGHTING smell all around the appliance area for gas.
OPERATING HEATER Continued 4. Press MODE button until mode shows in display window of transmitter/ remote. Press up or down key to change set temperature. 5. To set delay timer, press TIMER button followed by either the up or down key. 6. To change the flame height, press the button until mode is ON. Press MODE the FLAME button and press the up or down arrow key. 7. To change between Fahrenheit and Celsius, press the up and down arrow keys at the same time and hold for at least three seconds.
CLEANING AND MAINTENANCE WARNING: Turn off the appliance and allow to cool before cleaning. CAUTION: You must keep control areas, burners and circulating air passageways of fireplace clean. Inspect these areas of fireplace before each use. Have fireplace and chimney (if applicable) inspected yearly by a qualified service person. Fireplace may need more frequent cleaning due to excessive lint from carpeting, bedding material, etc. Only limited cleaning will be required under normal use of this appliance.
TROUBLESHOOTING Note: In normal operation, LED blinks once every two seconds; also, LED will be on for one second after every valid command received by the receiver/valve' these are not error codes. Failure codes can occur anytime after the pilot burner is lit. Failure code timing is 1/4 second on, 1/2 second off. Sequence is failure code followed by LED not blinking for four seconds. In the event of multiple failure codes, the next failure code follows the previous failure code by approximately 3 seconds.
TROUBLESHOOTING Continued OBSERVED PROBLEM POSSIBLE CAUSE REMEDY Pilot burning, no gas to burner, valve knob "ON", wall switch "ON" 1. Wa l l s w i t c h o r w i r e s defective 1. Check wall switch and wires for proper connections. Jumper wire across terminals at wall switch. If burner comes on, replace defective wall switch. If okay, jumper wires across wall switch wires at valve. If burner comes on, wires are faulty or connections are bad 2. Check thermopile with millivolt meter.
SPECIFICATIONS HCA-24-RFN HCM-24-RFN HKE-24-RFN Btu (Variable) 45,000/67,000 Type Gas Natural Gas Only Ignition Piezo Manifold Pressure 3.5" - 1.6"W.C. Inlet Gas Pressure (in. of water) Maximum 10.5" W.C. Minimum* 5.0" W.C. Valve Operation RF Millivolt Orifice Size #21 HCA-24-RFP HCM-24-RFP HKE-24-RFP 43,000/65,000 Propane/LP Only Piezo 10" - 6.3"W.C. HCA-18-RFN HCM-18-RFN HKE-18-RFN 41,000/56,000 Natural Gas Only Piezo 3.5" - 1.6"W.C.
ILLUSTRATED PARTS BREAKDOWN HCA-24-RFN, HCA-24-RFP, HCA-18-RFN, HCA-18-RFP, HCM-24-RFN, HCM-24-RFP, HCM-18-RFN, HCM-18-RFP, HKE-24-RFN, HKE-24-RFP, HKE-18-RFN, HKE-18-RFP 8 6 10 7 9 12 13 16 17 5 3 15 1 11 2 16 www.desatech.
PARTS LIST This list contains replaceable parts used in your heater. When ordering parts, follow the instructions listed under Replacement Parts on page 12 of this manual. PART NUMBER HCA-24-RFN HCA-24-RFP HCA-18-RFN HCA-18-RFP KEY HCM-24-RFN HCM-24-RFP HCM-18-RFN HCM-18-RFP NO.
ACCESSORIES Purchase these appliances from your local dealer. If they can not supply these accessories, call DESA at 1-866-672-6040 for referral informatioin. You can also write to the address listed on the back page of this manual. EQUIPMENT SHUTOFF VALVE GA5010 Equipment shutoff valve with 1/8" NPT tap. Fits 1/2" pipe. FIREPLACE HOOD Black - GA6050 Brass-GA6052 Antique Brss - GA6053 Helps deflect heat away from mantel or wall ab ove fireplace. Fits opening 28" to 4" wide.
NOTES _____________________________________________________ ______________________________________________________ ______________________________________________________ ______________________________________________________ ______________________________________________________ ______________________________________________________ ______________________________________________________ ______________________________________________________ ______________________________________________________ ___________
WARRANTY INFORMATION KEEP THIS WARRANTY Model Serial No. Date Purchased Always specify model and serial numbers when communicating with the factory. We reserve the right to amend these specifications at any time without notice. The only warranty applicable is our standard written warranty. We make no other warranty, expressed or implied.