User Manual MODEL: OPS240 40 TON KINETIC SPLITTER SAFETY AND OPERATION INSTRUCTIONS
Part II: Setting Up The Log Splitter IMPORTANT: Read safety rules and ASSEMBLY instructions carefully before ASSEMBLING AND OPERATING equipment.
Table of Contents Table of Contents PART I: General Safety Rules ....................................................................................................... 2 PART II: Setting Up the Log Splitter ............................................................................................ 6 PART III: Operating the Log Splitter ........................................................................................... 8 PART IV: Maintaining the Log Splitter .......................................
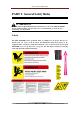
Part I: General Safety Rules PART I: General Safety Rules WARNING Read this Safety & Operating Instructions manual before you use the LOG SPLITTER. Become familiar with the operation and service recommendations to ensure the best performance of your machine. Labels The LOG SPLITTER carries prominent labels as reminders for its proper and safe use. Shown below are copies of all the Safety and Information labels that appear on the equipment.
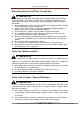
Part I: General Safety Rules Protecting Yourself and Those Around You WARNING This is a high-powered machine, with moving parts operating with high energy. You must operate the machine safely. Unsafe operation can create a number of hazards for you, as well as anyone else in the nearby area. Always take the following precautions when using this machine: A. Keep in mind that the operator or user is responsible for accidents or hazards occurring to other people, their property, and themselves. B.
Part I: General Safety Rules C. Replace rubber fuel lines and grommets when worn or damaged and after 5 years of use. D. Fill the gasoline tank outdoors with the engine off and allow the engine to cool completely. Don't handle gasoline if you or anyone nearby is smoking, or if you're near anything that could cause it to ignite or explode. Reinstall the fuel tank cap and fuel container cap securely. E. If you spill gasoline, do not attempt to start the engine.
Part I: General Safety Rules G. H. I. J. K. L. M. N. O. P. Q. machine could cause personal injuries and property damage and will invalid your warranty. Allow only one person to operate the Log Splitter at any time. If the machine start to make an unusual noise or vibrate, shut down the engine, disconnect the spark plug wire, keeping it away from the spark plug to prevent accidental starting, wait 5 minutes for engine to cool down, then inspect for damage. Vibration is generally a warning of trouble.
Part II: Setting Up The Log Splitter PART II: Setting Up the Log Splitter It may be helpful to familiarize yourself with the controls and features of your LOG SPLITTER as shown before beginning these procedures. If you have any question, please contact the dealers in your area.
Part II: Setting Up The Log Splitter MECHANICAL SPECIFICATIONS Recoil Start Engine 7HP four strokes, 3600rpm Power Gasoline Control Two-hands control Wedge Height 8 IN Log Capacity Length max 22 IN,diameter max 22IN Cycle Time 1 seconds(Approximate) Tire 6.5-8,4.0-8,4.8-8 Sprocket Rate 1:8 Flywheel Max RPM 450 *The diameter listed is indicative of the maximum suggested size - a small log can be difficult to split when it contains knots or a particularly tough fiber.
Part III: Operating The Log Splitter PART III: Operating the Log Splitter It may be helpful to better familiarize yourself with the features of your Log Splitter by reviewing Figure 1 in PART II before beginning the steps outlined in this chapter. WARNING A. B. C. D. Read and understand all instructions, safety precautions, and/or warnings listed in “PART I: General Safety Rules” before operating the LOG SPLITTER.
Part III: Operating The Log Splitter Stopping 1. 2. 3. Move the Throttle Lever to IDLE. Recoil Start: Turn the Ignition Switch to the OFF position. Electric Start: Turn the Key to the OFF position. Operator Zone Log Splittering NOTICE All logs should be no longer than 24". WARNING Do not place your hands on the ends of the log when loading the Log Splitter. This is a very UNSAFE method and could result in injury to your hands. Do not reach or step across the rail while the Log Splitter is running.
Part III: Operating The Log Splitter 1. 2. Place the log on the Log Splitter. Grasp the log on the sides near the middle of the block. Center the log, side-to-side, on the rail of the Log Splitter, making sure that one end is against the Splitting Wedge.
Part IV: Maintaining The Log Splitter PART IV: Maintaining the Log Splitter Regular maintenance is the way to ensure the best performance and long life of your machine. Please refer to this manual and the engine manufacturer's user manual for maintenance procedures. WARNING Before performing any maintenance procedure or inspection, stop the engine, wait five minutes to allow all parts to cool. Disconnect the spark plug wire, keeping it away from the spark plug.
Part IV: Maintaining The Log Splitter Lubrication NOTICE All Bearings of your Splitter are sealed units and should have sufficient lubricant to last the life of your machine with normal use. Greasing the rack and Pinion NOTICE All the rack and pinion should be greased before every use with standard gear grease.
Part V:Troubleshooting PART V: Troubleshooting Most problems are easy to fix. Consult the Troubleshooting Table below for common problems and their solutions. If you continue to experience problems, contact the dealers in your area. WARNING Before performing any maintenance procedure or inspection, stop the engine, wait five minutes to allow all parts to cool. Disconnect the spark plug wire, keeping it away from the spark plug. Troubleshooting Table SYMPTOM The engine won’t start.
Part V:Troubleshooting Rack catching on tail tube (at end of stroke). ➢ ➢ Rack returning very slow or not going all the way back. ➢ ➢ ➢ Operator Lever Snapping out of gear or not staying in gear. ➢ ➢ Rack slamming back too fast. ➢ ➢ Adjust carriage hold downs (slide guides). Check for wood chips or debris between ram bushing plate and beam. Check rack lift bearing for alignment or damage. Return spring is unhooked or damaged. Reconnect or replace as needed. Machine wedge end too low.
Part V:Troubleshooting 15
Part V:Troubleshooting Ref Description Ref2 Description3 1 Handle rubber sleeve 29 Roller rack 2 Handle 30 Pressure roller 3 Upper hood 31 Engine under hood 4 clasp 32 Roller holder spring 5 Small switch screw 33 Belt 6 Work table 34 Engine 7 Pully 35 Gasoline engine floor 8 Protect the frame tube 36 Screw rod 9 pulley under hood 37 Gasoline engine support 10 Pressing buckle 38 PIN (Wheel shaft) 11 Left arm guard 39 Tire 12 Right arm guard 40 Forefoot 13
Part V:Troubleshooting PLEASE DO NOT RETURN TO THE STORE YOU HAVE A 1 YEAR WARRANTY AND DK2 WILL REPLACE A DEFECTIVE PART FOR FREE CALL US AT 702-331-5353 FOR FAST WARRANTY PARTS AND QUESTIONS WHAT IS COVERED DK2 Inc. warrants to the original purchaser of any DK2 product that it will be free and clear of manufacturing defects in workmanship and materials under normal use and service for a period of one (1) year from the date of the original purchase.