
User guide


DETEXI NVR 83 - 169
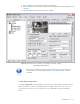
5. Enter a descriptive Name.
6. Select a Normal Status radio button — Open or Closed — indicating whether the input is connected
as normally open or normally closed.
7. If you are not sure, click the Check Current Status to query the status of the input port.
9 If, for instance, the status returns as Open, and the device is not in the alarm state, then the
normal status should be set to Open.
8. Repeat steps 4-7 to configure all external devices connected to the camera or video server input ports.
9 Check the documentation of the camera or video server for information on which
ports on the terminal block are associated with which inputs.
9 Be sure that the NVR input settings make sense considering the IP device
specification.
2. Configure Camera Outputs
IP-device outputs can be configured with toggle and/or momentary behavior.
• With toggle behavior, the state is simply switched indefinitely (i.e. unlock door strike, lock door
strike).
• With momentary behavior, the output is set to the non-normal state for a period of time before
being returned to the normal state (i.e. unlock door strike for 3 seconds; then return to locked).
• If both options are configured, either action can be taken by the operator or task — each will have
their own action button in the DETEXI Client.
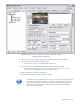
To configure camera outputs connected to external devices (relays) (Fig 54):
1. In the NVR Control Center — Cameras select a camera to configure from the Cameras List.
2. In the Cameras Settings enter the number of connected outputs in the Outputs field.
3. Switch to the Outputs bottom tab — the Output Number drop-down list will automatically be
populated with the number of outputs defined.
4. Select Output Number from the list to configure the device connected to this output.
5. Enter a descriptive Name.
6. Select a Normal Status radio button — OFF or ON indicating whether the output is connected as
normally OFF or normally ON.
7. To select a relay type under the Behavior check the Toggle and/or Momentary checkbox. The
selected relay type Action button activates.
9 If, for instance, similar relay Action buttons will be available on the DETEXI Client’s camera
live view allowing for external devices (relays) to be triggered.
9 To customize a relay Action button click on it to launch the Relay Types dialog.
9 The default off-delay for momentary behavior is 3 seconds.
8. Repeat steps 4-7 to configure all external devices connected to the camera or video server input ports.
Under the State on Close check proper checkbox — Unchanged , ON or OFF.
9 For instance, if the device is a door strike that should always stay locked, the state on close
OFF may be desired to prevent from accidentally leaving the door open.
9. Repeat steps 4-8 to configure all external devices connected to the camera or video server output
ports.