INSTRUCTION MANUAL D25123-XE, D25124-XE, D25213-XE, D25314-XE, D25315-XE HEAVY-DUTY SDS PLUS® ROTARY HAMMERS D25330-XE HEAVY-DUTY SDS PLUS® CHIPPING HAMMER
SAVE THESE INSTRUCTIONS Definitions: Safety Guidelines 1) WORK AREA SAFETY a) Keep work area clean and well lit. Cluttered or dark areas invite accidents. b) Do not operate power tools in explosive atmospheres, such as in the presence of flammable liquids, gases or dust. Power tools create sparks which may ignite the dust or fumes. c) Keep children and bystanders away while operating a power tool. Distractions can cause you to lose control. 2) ELECTRICAL SAFETY a) Power tool plugs must match the outlet.
d) Remove any adjusting key or wrench before turning the power tool on. A wrench or a key left attached to a rotating part of the power tool may result in personal injury. e) Do not overreach. Keep proper footing and balance at all tim es. This enables better control of the power tool in unexpected situations. f) Dress properly. Do not wear loose clothing or jewellery. Keep your hair, clothing and gloves away from moving parts. Loose clothes, jewellery or long hair can be caught in moving parts.
Additional Safety Instructions for Rotary Hammers • Do not strike jammed bits with a hammer to dislodge them. Fragments of metal or material chips could dislodge and cause injury. • Slightly worn chisels can be resharpened by grinding. • Keep the power cord away from the rotating bit. Do not wrap the cord around any part of your body. An electric cord wrapped around a spinning bit may cause personal injury and loss of control. • Air vents often cover moving parts and should be avoided.
Motor WARNING: Always use eye protection. All users and bystanders must wear eye protection that conforms to ASNZS1337. WARNING: We recommend the use of a residual current device with a residual current rating of 30mA or less. WARNING: ALWAYS wear proper personal hearing protection that conforms to ASNZS1270 during use. Under some conditions and duration of use, noise from this product may contribute to hearing loss. • The label on your tool may include the following symbols.
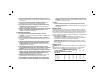
FIG. 1 C Switch FIG. 2 D25123-XE, D25124-XE D25213-XE C E B B G A G A D E D F To start the rotary hammer, depress the trigger switch (D). To stop rotary hammer, release the switch. VARIABLE SPEED TRIGGER The variable speed trigger switch (D) permits speed control. The farther the trigger switch is depressed, the higher the speed of the drill. NOTE: Use lower speeds for starting holes without a centerpunch, drilling in metal, plastics or ceramics, or driving screws.
Reversing Lever (Fig. 1–4) FIG. 5 D25123-XE, D25124-XE, D25213-XE, D25314-XE, D25315-XE The reversing lever is used to reverse the rotary hammer for backing out screws or jammed bits. It is located above the trigger, shown in Figure 2. CAUTION: When reversing to clear jammed bits, be ready for strong reactive torque. D25123-XE, D25124-XE To reverse the rotary hammer, turn it OFF and align the reversing lever (E) with the yellow arrow pointing backward (viewed when holding drill in operating position).
FIG. 6 WARNING: Burn Hazard. ALWAYS wear gloves when changing bits. Accessible metal parts on the tool and bits may get extremely hot during operation. Small bits of broken material may damage bare hands. NOTICE: Do not use chipping bits in this tool. Using chipping bits may cause the tool to bind-up and damage J to the tool may occur. To insert bit, insert shank of bit about 19 mm (3/4") into chuck. Push and rotate bit until it locks in place. The bit will be securely held.
MAINTENANCE DRILLING IN METAL D25123-XE, D25124-XE, D25213-XE, D25314-XE An SDS Plus® to round shank adaptor chuck is required. Ensure that tool is in drillonly mode. Start drilling with slow speed and increase to full power while applying firm pressure on the tool. A smooth even flow of metal chips indicates the proper drilling rate. Use a cutting lubricant when drilling metals. The exceptions are cast iron and brass which should be drilled dry.
30 DAY NO SATISFACTION GUARANTEE If you are dissatisfied with any DEWALT power tool, laser or nailer, for any reason, simply return it to the point of purchase with your sales receipt within 30 days for a replacement unit or a full refund. FREE WARNING LABEL REPLACEMENT: If your warning labels become illegible or are missing, call (AUS) 1800 444 224 or (NZ). 0800 339 258 for a free replacement. MAXIMUM RECOMMENDED CAPACITIES D25123-XE, D25124-XE D25213-XE, D25314-XE, D25315-XE Masonry 26 mm (1") Steel 12.
DEWALT Industrial Tool Co., 701 East Joppa Road, Baltimore, MD 21286 • 20 Fletcher Road, Mooroolbark, VIC 3138 Australia (FEB11) Part No. N079442 D25123-XE, D25124-XE, D25213-XE, D25314-XE, D25315-XE, D25330-XE Copyright © 2007, 2009, 2011 DEWALT The following are trademarks for one or more DEWALT power tools: the yellow and black color scheme; the “D” shaped air intake grill; the array of pyramids on the handgrip; the kit box configuration; and the array of lozenge-shaped humps on the surface of the tool.