D27111
Dansk 9 Deutsch 18 English 28 Español 37 Français 47 Italiano 57 Nederlands 67 Norsk 77 Português 86 Suomi 96 Svenska 105 Türkçe 114 Ελληνικά 123 Copyright DEWALT 2
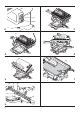
1 2 16 17 18 3 4 5 6 7 15 14 13 8 9 10 12 11 A1 19 20 21 22 23 26 25 24 A2 3
28 27 A4 A3 19 2 17 18 15 26 13 26 B A5 36 36 38 37 D C 20 39 40 19 E 4 42 37 F1
3 43 45 38 23 5 F3 F2 45 46 9 43 10 44 47 F4 G1 48 G2 13 49 45 11 G3 12 51 52 50 G4 50 H 5
10 15 53 54 J1 I 48 55 13 49 45 J2 57 56 14 J3 56 61 J5 J4 60 6 58 13 59 K1 6 K2
19 2mm 5mm 62 L M1 22 63 20 64 65 M2 66 N1 22 67 68 66 N2 N3 69 69 70 66 N4 N5 7
71 72 P O 17 R Q 73 T S 74 8 74 74 U 8
DANSK KAP- OG GERINGSSAV TIL BORDBRUG D27111 Tillykke! EU-Overensstemmelseserklæring Du har valgt et DEWALT værktøj. Mange års erfaring, ihærdig produktudvikling og innovation gør DEWALT til en af de mest pålidelige partnere for professionelle brugere. Tekniske data D27111 Spænding V 230 Motoreffekt W 1.500 Afgiven effekt Maks. klingehastighed W 1.100 omdr./min 2.
DANSK Sikkerhedsanvisninger Når man anvender faststående elværktøj skal de lokale sikkerhedsbestemmelser altid overholdes for at nedsætte riskoen for brand, elektrisk stød og personskader. Læs hele denne brugsanvisning omhyggeligt igennem, inden værktøjet tages i brug. Gem denne manual til fremtidige opslag. Generelt 1 Hold arbejdsområdet rent. Rodede områder og bænke kan forvolde ulykker. 2 Tænk på arbejdsmiljøets indflydelse Udsæt ikke værktøjet for regn.
DANSK ● Klingeafskærmningen på saven går automatisk op, når armen føres ned; den går ned over klingen, når armen løftes. Afskærmningen kan løftes med hånden, når savklingen skal monteres eller fjernes, eller når man vil inspicere saven. Løft aldrig klingeskærmen med hånden, uden at ledningen er taget ud at stikket. ● Hold området omkring maskinen godt vedligeholdt og frit for løse materialer, f.eks. spåner og afskårne stykker. ● Check med mellemrum, at luftsprækkerne i motoren er rene og fri for spåner.
DANSK Når maskinen bruges i maskinsavsfunktion, skal du sørge for, at både øverste og nederste beskyttelsesskærm er på plads og fungerer som de skal. Brug kun maskinen, når maskinsavsbordet er i vandret position. Når du foretager et snit i geringsavmode, så se instruktionerne givet i "Udførelse af en skæring". Bærepunkt.
DANSK Montering af den øvre beskyttelsesskærm til klingen (fig. E) Øverste klingeskærm (20) er beregnet til hurtig og let montering på spaltekniven (19), når maskinen først er sat op til bænksavsmode. ● Løsn vingemøtrikken (39). ● Idet beskyttelsesskærmen holdes lodret, justeres spalten bag på skærmen med spaltekniven. ● Sænk skærmen hen over spaltekniven (19), idet du sørger for, at boltskaftet går ind i åbningen.
DANSK @ Styresporet (59) kan blive tilstoppet af savsmuld. Brug en pind eller lavtryksluft til at rense styresporet med. Den bevægelige del af HØJRE side af bakken kan justeres, så den støtter arbejdsemnet maksimalt nær klingen, og samtidig gør det muligt at save i en skråvinkel på hele 45°, venstre. Glidefstanden begrænses af stop i begge retninger. Justering af anslaget (6): ● Løsn vingemøtrikkerne (60) for at løsne bakken (6). ● Skub anlægget til venstre.
DANSK Tænd og sluk (fig. O) Afbryderen har en indbygget 0-volt-udløsningsfunktion: hvis strømmen skulle blive afbrudt af en eller anden grund, skal afbryderen aktiveres igen med overlæg. ● For at tænde for maskinen, trykkes der på den grønne startknap (71). ● For at slukke for maskinen, trykkes der på den røde stopknap (72). Grundlæggende savning ● Grib fat om aktiveringshåndtaget (2) og tryk på udløserarmen (3) for at frigøre hovedet. ● Tænd for maskinen, og lad klingen komme op på fuld hastighed.
DANSK Savning i savbænkstilling ● Brug altid spaltekniven. ● Sørg altid for, at spaltekniven og klingebeskyttelsen er korrekt opstillet. ● Sørg altid for, at geringssaven er indstillet og låst i en geringsvinkel på 0°. @ Skær ikke i metal i denne mode. Rivning (fig. T) ● Sæt smigvinklen til 0°. ● Indstil savklingens højde. Klingen befinder sig i rette position når spidserne af tre tænder befinder sig over træets overflade. Sørg for at savbordet er sat godt fast i den indstillede højde.
DANSK DEWALT har en facilitet til indsamling og genbrug af DEWALT-produkter, når deres levetid er slut. Benyt dig af denne service og returner venligst dit produkt til et hvilket som helst af vore autoriserede serviceværksteder, som indsamler dem på vores vegne. For information om nærmeste autoriserede værksted: kontakt det lokale DEWALT kontor på den adresse, som er opgivet i denne brugsanvisning.
DEUTSCH TISCH-, KAPP- UND GEHRUNGSSÄGE D27111 Herzlichen Glückwunsch! EG-Konformitätserklärung Sie haben sich für ein Werkzeug von DEWALT entschieden, das die lange DEWALT-Tradition fortsetzt, nur ausgereifte und in zahlreichen Tests bewährte Qualitätsprodukte für den Fachmann anzubieten. Lange Jahre der Erfahrung und kontinuierliche Weiterentwicklung machen DEWALT zu Recht zu einem verläßlichen Partner aller professionellen Anwender.
DEUTSCH Sicherheitshinweise Beim Gebrauch von stationären Elektrowerkzeugen sind zum Schutz gegen elektrischen Schlag, Verletzungs- und Feuergefahr die nationalen Sicherheitsvorschriften zu beachten. Lesen Sie diese Anleitung gründlich durch, bevor Sie das Elektrowerkzeug verwenden. Bewahren Sie diese Anleitung auf. Allgemeines 1 Halten Sie Ihren Arbeitsbereich in Ordnung Unordnung im Arbeitsbereich führt zu Unfallgefahren. 2 Berücksichtigen Sie Umgebungseinflüsse Setzen Sie das Werkzeug keinem Regen aus.
DEUTSCH ● Vor der Verwendung von Zubehörteilen schlagen Sie in der Bedienungsanleitung nach. Die falsche Verwendung von Zubehör kann Sachschäden verursachen. ● Wählen Sie das richtige Sägeblatt für das zu schneidende Material. ● Beachten Sie die auf dem Sägeblatt angegebene Höchstgeschwindigkeit. ● Verwenden Sie beim Umgang mit einem Sägeblatt einen Halter oder tragen Sie Handschuhe. ● Vergewissern Sie sich vor dem Einsatz, daß das Sägeblatt ordnungsgemäß montiert ist.
DEUTSCH Beim Betrieb von Sägen lassen sich bestimmte Restrisiken trotz der Verwendung von Schutzeinrichtungen und der Einhaltung der Sicherheitsvorschriften nicht vermeiden. Es handelt sich hierbei insbesondere um: - Gehörschaden durch Lärmbelastung. - Unfallgefahr am nicht abgedeckten Bereich des rotierenden Sägeblatts. - Verletzungsgefahr beim Wechseln des Sägeblatts. - Quetschen der Finger beim Öffnen der Schutzabdeckungen.
DEUTSCH Verlängerungskabel Sollte ein Verlängerungskabel erforderlich sein, verwenden Sie ein zugelassenes Verlängerungskabel, das für die Leistungsaufnahme des Elektrowerkzeugs geeignet ist (siehe technische Daten). Der MindestLeiterquerschnitt beträgt 2,5 mm2. Das Kabel muß einen Gummimantel und einen Erdleiter haben. Rollen Sie das Kabel bei Verwendung einer Kabelrolle immer völlig aus. Installation Auspacken (Abb. B) ● Nehmen Sie Ihre Säge vorsichtig aus der Transportverpackung.
DEUTSCH Einstellungen für Kappsägebetrieb Ihre Kapp- und Gehrungssäge wurde werksseitig genau eingestellt. Sollte wegen des Transports oder aus irgendeinem anderen Grunde eine erneute Einstellung erforderlich sein, gehen Sie folgendermaßen vor, um Ihre Säge einzustellen. Die Einstellungen sollten dann zuverlässig bestehen bleiben. Prüfen und Justieren des Winkels zwischen Sägeblatt und Anschlag (Abb.
DEUTSCH ● Sichern Sie den Schienenfeststellknopf (17) mit dem Sägekopf in der hinteren Position. ● Drücken Sie auf den Kopfblockierungs-Freigabehebel (3), um den Kopf zu senken, und drücken Sie auf den Kopfverriegelungsstift (16). ● Bringen Sie den Parallelanschlag (22) wie unten beschrieben an. Spaltkeileinstellung (Abb.
DEUTSCH @ Sorgen Sie dafür, daß das Material während des Schneidens nicht kriecht; sichern Sie es sorgfältig. Lassen Sie das Sägeblatt immer zum Stillstand kommen, bevor Sie den Sägearm hochziehen. Falls dennoch an der Hinterseite des Werkstückes kleine Holzfasern abgespaltet werden, kleben Sie ein Stück Kreppband über das Holz, wo es geschnitten werden soll. Sägen Sie durch das Kreppband und entfernen Sie es nach dem Schneiden. Staubabsaugung (Abb.
DEUTSCH Doppelgehrungsschnitte Doppelgehrungsschnitte sind Schnitte, die Gehrung und Neigung kombinieren. ● Stellen Sie zuerst den Neigungswinkel und dann den Gehrungswinkel ein. Sägen im Tischkreissägebetrieb ● Verwenden Sie stets den Spaltkeil. ● Vergewissern Sie sich immer, daß der Spaltkeil und der Sägeblattschutz ordnungsgemäß ausgerichtet sind. ● Stellen Sie stets sicher, daß die Gehrungssäge im 0°Gehrungswinkel eingestellt und gesichert ist. Transport der Maschine (Abb.
DEUTSCH ● Reinigen Sie die Teile, in und auf denen sich Sägestaub und -späne ansammeln, regelmäßig mit einer trockenen Bürste. GARANTIE ● 30 TAGE GELD ZURÜCK GARANTIE ● Umweltschutz Z Getrennte Entsorgung. Dieses Produkt darf nicht über den normalen Hausmüll entsorgt werden. Sollte Ihr DEWALT Produkt eines Tages erneuert werden müssen, oder falls Sie es nicht weiter verwenden wollen, so darf es nicht über den Hausmüll entsorgt werden. Stellen Sie dieses Produkt zur getrennten Entsorgung bereit.
ENGLISH TABLE TOP MITRE SAW D27111 Congratulations! EC-Declaration of conformity You have chosen a DEWALT tool. Years of experience, thorough product development and innovation make DEWALT one of the most reliable partners for professional power tool users. Technical data D27111 Voltage V 230 Power input W 1,500 Power output W 1,100 min-1 2,950 Max. blade speed Blade diameter mm 305 Blade bore mm 30 Blade body thickness mm 1.8 Riving knife thickness mm 2.
ENGLISH Safety instructions When using stationary power tools, always observe the safety regulations applicable in your country to reduce the risk of fire, electric shock and personal injury. Read all of this manual carefully before operating the tool. Save this manual for future reference. 15 General 1 Keep work area clean Cluttered areas and benches can cause accidents. 2 Consider work area environment Do not expose the tool to rain. Do not use the tool in damp or wet conditions.
ENGLISH ● Keep the surrounding area of the machine well maintained and free of loose materials, e.g. chips and cut-offs. ● Check periodically that the motor air slots are clean and free of chips. ● Replace the kerf plate when worn. ● Disconnect the machine from the mains before carrying out any maintenance work or when changing the blade. ● Never perform any cleaning or maintenance work when the machine is still running and the head is not in the rest position.
ENGLISH Package contents The package contains: 1 Table top mitre saw 1 Saw blade 1 Parallel rip fence 1 Upper blade guard 1 Push stick 1 Allen key 5 mm 1 Allen key 6 mm 1 Instruction manual 1 Exploded drawing ● Check for damage to the tool, parts or accessories which may have occurred during transport. ● Take the time to thoroughly read and understand this manual prior to operation. Description (fig. A1 - A6) Your D27111 table top mitre saw has been developed for professional applications.
ENGLISH ● Release the rail lock knob (18), and push the saw head back to lock it in the rear position. ● Lock the table (19) into highest position. ● Press down the operating handle (2) and pull out the lock down pin (17), as shown. ● Gently release the downward pressure and allow the head to rise to its full height. Bench mounting (fig. C) ● Holes (36) are provided in all four feet to facilitate bench mounting. Two different sized holes are provided to accommodate different sizes of bolts.
ENGLISH ● Observe the pointer (51) and mitre scale (12). If the pointer does not indicate exactly zero, loosen the screw (52), move the pointer to read 0° and tighten the screw. Mitre lock/detent rod adjustment (fig. I) If the base of the saw can be moved while the mitre lever (10) is locked, the mitre lock/detent rod (53) must be adjusted. ● Unlock the mitre lever (10). ● Fully tighten the mitre lock/detent rod (53) using a screwdriver (54). Then loosen the rod a quarter of a turn.
ENGLISH Adjusting the saw bench table (fig. A1) The table (19) slides up and down manually and is held at the required height with two locking knobs. ● Loosen the table locking knobs, both main (16) and additional (4), but do not take them off. ● Set the table to the proper height needed. ● Tighten the table locking knobs. First tighten the main knob (16), then secure the table in position with the additional knob (4). Changing from saw bench to mitre saw mode (fig.
ENGLISH ● Remember to lock the saw head in the rear position when the sliding cuts are finished. Cutting small pieces (fig. K1 & K2) The upper part of the left side of the fence (13) and the moveable part of the right side of the fence (6) can be adjusted to provide maximum support when cutting small pieces. ● Put the saw blade into vertical position. ● Loosen the plastic knob (58) at least 3 full turns. ● Adjust the left fence as close to the blade as possible. ● Tighten the knob securely.
ENGLISH Cleaning and maintaining the kerf plate (fig. U) Regularly clean the area below the kerf plate. If the kerf plate is worn it must be replaced. ● Remove the screws (74) holding the kerf plate (8). ● Remove the kerf plate and clean the area below. ● Re-install the parts of the kerf plate and the screws. ● Tighten the screws hand-tight. ● To adjust the kerf plate, proceed as follows: ● Pull down the head until the blade just enters the saw kerf.
E S PA Ñ O L INGLETADORA DE SOBREMESA D27111 ¡Enhorabuena! Declaración CE de conformidad Usted ha optado por una herramienta DEWALT. Muchos años de experiencia y una gran asiduidad en el desarrollo y la innovación de sus productos han convertido DEWALT en un socio muy fiable para el usuario profesional. Características técnicas D27111 Voltaje V 230 Potencia absorbida W 1.500 Consumo de potencia W 1.100 min-1 2.
E S PA Ñ O L Instrucciones de seguridad Al utilizar herramientas eléctricas, observe las reglas de seguridad en vigor en su país, a fin de reducir el riesgo de descarga eléctrica, de lesiones y de incendio. Lea completamente este manual antes de utilizar la herramienta. Mantenga a mano este manual para consultas posteriores. 14 Generalidades 1 Mantenga limpia el área de trabajo. Un área o un banco de trabajo en desorden aumentan el riesgo de accidentes. 2 Tenga en cuenta el entorno del área de trabajo.
E S PA Ñ O L No utilice espaciadores para encajar la hoja en el eje. Consulte los datos técnicos en relación con las especificaciones adecuadas de la hoja. Utilice sólo las hojas que se especifican en este manual, que cumplen la norma EN 847-1. ● Considere la utilización de hojas reductoras de ruido especialmente proyectadas. ● No utilice hojas HSS. ● No utilice hojas de sierra que estén agrietadas o dañadas. ● No utilice discos abrasivos.
E S PA Ñ O L - Riesgo de situaciones descontroladas cuando se utiliza a temperaturas ambiente inferiores a -10 °C o superiores a +45 °C.
E S PA Ñ O L Montaje en el banco (fig. C) ● Existen orificios (36) en las cuatro patas para facilitar el montaje en el banco. Hay dos orificios de tamaño diferente para que quepan tornillos de distintas medidas. Utilice uno de los orificios; no es necesario utilizar ambos. Monte siempre la sierra con firmeza para evitar que se mueva.
E S PA Ñ O L ● Observe el indicador (51) y la escala de inglete (12) Si el indicador no marca cero exactamente, afloje el tornillo (52), mueva el indicador para que indique 0° y apriete el tornillo. Ajuste de la sujeción de ingletes/perno de detención (fig. I) Si la base de la sierra se puede mover mientras la palanca de inglete (10) está bloqueada, debe ajustarse la sujeción de ingletes/perno de detención (53). ● Desbloquee la palanca de inglete (10).
E S PA Ñ O L @ ● Use el perfil de 8 mm al hacer cortes longitudinales en piezas de trabajo bajas para que la varilla empujadora pueda pasar entre la hoja y la guía. ● La parte posterior de la guía debe quedar al mismo nivel que la parte delantera del abridor. Ajuste de la mesa de serrado en banco (fig. A1) La mesa (19) se desplaza hacia arriba y hacia abajo manualmente y se fija a la altura deseada con dos pomos de bloqueo.
E S PA Ñ O L ● Apriete el cabezal para que la hoja pueda cortar la madera y penetrar en la placa de corte de plástico (8). ● Tras finalizar el corte, apague la máquina y espere a que la hoja de la sierra se pare completamente antes de colocar el cabezal en su posición de reposo superior. Realización de un corte deslizante (fig. Q) El carril de guía permite cortar piezas de trabajo más grandes utilizando un movimiento deslizante hacia fuera-abajo-atrás. ● Libere el pomo de bloqueo del carril (17).
E S PA Ñ O L ● Bloquee la mesa (19) en la posición más baja. Bloquee el pomo de bloqueo del carril con el cabezal de la sierra en la posición frontal, bloquee el brazo de inglete en el ángulo de inglete más recto, deslice la guía (13) completamente hacia dentro y bloquee la palanca de bisel (15) con el cabezal de la sierra en la posición vertical para que la herramienta quede lo más compacta posible. ● Utilice siempre los rebajes para transporte (26) que aparecen en la fig. B para transportar la sierra.
E S PA Ñ O L GARANTÍA ● 30 DÍAS DE SATISFACCIÓN COMPLETA ● Si no queda totalmente satisfecho con su herramienta DEWALT, contacte con su Centro de Servicio DEWALT. Presente su reclamación, juntamente con la máquina completa, así como la factura de compra y le será presentada la mejor solución. ● UN AÑO DE SERVICIO GRATUITO ● Si necesita mantenimiento o servicio técnico para su herramienta DEWALT en los 12 meses siguientes a la compra, podrá obtenerlos gratuitamente en un Centro de Servicio DEWALT.
FRANÇAIS SCIE À ONGLETS DE TABLE D27111 Félicitations! Déclaration CE de conformité Vous avez choisi un outil DEWALT. Depuis de nombreuses années, DEWALT produit des outils électriques adaptés aux exigences des utilisateurs professionnels. Caractéristiques techniques D27111 Tension V 230 Puissance absorbée W 1.500 Puissance utile Vitesse maximale de lame W 1.100 courses/min 2.
FRANÇAIS Consignes de sécurité Afin de réduire le risque d'électrocution, de blessure et d'incendie lors de l'utilisation d'outils électriques immobiles, respectez toujours les consignes de sécurité en vigueur dans votre pays. Lire et observer attentivement les instructions contenues dans ce manuel avant d'utiliser l'outil. Conservez ce manuel pour pouvoir le consulter lors de prochaines utilisations.
FRANÇAIS ● N'utilisez pas de lames HSS. ● N'utilisez pas de lames de scies endommagées ou cassées. ● N'utilisez pas de disques abrasifs. ● Tirer la lame de la coupe avant de relâcher l'interrupteur. ● Prenez soin de fixer le bras solidement lors de la réalisation de coupes en biseau. ● Ne jamais caler d'objet contre le ventilateur du moteur pour bloquer l'axe du moteur. ● Le protecteur s'ouvre automatiquement quand le bras est abaissé et il se referme automatiquement sur la lame quand le bras remonte.
FRANÇAIS Les facteurs suivants influent sur l'exposition à la poussière : - lame de scie usée - extracteur de poussière avec une vélocité de l'air inférieure à 20 m/s - pièce à ouvrer guidée de manière imprécise Étiquettes apposées sur l'outil Les pictogrammes suivants sont inscrits sur l'outil : @ + Voyant d'utilisation sûre Lisez le manuel d'instruction avant utilisation Lors de l'utilisation de la machine en mode scie à onglets, veillez à ce que la partie supérieure de la lame de la scie soit entièrem
FRANÇAIS Toujours fixer la scie fermement pour éviter tout mouvement. Pour faciliter son transport, l'outil peut être fixé sur une planche en contre-plaqué de 12,5 mm ou plus, que l'on peut aisément monter sur le lieu de travail ou transporter en différents lieux. ● Lors de la pose de scie sur contre-plaqué, s'assurer que les vis de montage ne dépassent pas de la surface du bois, car le contre-plaqué doit être complètement lisse par rapport à l'établi.
FRANÇAIS ● Serrez les blocage d'onglet / tige à encliquetage (53) à fond à l'aide d'un tournevis (54). Puis desserrez la tige d'un quart de tour. ● Vérifier que la table ne se déplace pas lorsque le levier (10) est serré à un angle aléatoire (non-configuré). Contrôle et réglage de la lame sur la table (fig. J1 - J4) ● Desserrez la molette de verrouillage de l'inclinaison (15).
FRANÇAIS ● Desserrez les deux boutons de blocage de la table, aussi le bien le principal (16) que le supplémentaire (4), mais sans les retirer. ● Mettez la table à la bonne position nécessaire. ● Serrez les boutons de blocage de la table. Serrez d'abord le bouton de blocage principal (16) puis fixez la table avec le bouton supplémentaire (4). Conversion de mode d'établi de sciage en mode de scie à onglets (fig. A1 & A2) ● Bloquez la table (19) dans sa position la plus haute.
FRANÇAIS ● Baissez la tête de la scie pour permettre à la lame de couper le bois et de pénétrer dans l'insert (8). ● Une fois la coupe terminée, éteignez la machine et attendez que la lame de scie s'arrête totalement avant de ramener la tête dans sa position de repos supérieure. Effectuer une coupe en glissant (fig. Q) La glissière de guidage permet de couper des pièces à ouvrer plus grandes avec un mouvement de glissement circulaire (extérieur-en bas-en arrière).
FRANÇAIS ● Bloquez la table (19) dans sa position la plus basse. Bloquez le bouton de blocage du rail avec la tête de scie en position avant, bloquez le bras d'onglet dans l'angle droit de l'onglet, faites coulisser le guide (13) complètement vers l'intérieur et bloquez le levier d'onglet (15) avec la tête de scie en position verticale afin de rendre l'outil le plus compact possible. ● Utilisez toujours les échancrures pour la main (26) montrées sur la fig. B pour transporter la scie.
FRANÇAIS GARANTIE ● 30 JOURS D'ENGAGEMENT SATISFACTION ● Si, pour quelque raison que ce soit, votre machine DEWALT ne vous donne pas entière satisfaction, il suffit de la retourner avec tous ses accessoires dans les 30 jours suivant son achat à votre distributeur, ou à un centre de service après-vente agréé pour un remboursement intégral ou un échange. Pour la Belgique ou le Luxembourg, retournez votre machine à DEWALT. Munissez-vous d'une preuve d'achat.
I TA L I A N O TRONCATRICE DA TAVOLO D27111 Congratulazioni! Dichiarazione CE di conformità Siete entrati in possesso di un utensile DEWALT. Anni di esperienza, continui miglioramenti ed innovazioni tecnologiche fanno dei prodotti DEWALT uno degli strumenti più affidabili per l'utilizzatore professionale. Dati tecnici D27111 Tensione V 230 Potenza assorbita W 1.500 Potenza resa W 1.100 min-1 2.950 Velocità max.
I TA L I A N O Norme generali di sicurezza Durante l'utilizzo di utensili elettrici adottate sempre le elementari norme di sicurezza atte a ridurre i rischi d'incendio, scariche elettriche e ferimenti. Prima di adoperare l'utensile, leggere attentamente le istruzioni di cui al presente manuale. Conservare questo manuale di istruzioni per successive consultazioni. Informazioni generali 1 Tenere pulita l'area di lavoro Ambienti e banchi di lavoro in disordine possono essere causa d'incidenti.
I TA L I A N O ● Non utilizzare lame di troncatrice spaccate o danneggiate. ● Non utilizzare mole a disco. ● Prima di rilasciare l'interruttore sollevare la lama dal taglio praticato nel pezzo di lavorazione. ● Quando si eseguono dei tagli di sbieco, verificare che il braccio sia fissato saldamente. ● Non inserire alcun oggetto a cuneo contro il ventilatore per trattenere l'albero motore elettrico.
I TA L I A N O I seguenti fattori influenzano l'esposizione alla polvere: - lama usurata - aspiratore di polveri con velocità dell'aria inferiore a 20 m/s - pezzo in lavorazione non guidato correttamente Etichette sull'elettroutensile Sull'elettroutensile sono presenti le seguenti immagini: @ + Istruzioni per la sicurezza Leggere il manuale di istruzioni prima di mettere in funzione l'elettroutensile Se si usa la macchina nella modalità di troncatrice, assicurarsi che la parte superiore della lama sia com
I TA L I A N O Per renderla più facilmente trasportabile, la si può montare su un pezzo di compensato di 12,5 mm o più di spessore, che può a sua volta essere bloccato sul supporto di lavorazione o spostato in un'altra collocazione di lavoro e quindi nuovamente bloccato in posizione. ● Durante il fissaggio della troncatrice su un pezzo di compensato, accertarsi che le viti di montaggio non sporgano dal lato inferiore del legno. Il compensato deve essere montato a livello sul supporto di lavorazione.
I TA L I A N O ● Osservare l'indicatore (51) e la scala graduata (12) per taglio obliquo. Se l'indicatore non indica esattamente lo zero, allentare la vite (52), spostare l'indicatore fino a leggere 0° e serrare la vite. Regolazione dell'asta di ritenuta / bloccaggio taglio inclinato (fig. I) Se la base della troncatrice può essere spostata con la leva del taglio inclinato (10) bloccata, è necessario regolare l'asta di ritenuta / bloccaggio taglio inclinato (53).
I TA L I A N O ● Per l'impostazione su 8 mm, allentare la manopola di arresto (66) e far scivolare la guida (69) fuori dal supporto di serraggio (70). ● Ruotare la guida e bloccare nuovamente il supporto nella fessura, come mostrato (fig. N5). ● Per utilizzare l'altezza complessiva di 52 mm, far scivolare la guida nel supporto con il bordo largo in posizione verticale (fig. N4).
I TA L I A N O Taglio verticale a troncare (fig. A1 & P) ● Rilasciare la leva del taglio obliquo (10) e spingere il fermo del taglio obliquo (9). ● Innestare il fermo per taglio obliquo in posizione 0° e serrare la leva di bloccaggio per taglio obliquo. ● Posizionare il legno da tagliare contro il guidapezzo (6 & 13). ● Afferrare l'impugnatura di azionamento (2) e premere la leva di sbloccaggio della testa (3) per rilasciare quest'ultima.
I TA L I A N O Consultate il vostro rivenditore per ottenere ulteriori informazioni sugli accessori disponibili. Trasporto (fig. B) ● Per il trasporto della troncatrice, abbassare la testa e premere il perno di bloccaggio (17). ● Bloccare il piano (19) nella posizione più alta.
I TA L I A N O GARANZIA ● GARANZIA DI 30 GIORNI DI TOTALE SODDISFAZIONE ● Se non siete completamente soddisfatti delle prestazioni del vostro prodotto DEWALT, potrete restituirlo entro 30 giorni dalla data di acquisto, presso una nostra filiale di assistenza per ottenere il rimborso o il cambio dell'utensile, presentando debita prova dell'avvenuto acquisto.
NEDERLANDS TAFELBLAD-VERSTEKZAAG D27111 Gefeliciteerd! EG-Verklaring van overeenstemming U heeft gekozen voor een machine van DEWALT. Jarenlange ervaring, voortdurende produktontwikkeling en innovatie maken DEWALT tot een betrouwbare partner voor de professionele gebruiker. Technische gegevens D27111 Spanning V 230 Opgenomen vermogen W 1.500 Afgegeven vermogen Max. snelheid zaagblad W 1.100 min-1 2.
NEDERLANDS Veiligheidsinstructies Neem bij het gebruik van stationaire elektrische machines altijd de plaatselijk geldende veiligheidsvoorschriften in acht in verband met brandgevaar, gevaar voor elektrische schokken en lichamelijk letsel. Lees de gebruiksaanwijzing aandachtig door voordat u met de machine gaat werken. Bewaar deze instructies zorgvuldig! 14 Algemeen 1 Zorg voor een opgeruimde werkomgeving Een rommelige werkomgeving kan tot ongelukken leiden.
NEDERLANDS ● Overweeg om speciaal ontwikkelde geluidsarme bladen te gebruiken. ● Gebruik geen HSS-bladen. ● Gebruik geen gescheurde of beschadigde zaagbladen. ● Gebruik geen slijpschijven. ● Licht het zaagblad uit de zaagsnede in de werkstukopening, voordat de bedieningsschakelaar wordt losgelaten. ● Zorg dat de arm bij het uitvoeren van afschuinzaagsneden goed vastzit. ● Zet geen wig tegen de ventilator om op die manier de motoras tegen te houden.
NEDERLANDS - Risico van ongecontroleerde situaties bij gebruik in een omgevingstemperatuur onder -10 °C of boven +45 °C.
NEDERLANDS Werkbankmontage (fig. C) ● In de vier voeten zijn gaten (36) aangebracht om montage op de werkbank te vergemakkelijken. Er zijn twee gatmaten voor twee verschillende schroefdiameters. Het is niet nodig om beide gaten te gebruiken. Zorg voor een stevige montage, opdat de zaagmachine niet kan bewegen.
NEDERLANDS ● Kijk naar de wijzer (51) en de verstekschaal (12). Als de wijzer niet exact nul aanwijst, draai dan de schroef (52) los, beweeg de wijzer zodat hij 0° aangeeft en draai de schroef vast. Instellen van de verstekvergrendel/blokkeerstang (fig. I) Als het onderstel van de zaag kan worden bewogen terwijl de verstekhendel (10) vergrendeld is, dan moet de verstekvergrendel/ blokkeerstang (53) worden afgesteld. ● Zet de verstekhendel (10) los.
NEDERLANDS De parallelgeleiding is omkeerbaar: het werkstuk kan langs de aanslagkant van 52 mm hoog of langs de aanslagkant van 8 mm hoog worden geleid, zodat het duwhout ook bij het langszagen van dunne werkstukken kan worden gebruikt (fig. N5) ● Draai, om de zijde van 8 mm te gebruiken, de afstelknop (66) los en schuif de parallelgeleidng (69) uit de klemsteun (70). ● Draai de parallelgeleiding en laat de klemsteun weer in de groef vallen, zoals afgebeeld (fig. N5).
NEDERLANDS Verticale rechte afkortsnede (fig. A1 & P) ● Maak de verstekhendel (10) los en druk de verstekgrendel (9) in. ● Zet de verstekgrendel in de 0°-positie en zet de verstekhendel vast. ● Leg het te zagen hout tegen de parallelgeleiding (6 & 13). ● Pak de bedieningshendel (2) vast en druk op de zaagkopontgrendeling (3) om de zaagkop vrij te geven. ● Zet de machine aan en laat het zaagblad op volle toeren komen. ● Druk de zaagkop naar beneden om door het hout te zagen.
NEDERLANDS ● Zet de tabel (19) in de laagste stand vast. Zet de vergrendelknop van de geleiderail vast terwijl de zaagkop in de voorste positie staat, vergrendel de verstekarm in de uiterste rechtse verstekhoek, schuif de parallelgeleiding (13) helemaal naar binnen en zet de afschuinhendel (15) vast terwijl de zaagkop in de verticale positie staat om de machine zo compact mogelijk te maken. ● Gebruik altijd de handvatten (26) zoals afgebeeld in fig. B2 om de zaag te transporteren.
NEDERLANDS GARANTIE ● 30 DAGEN "NIET GOED, GELD TERUG" GARANTIE ● Indien uw DEWALT-machine om welke reden dan ook niet geheel aan uw verwachtingen voldoet, stuurt u de machine dan compleet zoals bij aankoop binnen 30 dagen terug naar DEWALT, samen met uw aankoopbewijs en uw rekeningnummer. U ontvangt dan uw geld terug.
NORSK BENKGJÆRINGSSAG D27111 CE-Sikkerhetserklæring Gratulerer! Du har valgt et DEWALT verktøy. Årelang erfaring, konstant produktutvikling og fornyelse gjør DEWALT til en av de mest pålitelige partnere for profesjonelle brukere. Tekniske data D27111 Spenning V 230 Motoreffekt W 1.500 Effektforbruk W 1.100 Maks. omdr.hastighet/min 2.
NORSK Sikkherhetsveiledning Ved bruk av fastmontert elektroverktøy må du alltid følge de gjeldende sikkerhetsreglene i landet, for å redusere faren for brann, elektrisk støt og personskade. Ta deg tid til å lese nøye gjennom bruksanvisningen før du begynner å bruke verktøyet. Ta vare på bruksanvisningen for senere bruk. Generelt 1 Hold arbeidsområdet rent og ryddig En uryddig arbeidsplass innbyr til ulykker. 2 Tenk på arbeidsmiljøets innvirkning Utsett ikke verktøyet for regn.
NORSK ● Hold området rundt maskinen godt vedlikeholdt og uten løse materialer som spon og avkapp. ● Kontroller regelmessig at motorens lufteåpninger er rene og fri for spon. ● Skift ut snittplaten når den er slitt. ● Kople maskinen fra strømtilførselen før du utfører vedlikehold eller bytter blad. ● Aldri utfør rengjørings- eller vedlikeholdsarbeid når maskinen er i gang og hodet ikke er i hvileposisjon. ● Hvis mulig skal maskinen alltid monteres på en benk.
NORSK Bærepunkt. Kontroll av pakkens innhold Pakken inneholder: 1 Benkgjæringssag 1 Blad 1 Parallell kløyveskjerm 1 Øvre bladvern 1 Påskyver 1 Umbrakonøkkel 5 mm 1 Umbrakonøkkel 6 mm 1 Instruksjonsbok 1 Splitt-tegning ● Kontroller om verktøyet, deler eller tilbehør er blitt skadet under transporten. ● Ta deg tid til å lese nøye igjennom instruksjonsboken slik at du forstår innholdet før verktøyet tas i bruk. Beskrivelse (fig. A1 - A6) Din D27111 benkgjæringssag er utviklet for profesjonell bruk.
NORSK Montere sagbladet (fig. D & F1 - F4) Tennene på et nytt blad er skarpe og kan være farlige. Når du skal montere et nytt sagblad, må du justere bordet til dets høyeste stilling og heve saghodet til høyeste stilling. ● Sett sekskantnøkkelen (37) gjennom hullet (42) i båndhuset og inn i spindelenden (fig. F1). Plasser sagbladnøkkelen (38) på låseskruen for sagbladet (43) (fig. F2).
NORSK Sjekke og justere avfasingsvinkelen (fig. A1, A2 & J5) ● Løsne innstillingsrattet (58) for føringsstykket, og skyv øvre del av venstre del av føringsstykket mot venstre så langt det går. ● Løsne innstillingshendelen for skråsnitt (15), og flytt saghodet mot venstre. Dette er innstillingen for 45° skråsnitt. ● Følgende framgangsmåte brukes ved justering: ● Flytt stoppskruen (61) inn eller ut til indikatoren (56) angir 45°.
NORSK @ Pass på at arbeidsstykket ikke flytter seg mens du skjærer. Spenn det godt fast. La alltid sagbladet stoppe helt før du hever betjeningsarmen. Hvis små trefliser fortsatt blir revet ut på baksiden av arbeidsstykket, kan du sette på et stykke maskeringstape der du skal skjære i arbeidsstykket. Skjær gjennom tapen, og fjern forsiktig tapen til slutt. Støvavsug (fig. A5) Maskinen har en 38 mm støvutsugsport på det øvre bladvernet. ● Kople til en egnet støvutsuger under all saging.
NORSK ● Hold begge hender borte fra banen til sagbladet. ● Slå maskinen på og la sagbladet nå full hastighet. ● Mat arbeidsemnet forsiktig inn under det øvre bladvernet. Hold det fast presset mot skjermen. La tennene skjære, ikke tving arbeidsemnet inn mot sagbladet. Sagbladets hastighet skal være konstant. ● Bruk alltid en skyvestang (73) når du nærmer deg bladet. ● Etter at du har saget ferdig, må du slå av maskinen, la sagbladet stoppe og fjerne arbeidsstykket.
NORSK GARANTI ● 30 DAGERS FORNØYD-KUNDEGARANTI ● Hvis du ikke er tilfreds med din DEWALT maskine, kan den returneres innen 30 dager til din DEWALT forhandler eller til et DEWALT autorisert serviceverksted og du kan bytte eller få pengene tilbake. Kvittering må fremlegges. ● 1 ÅRS FRI VEDLIKEHOLDSERVICE ● Skulle din DEWALT maskine trenge vedlikehold eller service i de første 12 månedene etter det ble kjøpt, vil dette bli utført gratis av et autorisert DEWALT serviceverksted.
PORTUGUÊS SERRA DE ESQUADRIA DE TOPO DE MESA D27111 Parabéns! Declaração CE de conformidade Escolheu uma ferramenta DEWALT. Muitos anos de experiência, um desenvolvimento contínuo de produtos e o espírito de inovação fizeram da DEWALT um dos parceiros mais fiáveis para os utilizadores profissionais.
PORTUGUÊS Instruções de segurança Quando usar ferramentas eléctricas fixas observe as regras de segurança aplicáveis no seu país para reduzir o risco de incêndio, choque eléctrico e acidentes pessoais. Leia todo o manual atentamente antes de utilizar a ferramenta. Guarde este manual para futura referência. 14 Instruções gerais 1 Mantenha a área de trabalho arrumada. Mesas e áreas de trabalho desarrumadas podem provocar acidentes.
PORTUGUÊS ● Não use lâminas com diâmetro maior ou menor do que o recomendado. Não utilize espaçadores para ajustar a lâmina no fuso. Para conhecer as lâminas de medida correcta, consulte os dados técnicos. Utilize apenas as lâminas especificadas neste manual, conforme a norma EN 847-1. ● Considere a aplicação de lâminas especialmente projectadas para redução de ruído. ● Não utilize lâminas HSS. ● Não utilize lâminas de serra danificadas ou rachadas. ● Não utilize discos abrasivos.
PORTUGUÊS Os factores a seguir indicados influenciam a produção de ruído.
PORTUGUÊS Para aumentar a portabilidade, a máquina pode ser montada numa prancha de madeira de 12.5 mm ou mais, a qual depois pode ser fixada com grampos na sua bancada ou ser levada para outro sítio de trabalho e lá ser fixada com grampos. ● Se montar a sua serra numa prancha de madeira, certifique-se de que os parafusos de montagem não sobressaiem debaixo da madeira. A prancha deve estar bem encostada ao suporte.
PORTUGUÊS Ajuste do engate do ângulo em esquadria/haste (fig. I) Se a base da serra puder ser movida enquanto a alavanca para o corte em esquadria (10) é bloqueada, o engate do ângulo em esquadria/haste (53) têm de ser ajustados. ● Desbloqueio da alavanca para o corte em esquadria (10). ● Aperte completamente o engate do ângulo em esquadria/haste (53) utilizando uma chave de fendas (54). De seguida, desaperte a haste um quarto de volta.
PORTUGUÊS @ ● Utilize o perfil de 8 mm para cortar peças baixas de forma a permitir o acesso entre a lâmina e a guia para o pau de empurrar. ● A extremidade posterior da guia deve estar nivelada com a parte frontal da lâmina separadora. Ajustar a mesa de serrar (fig. A1) A mesa (19) desliza para cima e para baixo manualmente e pode ser ajustada à altura necessária com dois botões de travamento. ● Desaperte os botões de travamento da mesa, tanto o principal (16) como o adicional (4), mas não os retire.
PORTUGUÊS ● Ligue a serra e deixe a lâmina da serra alcançar a máxima velocidade. ● Carregue na cabeça para permitir que a lâmina corte através da madeira e entre na chapa de plástico com ranhura (8). ● Após a conclusão do corte, desligue a máquina e aguarde até que a lâmina da serra pare completamente antes de voltar a colocar a cabeça na sua posição superior de repouso. Realizando um corte de deslizamento (fig.
PORTUGUÊS ● Bloqueie a mesa (19) na posição mais baixa. Bloqueie o botão de bloqueio do varão com a cabeça de corte virada para a frente, bloqueie o braço para o corte em esquadria no ângulo para corte em esquadria superior direito, deslize a guia (13) completamente para a frente e bloqueie a alavanca do ângulo de inclinação (15) com a cabeça de corte na vertical para tornar a ferramenta o mais compacta possível. ● Use sempre os recortes para as mãos (26), indicados na fig. B, para transportar a serra.
PORTUGUÊS GARANTIA ● 30 DIAS DE SATISFAÇÃO COMPLETA ● Se não estiver completamente satisfeito com a sua máquina DEWALT, contacte um Centro de Assistência Técnica DEWALT. Apresente a sua reclamação, juntamente com a máquina completa, bem como a factura de compra e ser-lhe á apresentada a melhor solução. ● UM ANO DE MANUTENÇÃO GRATUITA ● Se necessitar de manutenção para a sua máquina DEWALT, durante os 12 meses após a compra, entregue-a, sem encargos, num Centro de Assistência Técnica DEWALT.
SUOMI PÖYTÄJIIRISAHA D27111 CE-Vaatimustenmukaisuustodistus Onneksi olkoon! Olet valinnut DEWALT-työkalun. Monivuotisen kokemuksen, ahkeran tuotekehittelyn ja uudistusten ansiosta DEWALT on yksi ammattikäyttäjien luotettavimmista yhteistyökumppaneista. Tekniset tiedot D27111 Jännite V 230 Ottoteho W 1.500 Virrankulutus W 1.
SUOMI Turvaohjeet Käytettäessä kiinteitä koneita on aina noudatettava kyseisessä maassa voimassa olevia turvamääräyksiä, jotta tulipalon, sähköiskun ja henkilökohtaisen vahingon riski pienentyisi. Lue käyttöohje huolellisesti ennen koneen käyttöönottoa. Säilytä käyttöohje kaikkien koneen käyttäjien ulottuvilla. 15 Yleistä 1 Pidä työskentelyalue siistinä Poista roskat ja mahdolliset esteet työskentelyalueelta välttyäksesi vaurioilta.
SUOMI ● Pidä konetta ympäröivä alue asianmukaisessa kunnossa ja puhtaana irtonaisista materiaaleista, esim. lastuista ja leikkuujätteistä. ● Tarkista säännöllisin väliajoin, että moottorin ilma-aukot ovat puhtaat eikä niissä ole lastuja. ● Vaihda kulunut kitapala. ● Irrota kone verkkovirrasta ennen sen huoltoa ja terää vaihdettaessa. ● Älä koskaan suorita puhdistus- tai huoltotöitä koneen käydessä, kun sahauspää ei ole lepoasennossa. ● Asenna kone penkille aina, kun se on mahdollista.
SUOMI Pakkauksen sisältö Pakkaus sisältää: 1 Pöytäjiirisaha 1 Terä 1 Yhdensuuntainen halkaisuohjain 1 Ylempi teräsuojus 1 Työntökapula 1 Kuusiokoloavain 5 mm 1 Kuusiokoloavain 6 mm 1 Käyttöohje 1 Hajoituskuva Kaapelin tai pistotulpan vaihto Kun vaihdat kaapelin tai pistotulpan, hävitä se turvallisesti. Pistoke, jossa on paljaita johtimia, on vaarallinen kiinnitettynä jännitteiseen pistorasiaan.
SUOMI Sahanterän asentaminen (kuva D & F1 - F4) Uuden terän hampaat ovat erittäin terävät - varo ettet loukkaa itseäsi. Uuden sahanterän sijoittamiseksi on välttämätöntä, että pöytä säädetään korkeimpaan asentoon ja sahauspää nostetaan korkeimpaan asentoonsa. ● Työnnä kuusiokoloavain (37) suojuksessa olevan reiän (42) läpi karan päähän (kuva F1). Aseta kuusiokoloavain (38) terän lukitusruuviin (43) (kuva F2).
SUOMI Säädä vaste mahdollisimman lähelle sahanterää, jotta se tukisi työkappaletta kunnolla häiritsemättä kuitenkaan sahausvarren liikettä ylös ja alas. ● Kiristä siipimutteri (60) varmistaaksesi vasteen paikalleen. Viistokulman tarkistaminen ja säätäminen (kuva A1, A2 & J5) ● Löysää vasemman takavasteen lukitusnuppi (58) ja siirrä takavasteen yläosaa vasemmalle mahdollisimman pitkälle. ● Löysää vinosahauksen lukitusvipu (15) ja siirrä sahauspää vasemmalle. Tämä on 45° vinosahausasento.
SUOMI Tavallinen sahaus Sahausjäljen laatu Sahausjäljen tasaisuus riippuu monista tekijöistä, esim. sahattavasta materiaalista. Kun tarvitaan hyvin tasaista jälkeä listoja ja muita tarkkuustöitä varten, terävä sahanterä (60-hampainen karbiditerä) ja hitaampi, tasainen sahaus antaa paremman tuloksen. @ Varmista ettei sahattava materiaali siirry paikaltaan sahattaessa. Kiinnitä työstökappale kunnolla. Anna sahanterän pyörimisliikkeen pysähtyä aina ennen kuin nostat sahauspäätä.
SUOMI @ Älä sahaa metallia tässä tilassa. Halkaisusahaus (kuva T) ● Aseta vinokulmaksi 0°. ● Säädä sahanterän korkeus. Terä on oikeassa asennossa, kun kolmen hampaan kärjet ovat puun yläpinnan yläpuolella. Varmista, että sahapenkkipöytä on kiinnitetty tiukasti valittuun korkeuteen. ● Aseta sivuohjain oikealle etäisyydelle. ● Pidä työstettävää kappaletta painettuna pöytää ja ohjainta vasten. Pidä työkappale noin 25 mm:n etäisyydellä sahanterästä. ● Pidä molemmat kädet poissa sahanterän kulkureitiltä.
SUOMI TAKUU ● 30 PÄIVÄN TYYTYVÄISYYSTAKUU ● Jos et ole täysin tyytyväinen DEWALT-työkaluusi, palauta se myyjälle tai valtuutettuun DEWALT-huoltopisteeseen 30 päivän sisällä ostopäivästä, niin saat rahasi takaisin tai vaihtokoneen. Tuote on palautettava täydellisenä ja ostokuitti on esitettävä. ● YHDEN VUODEN ILMAINEN YLLÄPITOHUOLTO ● DEWALT-työkalusi kunnossapito ja huolto suoritetaan ilmaiseksi 12 kuukauden sisällä ostopäivästä huoltopisteessämme.
SVENSKA BÄNKGERINGSSÅG D27111 CE-Försäkran om överensstämmelse Vi gratulerar! Du har valt ett DEWALT verktyg. Mångårig erfarenhet, ihärdig produktutveckling och förnyelse gör DEWALT till ett av de mest pålitliga namnen för professionella användare. Tekniska data D27111 Spänning V 230 Ineffekt W 1.500 Strömförbrukning W 1.100 Max.
SVENSKA Säkerhetsanvisningar Iakttag, när du använder stationära elverktyg, alltid de säkerhetsbestämmelser som gäller i ditt land för att minska risken för brand, elektriska stötar och personskada. Läs bruksanvisningen noggrant innan du använder verktyget. Behåll denna bruksanvisning för framtida referens. Allmänt 15 1 Håll arbetsområdet i ordning Nedskräpade ytor och arbetsbänkar inbjuder till skador. 2 Tänk på arbetsmiljöns inverkan Utsätt inte verktyget för regn.
SVENSKA ● Kontrollera regelbundet att motorns ventilationsöppningar är rena och fria från flisor och spån. ● Byt ut spårskivan när den är utsliten. ● Koppla bort maskinen från strömkällan före underhållsarbeten eller klingbyte. ● Utför aldrig rengöring eller underhåll medan maskinen är i gång och huvudet inte står i viloläge. ● Montera alltid maskinen på en bänk när det är möjligt. ● Om du använder en laser till att ange såglinjen, måste lasern vara av klass 2 enligt EN 60825-1:2001.
SVENSKA Kontroll av förpackningens innehåll Förpackningen innehåller: 1 Bänkgeringssåg 1 Blad 1 Parallellklyvanslag 1 Övre skydd 1 Påskjutare 1 Insexnyckel 5 mm 1 Insexnyckel 6 mm 1 Instruktionshandbok 1 Sprängteckning ● Kontrollera defekter på verktyg, delar och tillbehör som kan ha uppstått i samband med transport. ● Läs noga igenom handboken och förvissa Dig om att Du förstår instruktionerna innan Du börjar använda maskinen. Beskrivning (fig.
SVENSKA Montering av sågklinga (fig. D & F1 - F4) Tänderna på ett nytt blad är mycket vassa och kan vara farliga. För montering av ett nytt sågblad måste bordet sättas så högt som möjligt och såghuvudet sättas i sitt högsta läge. ● För insexnyckeln (37) genom hålet (42) i höljet och in i spindelns ände (fig. F1). Sätt insexnyckeln (38) i bladets spärrskruv (43) (fig. F2). ● Bladets spärrskruv är vänstergängad, vrid därför skruvnyckeln medurs för att lossa muttern medan du håller insexnyckeln stadigt på plats.
SVENSKA ● Inställningen går till så här: ● Vrid ställskruven (61) in eller ut tills visaren (56) står på 45°. @ Medan denna justering utförs bör såghuvudet avlastas genom att stödja dess vikt. Då är det lättare att vrida justeringsskruven. Justering af skinnefører (fig. L) ● Kontrollera regelbundet att skenorna har fritt utrymme. ● Minska avståndet genom att vrida ställskruven (62) medsols medan såghuvudet förs framåt och bakåt. ● Ställ in bordet på önskad höjd. ● Dra åt bordets låsknappar.
SVENSKA ● Använd om möjligt en dammsugare som fyller gällande föreskrifter gällande dammutsläpp. Sågning i geringssågläge Maskinen är farlig om inte skydden används. Alla skydd måste sitta på plats vid sågning. Allmän hantering - I geringssågläge spärras såghuvudet automatiskt i sitt övre viloläge. - Såghuvudet frigörs genom att klämma in bladskyddets lossningsspak. När såghuvudet sänks dras det rörliga undre skyddet in.
SVENSKA Extra tillbehör (fig. A3 - A6) Fastmontering av arbetsstycket (fig. A3) ● Bladets rörelse är tillräcklig för att hålla materialet stadigt mot anslaget. ● Om materialet har en tendens att lyfta eller åka framåt mot anhållet, kan det vara lämpligt att använda fastspänningsanordningen (27) som finns som tillbehör. Stödning av långa arbetsstycken (fig. A4) ● Långa arbetsstycken måste alltid stödjas.
SVENSKA GARANTI ● 30 DAGARS NÖJD-KUND-GARANTI ● Om du inte är fullständigt nöjd med din DEWALT-maskinens prestanda behöver du endast returnera den inom 30 dagar, komplett som vid köpet, till ditt inköpsställe eller en DEWALT auktoriserad serviceverkstad för fullständig återbetalning eller utbyte. Inköpsdatum måste påvisas.
TÜRKÇE MASA ÜSTÜ GÖNYE TESTERESİ D27111 Avrupa Birliği şartnameye uygunluk beyanı Tebrikler! Bir DEWALT aletini seçmiş bulunuyorsunuz. Ürün geliştirme ve yenilemede yılların deneyimi DEWALT'ı profesyonel kullanıcılar işin en güvenilir partnerlerden biri haline getirmektedir. Teknik veriler D27111 Voltaj V 230 Güç ihtiyacı W 1.500 Güç çıkışı W 1.100 Azami bıçak hızı Bıçak çapı min-1 2.
TÜRKÇE Güvenlik talimatları Elektrikli aletleri kullanırken daima, yangin, elektrik çarpması ve yaralanma riskini azaltmak için, ülkenizde uygulanabilecek güvenlik kurallarına uyun. Cihazı kullanmadan önce bu kullanım kılavuzunu dikkatlice okuyunuz. Bu kullanım kılavuzunu gelecekteki kullanımlar için saklayınız. 15 Genel Bilgiler 16 1 Çalışma alanınızı temiz tutun Dağınık yerler ve tezgahlar kazaya neden olabilir.
TÜRKÇE ● Makinenin etrafındaki alanı ihmal etmeyin ve etrafı talaş, döküntü parçalar gibi rasgele savrulan malzemelerden temizleyin. ● Düzenli olarak motorun hava deliklerinin temiz ve talaştan arındırılmış olup olmadığını kontrol edin. ● Çentik plakası yıpranırsa bunu değiştirin. ● Bakım yaparken veya kesim levhasını değiştirirken makineyi elektrikten çekin. ● Makine çalışırken ve başlık durma konumunda değilken, herhangi bir temizlik veya bakım işlemi yapmayın.
TÜRKÇE Makineyi tezgah testere kipinde kullanırken, üst ve alt siperlerin yerinde olmasına ve düzgün çalıştığına dikkat edin. Makineyi sadece tezgah testere tablası en yatay konumdayken kullanın. Opsyonel aksesuarlar Şevli testere modunda kızaklı kesim yaparken, "Kızaklı kesim yapılması" adı altında verilen talimatlara riayet edin.
TÜRKÇE Montaj @ Montajdan önce mutlaka aletin fişini çekin. Üst bıçak siperinin (şekil E) monte edilmesi Makine bir kez testere tezgah kipine ayarlandığında üst bıçak koruması (21) keski demirine (21) çabuk ve kolayca tespit edilecek şekilde tasarlanmıştır. ● Kelebek somunu gevşetin (39). ● Korumayı dikey olarak tutarak, korumanın arkasındaki çentiği keski demiri ile birleştirin. ● Cıvata çubuğunun oluğa girdiğinden emin olarak korumayı keski demirinin (20) üzerinden aşağıya indirin.
TÜRKÇE @ Kılavuz çentik (59) kesim artıklarıyla tıkanabilir. Kılavuz çentiği temizlemek için bir çubuk veya düşük basınçlı hava kullanın. Aynanın sağ tarafının hareketli parçası, testerenin 45° tam sola meyillenmesine izin vererek, bıçağın yanındaki iş parçasının maksimum derecede desteklenmesini sağlamak üzere ayarlanabilir. Kayan mesafe her iki yönde engeller ile sınırlandırılmıştır. Siperi (6) ayarlamak için: ● Aynayı (6) serbest bırakmak için kelebek somununu (60) gevşetin. ● Aynayı sola kaydırın.
TÜRKÇE ● Demir içermeyen malzemeleri keserken, -5°'lik açısı olan uygun bir DEWALT testere bıçağı kullanın. Bir malzeme mengenesi kullanarak, malzemenin yerine sabitlendiğine emin olun. ● Çentik plakasını kullandığınızdan emin olun. Çentik yuvası 10 mm'den kalınsa makineyi çalıştırmayın. Makinenin açılıp-kapatılması (şekil O) Açma/kapatma düğmesinin içinde voltaj kesme anahtarı fonksiyonu bulunmaktadır: elektrik herhangi bir nedenden dolayı kesilirse, çalıştırma düğmesine yeniden basılması gerekmektedir.
TÜRKÇE Bileşik gönye Bu kesim, gönye ile meyilli kesimin bir bileşimidir. ● Meyil açısını ayarlayın ve ardından gönye açısını ayarlayın. Tezgah kipinde kesim ● Daima keski demirini kullanın. ● Keski demiri ve bıçak siperinin daima doğru bir şekilde birleştirilmesine dikkat edin. ● Gönye testerenin ayarlandığına ve 0° gönyeye kilitlendiğine daima emin olun. @ Metalleri bu kip ile kesmeyin. Yırtma kesim (şekil T) ● Meyil açısını 0° olarak ayarlayın. ● Testere bıçağı yüksekliğini ayarlayın.
TÜRKÇE DEWALT ürünleri çalışma ömürlerini tamamladıklarında, DEWALT bunların geri kazandırılması ve biriktirilmesi için kolaylıklar sağlamaktadır. Bu hizmetten yararlanmak için lütfen sahip olduğunuz ürünü, bunları toplayan yetkili bir tamir servisine götürün. Bu kılavuzda belirtilen adresteki yerel DEWALT ofisine başvurarak size en yakın yetkili tamir servisinin yerini öğrenebilirsiniz.
ΕΛΛΝΗΙΚΑ ΕΠΙΤΡΑΠΕΖΙΟ ΦΑΛΤΣΟΠΡΙΟΝΟ D27111 Θερμά συγχαρητήρια! Δήλωση συμμόρφωσης ΕΚ Διαλέξατε ένα από τα μηχανήματα της DEWALT. Η πολύχρονη εμπειρία της DEWALT, η συνεχής εξέλιξη των προϊόντων της και η εφαρμογή καινοτομιών την καθιστούν έναν από τους πιό αξιόπιστους συνεργάτες των επαγγελματιών. Τεχνικά χαρακτηριστικά D27111 Τάση V 230 Ισχύς εισόδου W 1.500 Απορροφούμενη ισχύς W 1.
ΕΛΛΝΗΙΚΑ Οδηγίες ασφαλείας Οταν χρησιμοποιείτε ηλεκτρικά εργαλεία πρέπει να λαμβάνετε πάντοτε υπόψη τους κανόνες ασφαλείας που ισχύουν στη χώρα σας προκειμένου να αποφευχθεί ο κίνδυνος πυρκαγιάς, ηλεκτροπληξίας και τραυματισμού. Προτού χρησιμοποιήσετε το εργαλείο, διαβάστε προσεκτικά ολόκληρο το παρόν εγχειρίδιο. Φυλάξτε το εγχειρίδιο και για μελλοντική χρήση. Γενικά 1 Διατηρείτε καθαρό το χώρο εργασίας Ακατάστατοι χώροι και πάγκοι εγκυμονούν κίνδυνο ατυχήματος.
ΕΛΛΝΗΙΚΑ ● Ποτέ μη προσπαθήσετε να σταματήσετε το μηχάνημα όταν είναι σε λειτουργία τοποθετώντας ένα εργαλείο ή άλλο αντικείμενο στην λεπίδα για να την μπλοκάρετε. Μπορεί να προκληθεί κατά λάθος σοβαρός τραυματισμός. ● Πριν χρησιμοποιήσετε οποιοδήποτε εξάρτημα ανατρέξτε στο εγχειρίδιο οδηγιών. Η ακατάλληλη χρήση ενός εξαρτήματος μπορεί να προκαλέσει βλάβη. ● Επιλέξτε τη σωστή λεπίδα για το υλικό που θα κόψετε. ● Μην ξεπεράσετε την μέγιστη ταχύτητα που αναγράφεται στη λεπίδα πριονιού.
ΕΛΛΝΗΙΚΑ ● Φροντίζετε ότι ο πάνω και κάτω προφυλακτήρας να βρίσκονται στη θέση τους στη κατάσταση κοπής στον πάγκο. Χρησιμοποιείτε μόνο το μηχάνημα όταν ο τραπέζι πριονιού βρίσκεται σε οριζόντια θέση. Παραμένοντες κίνδυνοι Οι ακόλουθοι κίνδυνοι προέρχονται από τη χρήση των πρίονων: - τραυματισμοί από την επαφή με τα περιστρεφόμενα τμήματα Παρά την εφαρμογή των σχετικών κανονισμών ασφαλείας και των διατάξεων ασφαλείας, ορισμένοι παραμένοντες κίνδυνοι δεν είναι δυνατό να αποφευχθούν.
ΕΛΛΝΗΙΚΑ Αντικατάσταση του καλωδίου ή του ρευματολήπτη Οταν αντικαθιστάτε το καλώδιο ή το ρευματολήπτη, κάντε το με ασφάλεια. Ενας ρευματολήπτης με γυμνά καλώδια είναι επικίνδυνος όταν τοποθετείται σε μία πρίζα ρεύματος. Αν απαιτείται ένα καλώδιο επέκτασης, χρησιμοποιείστε ένα εγκεκριμένο καλώδιο επέκτασης κατάλληλο για το ρεύμα εισόδου αυτής της μηχανής (δείτε τα τεχνικά στοιχεία). Το ελάχιστο μέγεθος αγωγού είναι 2,5 mm². Το καλώδιο πρέπει να έχει λαστιχένιο κάλυμμα και ένα αγωγό γείωσης.
ΕΛΛΝΗΙΚΑ Ρυθμίσεις για λειτουργία φαλτσοπρίονου Το Γωνιακό Πριόνι σας ρυθμίστηκε επακριβώς στο εργοστάσιο. Εάν χρειάζεται επαναρύθμιση λόγω της μεταφοράς και διακίνησής του ή για οποιονδήποτε άλλο λόγο, ακολουθήστε τα στάδια παρακάτω για να ρυθμίσετε το πριόνι σας. Αυτές οι ρυθμίσεις, αφού γίνουν, πρέπει να παραμείνουν ακριβείς. Ελεγχος και ρύθμιση της λεπίδας στον οδηγό (εικ.
ΕΛΛΝΗΙΚΑ Ρυθμίσεις για θέση λειτουργίας πάγκου πριονιού Αλλαγή από λειτουργία πάγκου πριονιού σε λειτουργία φαλτσοπρίονου (εικ. A1 & A2) ● Τοποθετήστε τη λεπίδα σε θέση 0° εγκάρσιας κοπής με το μοχλό γωνιακής κοπής (10) ασφαλισμένη (εικ. Α1). ● Κλειδώστε το κουμπί ασφάλισης ράγας (17) με τη κεφαλή κοπής στη πίσω θέση. ● Πιέστε το μοχλό απελευθέρωσης ασφαλείας κεφαλής (13) για να κατεβάστε τη κεφαλή και πιέστε τον ασφαλιστικό πείρο (16). ● Τοποθετήστε τον παράλληλο οδηγό (22) όπως περιγράφεται παρακάτω.
ΕΛΛΝΗΙΚΑ Βασικές εργασίες κοπής Ποιότητα κοπής Η ομαλότητα οποιασδήποτε κοπής εξαρτάται από ορισμένες παραμέτρους. π.χ. το υλικό που κόβεται. Οταν χρειάζονται ομαλές κοπές για διακοσμητικά στοιχεία και άλλες εργασίες ακριβείας, μία κοφτερή (60 δόντια καρβιδίου) λεπίδα και ένας βραδύτερος, ομοιόμορφος ρυθμός κοπής παρέχουν τα επιθυμητά αποτελέσματα. @ Εξασφαλίστε ότι το υλικό δεν γλιστρά κατά την κοπή. Σφίξτε το καλά στη θέση του.
ΕΛΛΝΗΙΚΑ ● Χαλαρώστε τη λαβή σύσφιξης οδηγού αριστερής πλευράς (58) και σύρετε το επάνω μέρος της αριστερής πλευράς (13) προς τα αριστερά μέχρι όσο φτάνει. Χαλαρώστε τη λαβή σύσφιξης φαλτσογωνίας (15) και ρυθμίστε τη φαλτσογωνία όπως επιθυμείτε. ● Σφίξτε καλά τη λαβή σύσφιξης φαλτσογωνίας (15). ● Ενεργήστε όπως και για την κατακόρυφη ευθύγραμμη εγκάρσια τομή. Σύνθετη λοξοτομή Η κοπή αυτή αποτελεί συνδυασμό λοξοκοπής και φαλτσογωνιάς.
ΕΛΛΝΗΙΚΑ Λίπανση Το μηχάνημα αυτό δεν χρειάζεται λίπανση. Τα έδρανα του κινητήρα έχουν δεχτεί λίπανση εκ των προτέρων και είναι υδατοστεγή. ● Αποφύγετε να χρησιμοποιήσετε λάδι ή γράσο, γιατί μπορεί το μηχάνημα να στομώσει από πριονίδια και αποκόμματα και να δημιουργηθούν προβλήματα. ● Καθαρίζετε τα μέρη που συνήθως μαζεύεται σκόνη και ροκανίδια τακτικά με ένα στεγνό βουρτσάκι.
Belgique et Luxembourg België en Luxemburg DEWALT Mechelen Campus, Schaliënhoevedreef 20E B-2800 Mechelen Tel: +32 (0)015 - 15 47 9211 Fax: +32 (0)015 - 15 47 9210 www.dewalt.com Danmark DEWALT Sluseholmen 2-4 2450 København SV Tlf: 70 20 15 10 Fax: 36 94 49 01 www.dewalt-nordic.com Deutschland DEWALT Richard-Klinger-Straße 65510 Idstein Tel: 06126-21-1 Fax: 06126-21-2770 www.dewalt.de Ελλάς Black & Decker (Hellas) S.A.