
Use and Care Manual


ENGLISH
8
is no battery pack in the cavity. Unplug the charger
before attempting toclean.
6. Do not freeze or immerse the charger in water or any
otherliquid.
Storage Recommendations
1. The best storage place is one that is cool and dry, away
from direct sunlight and excess heat orcold.
2. For long storage, it is recommended to store a fully
charged battery pack in a cool dry place out of the
charger for optimalresults.
NOTE: Battery packs should not be stored completely
depleted of charge. The battery pack will need to be
recharged beforeuse.
SAVE THESE INSTRUCTIONS FOR
FUTURE USE
COMPONENTS (FIG. A)
WARNING: Never modify the power tool or any part
of it. Damage or personal injury couldresult.
Refer to Figure A at the beginning of this manual for a
complete list ofcomponents.
Intended Use
The DCD130 is a mixer/drill and is designed for
professional mixing and drilling at various work sites (i.e.,
constructionsites).
DO NOT use under wet conditions or in presence of
flammable liquids orgases.
This mixer/drill is a professional power tool. DO NOT let
children come into contact with the tool. Supervision is
required when inexperienced operators use thistool.
ASSEMBLY AND ADJUSTMENTS
WARNING: To reduce the risk of serious personal
injury, turn unit off and remove the battery pack
before making any adjustments or removing/
installing attachments or accessories. An
accidental start-up can causeinjury.
Torque
WARNING: This is a high-torque drill. To reduce the
risk of serious personal injury, ALWAYS hold tool
firmly with both hands in the proper position for
operation as shown.
Torque is the twisting action the drill produces in regards
to the rotating bit. As the drill bit meets resistance in the
material being drilled, the motor responds by adjusting the
output torque to meet the requirement up to the maximum
capacity of the motor and gear system.
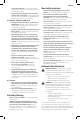
E-Clutch® System (Fig. A)
The DCD130 is equipped with the
DeWALT
anti-rotation
E-Clutch® System. This feature senses the motion of the
tool and shuts the tool down if necessary. The red LED
indicator
8
illuminates when the E-Clutch® System
isengaged.
INDICATOR DIAGNOSIS SOLUTION
OFF Tool is functioning
normally
Follow all warnings and instructions
when operating the tool.
SOLID E-Clutch® System
has been activated
(ENGAGED)
With the tool properly supported,
release trigger. The tool will function
normally when the trigger is
depressed again and the indicator
light will go out
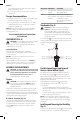
Side Handle (Fig. A)
WARNING: To reduce the risk of personal injury,
ALWAYS operate the tool with the side handle
properly installed. Failure to do so may result in
the side handle slipping during tool operation and
subsequent loss of control. Hold tool with both hands
to maximizecontrol.
The side handle
9
can be placed in either side of the drill
or the top of the drill according to operator preference and
available workingclearance.
Fig. E
9
Variable Speed Trigger and Forward/
Reverse Control Button (Fig. A)
The drill is turned on and off by pulling and releasing
the variable speed trigger
3
. The farther the trigger is
depressed, the higher the speed of the drill. Your tool is
equipped with a brake. The chuck will stop as soon as the
trigger switch is fullyreleased.
A forward/reverse control button
4
determines the
rotational direction of the tool and also serves as a
lock-offbutton.
• To select forward rotation, release the trigger and
depress the forward/reverse control button on the right
side of thetool.
• To select reverse, depress the forward/reverse control
button on the left side of thetool.
NOTE: The center position of the control button locks
the tool in the off position. When changing the position
of the forward/reverse control button, be sure the trigger
isreleased.
Installing and Removing the Chuck Key
(Fig. F)
Your tool is provided with a chuck key
6
that can be stored
on the foot of the tool. To install the chuck key into its