Operation Manual
Manuals
Brands
DeWalt Manuals
Electric Miter Saw
DW713 T 2
1
2
3
4
5
6
7
8
9
10
2
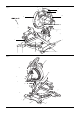
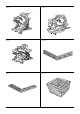
Figure 3
Figure 4
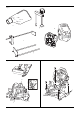
ff
gg
ii
jj
Figure 5
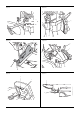
a
m
r
o
j
hh
1
...
2
3
4
5
6
...
...
140