
Full Product Manual


11
ASSEMBLY
WARNING!
• Serious or fatal crashing injuries can occur from furniture
tipping over. To prevent this, the rack must be secured to a wall,
especially in earthquake-prone environments, where surfaces
are uneven, and where children and/or pets are present.
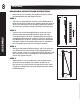
FPO
WALL MOUNTING INSTRUCTIONS
• Note: Drywall anchors and anchor screws are included with
this rack; however, different wall materials require different
types of fasteners. Use fasteners suitable for your specific
type of wall. If you are uncertain about what type of fasteners
to use, then please contact your local hardware store.
STEP 1
• Take the U-shaped bracket and rock it up at an angle to
attach it to the bottom inner channel of the crossbeam.
Once attached, the back portion will sit flush against the
inside of the crossbeam.
STEP 2
• Once attached, the U-shaped bracket can be moved from
side to side (in between the two safety straps). This allows
for it to be attached to a 2 x 4 in the wall.
STEP 3
• The L-shaped bracket has two sets of four square holes
that allow you to adjust the distance of the rack to the wall.
Use two carriage bolts and two 10 mm nuts to attach the
L-shaped bracket to the bottom of the U-shaped bracket.
STEP 4
• Position the rack so the flat end of the L-shaped bracket is
touching the wall. Use a pencil to mark the location of the
four holes on the wall. Use the included drywall anchors,
anchor screws, and the appropriate tools if you’re securing
the rack to drywall only. Be sure to follow standard
instructions for installing anchor screws.
ROCK BRACKET UPWARDS