
Owner's manual

User Manual-5.0
Page 26 of 65
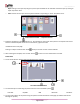
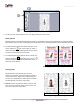
Panning
Panning lets you view specific areas of the photo by moving the photo up or down and sideways in the document
window. This gives access to the areas that would otherwise remain obscure given the size of the photo.
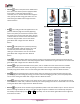
How to: Place the cursor over , which then changes to or the ‘hand symbol’. Now use your mouse to take hold
of the photo and move it around to get to the area you wish to work on.
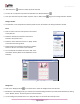
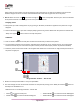
Swapping Photos
Many times you need to swap photos as you go along to. However, the borders if applied to the photos do not get
swapped.
How to: Select the photos you wish to swap by keeping the ctrl key pressed. When both the photos are selected the
‘Swap’ icon appears . Click on the icon to swap the photos.
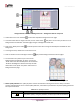
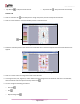
Add Border
Click on ‘Border’ tab on the left panel to select the border that you want for the photos.
You could select a border from the options, Calendar Xpress displays for you on the left panel or you could browse
and select a border of your choice from the path in which you have saved it (the previous 15 paths are available).
Select the photo on which the border is to be applied and double click on the border or drag and drop the border on
the photo to apply to it.
‘Design Calendar’ window …. ‘Border’ tab
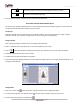
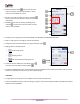
Borders are easily transformable i.e. they are expandable.
You could change the color of the border to better suit the photo by clicking on the ‘Ready Tone’ button . There are
18 ready tones available for use.
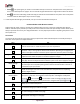
! Additional icon on the ‘Design Calendar’ – Border tab:
o ‘Reset’ : To reset the ready tone.
o ‘Rotate CW90’ : To rotate the border 90 degrees.
o ‘Rotate CW180’ : To rotate the border 180 degrees.
o ‘Rotate CW270’ : To rotate the border 270 degrees.