User Manual-5.0 USER MANUAL 1.0 DgFlick Solutions Pvt. Ltd., Telephone: US +1-732-543-7676, India +91 22 2968 68 68. www.dgflick.com support@dgflick.
User Manual 1.0 Xpress Profit USER MANUAL 1.0 Introduction.............................................................................................................................................. 4 System Requirements ............................................................................................................................... 4 Opening the Tool Box – Getting Started ....................................................................................................
User Manual 1.0 HELLO Green screen photography is a current trend in the market. It is the most trending way for gaining new contracts and earning more in less time. It also replaces the traditional methods of purchasing and carrying background set everywhere which makes it cost effective. Event Xpress provides you the solution which you need at the time of replacing old background and adding new attractive backgrounds.
User Manual 1.0 Receipt Printing ..................................................................................................................................... 28 Output .................................................................................................................................................. 28 Adding or Editing Designs ...................................................................................................................... 30 Creating new Design ................
User Manual 1.0 Registration Once you have installed the Event Xpress software on your computer, you need to proceed to Registration. This ensures that all features of the software are made available to you. Registration is very easy and the user-friendliness of the software makes the process quick and simple. The Process On installation of Event Xpress, the Registration Window appears on your screen.
User Manual 1.0 Enter your details in the relevant fields. These are Name, Address, City, Country, State, Zip/Pin, Email and Phone or Mobile number. Fields marked with an asterisk (*) are mandatory and cannot be left incomplete. In the last field- Serial Number (XXXXX-XXXXX-XXXXX-XXXXX) will be automatically generated in the serial number text box. You will also find the serial number inside the software box pack.
User Manual 1.0 Know Your Software This section gives you a basic understanding of Event Xpress before you actually start working on the software. Running through this section will enhance your understanding of the options available and will help you to make optimal use of the software. General Features Event Xpress comes with several features, which are discussed in this section: Ready-to-Use Templates and Presets: Event Xpress has various inbuilt templates.
User Manual 1.
User Manual 1.
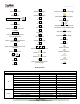
User Manual 1.0 View Delete Object(s) Undo Object(s) Redo Object(s) Show Photo Information Fit to Screen Actual Size (1:1) Zoom In Zoom Out DEL CTRL + Z CTRL + Y CTRL + SHIFT + I CTRL + F12 CTRL + SHIFT + F12 + - DEL COMMAND + Z COMMAND + Y COMMAND + SHIFT + I COMMAND + F12 COMMAND + SHIFT + F12 + - Preferences Event Xpress allows you great flexibility in usages while working on it. You could Change to the language of your choice. Select the desired Theme for your software.
User Manual 1.0 Email: You can send designs through Email. You can set the file size from email option while creating event. You have size options of 4 X 6 OR 5 X 7 OR 6 X 8 OR 8 X 12. File: All the processed events are exported in JPG format by default. You can set the output file size from available size options of 4 X 6 OR 5 X 7 OR 6 X 8 OR 8 X 12. Defining and Modifying Events After opening Event Xpress, the first screen you see is ‘Select Event’ window.
User Manual 1.0 In ‘Email’ column , you can see the no of photos to be sent to the email ID of the customer and also a CSV file in which you will get the email ID and the file name which you are suppose to send on that respective ID for your reference. This column is interlinked to the output folder to save your time. Direct clicking allows you to go to the folder you can see the files to be sent on Email and CSV file of the event.
User Manual 1.0 From ‘Path’ option, you can choose the path in which you want to save the project and the output generated in the event. Number of Photos in Design You can add more than one photo in the design. The photo addition, settings and editing of photos can be done in ‘Add Event’ window in ‘Photo’ section . This section guides you about photo tools available in ‘Add Event’ window. From ‘Photo1’ option you can do the settings of the photo to be included in the designs.
User Manual 1.0 ‘Select Designs’ window If you want to edit any design for this event, then select the design which you want to edit and click on ‘Edit’ button. You will be redirected to the ‘Edit Design’ window. In this window, you can edit attributes according to your Preference. From the ‘Edit Design’ window, you can add logo to the design and place it on the page according to you. Once you finish with editing, you can save the changes with ‘Save’ button.
User Manual 1.0 on ‘Set Account’ option, you will be redirected to the Facebook login window where you will be asked to provide login details. Login from here and follow the onscreen instructions to set your account. Second option in ‘Facebook’ tab is ‘Variable Account’. From this option, you can set secondary account on which the photos are to be posted. You can choose the size of photos which are going to be posted on facebook from ‘FB Size’ option.
User Manual 1.0 From ‘Path’ option, you can change the path in which you want to save the project. Number of Photos in Design You can add more than one photo in the design. The photo addition, settings and editing of photos can be done in ‘Photo’ section only. This section guides you about photo tools available in ‘Add Event’ window. From ‘Photo1’ option you can change the settings of the photo to be included in the designs.
User Manual 1.0 Receipt number and Prints Everytime you generate the output, a receipt is also generated and can be printed if the printer is connected to the computer. You can define the Seller’s name, receipt number and define the printer also from ‘Receipt’ section . From ‘Seller’s Name’ option, you can change the seller name for receipt. From ‘Receipt Number’ option, you can change receipt number. If you want to print Receipt, check the checkbox of ‘Receipt Printer’.
User Manual 1.0 Delete the Event If you want to delete any project permanently, you can directly delete it in ‘Select Event’ window. The event which you want to delete need to be selected first. After selecting the event, press ‘Delete’ button located at top left side of the ‘Select Event’ window. A confirmation window will appear which will ask for your confirmation to delete the selected event. Choose ‘OK’ if you want to delete the event. Abort the process with ‘Cancel’ button.
User Manual 1.0 You can also select the designs of which you want as a final output. The designs can be selected by doing a single click on it. The selected designs have a green tick mark on it. ‘My Designs’ window You can simply deselect design by clicking on that design. Adjustment of photo in the design You can also adjust the photos into the design. The photos can be set according to the design. ‘Edit Design’ window …. Photo adjusted To adjust the photos and design, double click on the design.
User Manual 1.0 Rotating Photo Rotating photo in the Design page keeping the creativity in mind adds to the overall presentation of the pages. Event Xpress gives you the option of either rotating the photo within the frame or rotating the whole picture along with the frame. To rotate the photo within the frame: Keep your cursor on the rotate icon that is seen when you select a photo. Once the ‘hand’ symbol appears use the mouse to rotate it in the direction of your choice.
User Manual 1.0 Indicator and color Interpretation The photo quality is not good; however, the final output will be satisfactory. Yellow The photo quality is poor and will not yield good results on printing. Orange The photo is unsuitable for printing. Red Add Effects To apply effects to your Design, click on ‘Effects’ tab There are 10 different options under this category. They are: Colorize, Blur, Opacity, Feather, Shadow, Glow, Outline, Rotation, Presets and Blend.
User Manual 1.0 the given effects with a single click from ‘Reset all’ button o Shadow . : To apply the shadow effect to your photo, click on ‘Shadow’ and then choose from the available presets. You could customize ‘shadow’ by clicking on ‘Custom’ button and then applying the shadow settings manually using various sliders.
User Manual 1.0 To use a background, double click on it or drag and drop it on the canvas from the option bar. Uncheck the ‘Fit to Screen’ check box on the left to expand the background on the page. To fill the canvas with one single solid color, click on ‘Color Picker’ and place it on the color you wish to use as background for your Design. The whole page now gets a background of that color.
User Manual 1.0 o Font from font dropdown menu , o Font size from size dropdown menu o Font Style from various style options o Font Color from color palette or color picker , , o Ready presets can be used from available options . , In this way, you can add title to the design if you want. Add Logo You can also add a logo to the design. For that go to the ‘Logo’ tab In ‘Logo’ tab, from ‘Browse’ button button. .
User Manual-3.0 Once the logo is added, you can close the ‘Logo’ tab from ‘Close’ button . Save the altered design to the current project with the help of ‘Save’ button. ‘My Designs’ window You will see the changed design in ‘My Designs’ window. Please remember that the changes you make to the design are temporarily i.e. the changes are for the current process only and they will not affect your original designs. Photo Correction From ‘My Designs’ window, you can change the photos as well.
User Manual-3.0 You can enhance the photo with the help of ‘Edit Photo’ button . ‘Enhance’ option bar When you click on ‘Edit Photo’ button, you are redirected to the ‘Edit Photo’ window where you can see various types of effects for your photo. Do the needful editing to the photo and save the changes by ‘Save’ button. (For details refer section Fine Tuning – Photo Editing) Next option is ‘Chroma’ option.
User Manual-3.0 On ‘Enhance’ bar, you will find some more options for photo editing. Next option is ‘Touchup’ from which you can give touchup effect to the photo. You can remove all the blemishes, wrinkles, unwanted spots and marks with the help of ‘Touchup’ tool. Another option on ‘Enhance’ bar is ‘Add’ from you can add second photo to the design if the design you have selected is of two photos. Click on ‘Add’ button. Below first photo you will see another panel for second photo.
User Manual-3.0 ‘My Designs’ window Once your project is processed, you will be indicated by a dialog box that your project is exported successfully. Receipt Printing After each process, software generates a receipt of the transaction. If you have given path of the receipt printer at the time of adding the event, the receipt will also get printed on the printer.
User Manual-3.0 ‘My Designs’ window Select the printer according to the design you are going to print. You will find a drop down menu in front of each printer, from here you can define number of prints you want for that particular process. If you want to print the designs instantly, check the checkbox of the printer of your choice. When you will click on ‘Done’ button, your selected designs will directed printed via selected printer. The output will be printed as per your printer size.
User Manual-3.0 ‘Select Event’ window You can send these files to your customer account later. Similarly in ‘Email’ column, you will see an indication number if you have chosen option of email exporting at the time of adding the project. a folder will be created for Email in the respective event and you will find the ready designs exported by you and also an excel file in which you will find email id of the customer and the image name which you are suppose to email to your client.
User Manual-3.0 The Tool Bar The tool bar at the top of the screen has a variety of options that makes Event Xpress user friendly and easy to work with. These options are explained below. Icon Use Can be used to lock or unlock the photos as per the requirement. The four options in this tool – Send to Back, Send Backward, Bring to Front, Bring Forward – helps in moving objects forward and backward depending on the page layout.
User Manual-3.0 Creating new Design The software provides you various ready to use designs. The designs can be edited as per your suitability and requirement. You can also create new designs and export your project in new design. The flexibility of the software allows you to create your own designs and save them for future use. Let’s see how to create new designs. The ‘Select Designs’ window is to add designs to the event and you can also create new designs.
User Manual-3.0 Import your downloaded or created designs to the Event Xpress from the ‘Import’ button . You will see an ‘Import’ window in which you have a ‘Browse’ option. You can browse through your computer and select the folder in which your designs are saved. The designs will be displayed in ‘Import’ window. Select the desired designs and click on ‘OK’. You can increase thumbnail size from ‘Adjust Thumbnail Size’ button . ‘Create Design’ window ….
User Manual-3.0 Click on ‘Filter’ icon Default. to filter the templates according to the Orientation, No. of photos, Color, Theme, Style and Select the desired filtration type from and click on ‘OK’. Double click on the desired template to be applied. Add Background Click on the ‘Background’ tab color. on the option bar to insert the background in the design or to fill it with any solid ‘Create Design’ window ….
User Manual-3.0 Click on the ‘Ready Tone’ button background. on the left panel to select from a range of 18 ready tones available for each To change the tone; double click on the chosen tone. Add Photo Click on the ‘Photo’ tab on the ‘Create Design’ window to access the photos of your choice. You can add photos from Hard Disk, CD/DVD Drive, Pen drive and Bluetooth. You could browse photos and even access the last 15 paths you have used. Sort the photos by clicking on ‘Sort By’ button .
User Manual-3.0 Rotating Photo Rotating photo in the Design page keeping the creativity in mind adds to the overall presentation of the pages. Event Xpress gives you the option of either rotating the photo within the frame or rotating the whole picture along with the frame. To rotate the photo within the frame: Keep your cursor on the rotate icon that is seen when you select a photo. Once the ‘hand’ symbol appears use the mouse to rotate it in the direction of your choice.
User Manual-3.0 Select the photos you wish to swap by keeping the ctrl key pressed. When both the photos are selected the ‘Swap’ icon appears Click on the icon to swap the photos. Photo Quality Indicator The quality of photos used in the design must be good to ensure clarity in the final product. Event Xpress has an inbuilt ‘Quality Indicator’, which warns you whenever the photo quality goes below the required standards.
User Manual-3.0 ‘Create Design’ window …. ‘Border’ tab …. Border added In this way you can add Border to the photo. Add Clipart Click on the ‘Clipart’ tab on the option bar for a listing on the available cliparts. Double click on the clipart of your choice or drag and drop it onto the canvas to use it on the page. You could even use your own cliparts by accessing them using ‘Browse’ button are available. ‘Create Design’ Window ….
User Manual-3.0 Click on ‘Ready Tone’ button to access the ready tones for the cliparts. There are 18 ready tones available for each clipart and you could use the color of your choice depending on your page setup by double clicking on the ready tone. (a) (b) (a) A clipart. (b) Ready tone of the clipart Add Mask Click on the ‘Mask’ tab on the left-hand panel, if you want to insert the mask to your Design. ‘Create Design’ Window...
User Manual-5.0 Right Clicking While working on Design, you could use the right click button to get several options right then and there. Right clicking outside photos: As seen in the image, right clicking outside photos lets you access the following options directly: o The ‘Effects’ option- Give effects like Colorize, Blur, Opacity, Feather, Shadow, Glow, Outline, Rotation, Presets and Blend. o The ‘Flip’ option to flip the page either vertically or horizontally.
User Manual-3.0 ‘Create Design ‘Window ….. Add Title In this way you can add the title and give it artistic look. Save Template Once you finish with the design creation, you can save the design with the ‘Save’ option available in ‘Template’ tab in ‘Create Design’ window. In the textbox that appears; enter the template information pertaining to the parameters (except the parameter according to which the template has been filtered). These include: No.
User Manual-3.0 Editing the Design You can also edit any design as per your requirement. To edit the design, first you need to select the design in ‘Add Event’ or ‘Edit Event’ window. You will find an ‘Edit’ option Select the ‘Edit’ option. You will be redirected to the ‘Edit Design’ window where you will see the design and some tabs with the help of which you can edit the design. Background tab Click on the ‘Background’ tab solid color.
User Manual-3.0 ‘Edit Design ‘Window ….. Add Title The empty white field can be used to type in the title you wish to add to your design. You can change the following parameters for the title: o Font from font dropdown menu , o Font size from size dropdown menu o Font Style from various style options o Font Color from color palette or color picker , , o Ready presets can be used from available options . , In this way you can add or edit title if you want.
User Manual-3.0 photo to apply it You could even access the previous 15 paths . Masks are easily transformable i.e. they are expandable. You can also import your own masks with the help of ‘Browse’ button . ! Additional icon on the ‘Create Design’ – Mask tab: o ‘Reset’ o ‘Rotate CW90’ o ‘Rotate CW180’ : To reset the changes. : To rotate the mask 90 degrees. : To rotate the mask 180 degrees. o ‘Rotate CW270’ : To rotate the mask 270 degrees.
User Manual-3.0 You can give masking effect to the logo. To give masking effect, select the logo and go to the ‘Mask’ tab. From here you can apply any mask on the logo. You can also give various effects to the photo. For that select the logo first and then go to the ‘Effects’ tab. Select the desired effect from various available effects in the tab. You can increase thumbnail size of the logo in the folder from ‘Adjust Thumb Size’ bar.
User Manual-3.0 Copy, Paste and Clear Effects Event Xpress allows you to cut, copy and paste photos and effects on the photos in the Design. Right click on the element you want to copy and select the ‘Copy’ option on the drop list. Now paste it on to the location of your choice by right clicking on it and choosing the ‘Paste’ option. Lock and Unlock Photos Event Xpress generally ‘locks’ the photo on the Design to ensure precise designing.
User Manual-3.0 Grids: On the top, right-hand corner of the window, click on to activate the gridlines on the page you are working on. The grids on the page allow you to align the photos and other elements on the page accurately. Gridlines activated on the page Click on the same icon again to deactivate the grids on the page. Rulers: On the ‘Create Design’ window, you can view the rulers at the top and on the left of the page.
User Manual-3.0 Select photos or other elements you wish to align using the Ctrl key. Then click on to select the alignment option you wish to apply to your photos from the drop list. Alternatively, use the right click button and on the drop list click on ‘Page-based alignment’ to access the sub-options. You can undo the changes by clicking on . Fine Tuning – Photo Editing Event Xpress has inbuilt photo editing tools.
User Manual 1.0 BCG (Brightness, Contrast and Gamma) Color Correction To adjust the brightness, contrast and gamma of your photo, click on the ‘BCG’ button on the ‘Edit Photo’ window. Move the sliders of the three parameters forward and backward to achieve the desired effect. Alternatively, you could enter the values for the parameters in the value boxes above the respective sliders. The ‘BCG’ option Clicking on the ‘Auto Contrast’ button at the top will adjust the contrasts automatically.
User Manual 1.0 Select the color for which the input and output levels need to be modified (RGB i.e. red, green or blue) from the drop list under the ‘Channel’ button . Modify the ‘Input’ and ‘Output’ level values in the value boxes as required. The ‘Level’ option Blur Click on ‘Blur’ button to give blur effect to the photo. Adjust the blur level from silder . The ‘Blur’ option The changes can be reset by clicking on ‘Reset’ .
User Manual 1.0 (a) (b) ‘Feather’ Effect (a) Before, (b) After Opacity Click on ‘Opacity’ option to give opacity effect to the photo. Adjust the opacity level from slider . The changes can be reset by clicking on ‘Reset’ . The ‘Opacity’ option Applying ‘Opacity’ to the photo Crop To crop the photo to the desired dimensions and orientation, click on ‘Crop’ Photo’ window. button on the ‘Edit Change the aspect ratio by clicking on the ‘Aspect Ratio’ box and select the required value.
User Manual 1.0 (a) (b) Cropping: (a) Landscape; (b) portrait You can enter the values for the width and height after selecting the unit you want to work with. Uncheck the ‘Maintain Aspect Ratio’ checkbox option photo. if you would like to proceed with free-hand cropping of the Rotate Select the ‘Rotate’ option on the options bar and then rotate the photo to the desired angle using the slider . The changes can be reset by clicking on ‘Reset’ .
User Manual-1.0 Correction Tool The correction tool appears with all options and can be used to ‘correct’ any error that might happen while using the filters or add to the effects already created. The brush size and feather tool can be altered by using the respective slider or by entering the value of your choice in the value box. ! Remember to keep the Ctrl key pressed to activate the correction mode and to keep the Shift key pressed to undo the change.
User Manual-1.0 Mosaic Click on ‘Mosaic’ option your photo. to add a mosaic effect to You could apply the effect seen in any one of the 10 presets on the options bar to your photo by double clicking on the preset. To customize the size of the mosaic blocks, click on ‘Custom’ button below the presets. Click on ‘Reset’ button to reset the settings. Applying a ‘Mosaic’ preset to the photo Ripple To add a ‘Ripple’ effect to your photos, click on ‘Ripple’ button on the options bar.
User Manual-1.0 Of the five presets that appear on the options bar, you could choose any one for your photo and apply the effect by double clicking on it. Click on ‘Custom’ button to customize the density of the splash effect. Use the slider to change the value of the density or manually enter the value in the value box. Click on ‘Reset’ button to reset the settings. Implode Click on ‘Implode’ button on the options bar to apply the effects under implode to your photo.
User Manual-1.0 Of the 10 presets available under this category, you could choose any one for your photo by double clicking on it. To customize the cell size and line depth, click on ‘Custom’ button . Use the sliders to adjust the cell size and line depth as per your requirements, else insert the values in the value boxes. Click on ‘Reset’ button to reset the settings. Softlense Click on ‘Softlense’ button on the options bar to apply the effects under the ‘Softlense’ category.
User Manual-1.0 Charcoal Drawing To add a charcoal drawing effect to your photo, click on Charcoal Drawing’ button on the options bar. Check the box corresponding to ‘Charcoal Drawing’, to apply the effect to your photo. Uncheck the Charcoal Drawing’ box to reset the setting. Other Icons on Edit Photo window Apart from the options that are available under Basic filters, there are few other ‘aids’ on the Event Xpress that help you as you proceed with designing your Photos.
User Manual-1.0 ‘Edit Photo’ window …. Advanced Filters You could even download plug-ins from the Internet. Most of Photoshop plug-ins are supported by Event Xpress. Note: Advanced Filters option is not available with MAC. Global Chroma Click on ‘Global Chroma’ icon selected photo.
User Manual-1.0 Click on the color picker and click on the area on the photo that you want concealed. Adjust the values for the feather and tolerance as per your requirement by moving the sliders for these values backward and forward or by manually entering the values in the value boxes. To undo a change or to make corrections to the changes made, use the correction tool on the page. You could change the brush and feather size by using the sliders or by entering the values in the value boxes.
User Manual-1.0 To undo a change or to make corrections to the changes made, use the correction tool on the page. You could change the brush and feather size by using the sliders or by entering the values in the value boxes. Keep the Ctrl key pressed to activate the correction mode and the Shift key to reset the change. At any point of the process, click on ‘After’ to see how the picture will appear after the change is applied and ‘Before’ to view the photo as it was before the change.
User Manual-1.0 Event Xpress has more than 90 ready-to-use templates, which can be accessed by clicking on the ‘Template’ tab on the option bar. Moreover, these templates come along with the software pack. You can design each of your Output in a unique manner by applying different templates. Event Xpress also has a huge collection of decor options for Event designing.
User Manual-1.0 OR On ‘Create Design’ window, Click on ‘Galleria’ DgFlick website. . Click on ‘Get More’ Button to access more templates from the You are now routed to www.dgflick.com from where you can download the templates of your choice and proceed to creating your Event. Import Event Xpress software provides you the facility to use your own created or downloaded templates in design creation. For that you need to import your templates into the software.
User Manual-1.0 Click on ‘Ok’ to proceed and on ‘Cancel’ to quit the process. To proceed with the building of your templates, click on ‘Build’ . Building your template – 1 On the ‘Build’ window, select the templates and then click on ‘Build’. In the text box that appears in next window, specify the name of the folder the path in which you wish to save it and where you want to place it.
User Manual-1.0 ‘Share’ window …. Sharing your template You need to log into your account using your username and password to be able to share templates. Sharing your template – login Event After entering your details, click on the ‘Sign In’ button to access your account. If you do not have a username and password, click on ‘Sign Up’ to start an account with DgFlick. On completion of the login process, a textbox asking if you agree to the terms and conditions of template sharing appears.
User Manual-1.0 ‘Create Design’ window …. ‘Template’ tab …. Deleting Template Note: Some features are available only for the Event Xpress PRO version users. Troubleshoot This section deals with questions most commonly encountered by Event Xpress users. 1. How fast can I create an Design? Ans: With Event Xpress, you have the option of creating Designs in a matter of Seconds. Once you select the designs and photos that go into your Design, Event Xpress will do the rest for you. 2.
User Manual-1.0 7. Can I remove Chroma of multiple photos at a time? Ans: Yes you can remove Chroma of multiple photos in a single click. Event Xpress provides you the Local and Global chroma tool with the help of which you can remove chroma of single and multiple photos respectively at a time. Support For additional technical support or clarification, please contact DgFlick offices/support via: DgFlick Solutions Pvt. Ltd., 203/204, Shreeji Arcade, M. G.