
Installation Guide


Lowes.comLowes.com
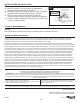
3
STEP 5: 60-in Vanity Base Cabinet,
Single Bowl Conversion (Select Styles Only)
5a. Remove center wood stretcher rail.
5b. Install countertop/sink as per manufacturer’s instructions.
5c. Detach drawer front from drawer box (see Step 8).
Position drawer front back into top drawer location and secure.
STEP 2: Vanity Drawer Removal
2a. Open the preassembled drawer as far as possible.
2b. Simultaneously press the right side spring clip downward
and the left side spring clip upward.
2c. Once both springs clips are held in the indicated position,
pull the drawer straight out.
STEP 3: Shadow Toekick Installation (Select Styles Only)
3a. Lay vanity base (A) on it’s back.
3b. Set shadow toekick (BB) back 3-in from front of vanity base (A).
3c. Use staple gun to secure shadow toekick (BB) to vanity base (A)
using plastic corner braces (CC).
3d. Place one corner brace vertically in each corner. For 48-in and
60-in vanities, add a 3rd corner brace horizontally in center.
STEP 7: Hinge Adjustment For Door Alignment
If the alignment of the preassembled doors on vanity base (A)
isoff,refertothegureontherightforhowtoadjust.
INSTALLATION INSTRUCTIONS
2
3
STEP 4: Vanity Base Installation
4a. Place vanity base (A) at the desired position.
4b. Drill through vanity back braces into wall studs using
a 3/32-in diameter drill bit (not included). Note: Holes
should come no closer than 2 inches from any inside edge.
4c. Insert installation screws (not included) through vanity base (B)
and into the holes and tighten securely.
4d. Install knobs (C) to the doors and drawers with the
preassembled hardware(AA).
4
STEP 6: Vanity Drawer Installation
6a. Close completely both slides attached to the vanity base (A).
6b. Move the component of the slides with ball bearings to the
front of the slides, still keeping the slides completely closed.
6c. Carefully line up the slides of the drawer box with the
slides in the vanity base (A) and push the drawer all the
way to the back.
6d. Open the drawer completely to ensure it is properly installed.
5
Simultaneously
press the right
spring clip
and left spring
clip to remove
drawer
6
Drill through
cabinet back
braces
B
Placement for
all vanities
Placement
for 48-in
and 60-in
vanities
Adjustdoorheight
Adjustdampingforce
Adjustgapsbetween
doors and vanity
Adjustgapsbetweendoors
7
2
PACKAGE CONTENTS
PREPARATION
SAFETY INFORMATION
Estimated Installation Time: 30 minutes
Tools Required for Installation (not included): #10 x 2-1/2-in Installation Screws, Phillips Screwdriver,
Drill, 3/32-in Drill Bit, Marking Tool, Carpenter’s Level, Tape Measure, Stud Finder and Staple Gun
(for shadow toekick installation only)
Itisrecommendedthisitembeinstalledtoatleast1wallstud.Useastudnder
(notincluded)tondthewallstud(s)atthedesiredinstallationsiteandmark
area(s) with a pencil (not included). Note: To make installation easier, remove all
doors and drawers from the vanity before installation.
WARNING
Please read and understand this entire manual before attempting to assemble, operate or install the product.
Do not stand on vanity. Use vanity on level ground. Base vanity supports a maximum weight of 200 lbs.
Exceeding maximum weight limit will compromise the integrity of the vanity structure and could cause
the vanity to fail.
CAUTION
Do not hang from the vanity.
PART DESCRIPTION QUANTITY
A Vanity Base 1
A
Before beginning assembly of product, make sure all parts are present. Compare parts with package
contents list and hardware contents list. If any part is missing or damaged, do not attempt to
assemble the product.
STEP 1: Wall Stud Location
INSTALLATION INSTRUCTIONS
1
HARDWARE CONTENTS
AA
AA
BB
CC
Knob
Qty. 1 per door/drawer
Shadow Toekick
(included with 39A, 39B, and 39C models only)
Qty.1
Plastic Toekick Braces
(included with 39A, 39B, and 39C models only)
Qty. 2 for 30-in and 36-in vanities;
3 for 48-in and 60-in vanities