SOUND CARD MANUAL Quick Start Guide ©2009 Diamond Multimedia. All rights reserved. p/n: 40042 version 7.
BLANK
Safety Notices Please read through the following safety tips to ensure for a safe and proper installation of this product. Please make sure to read all the instructions thoroughly before attempting the installation of this sound card. • Do not attempt to install this product during an electrical storm. • Make sure your computer system is connected to a properly grounded power outlet. • Touching the exposed metal part of your computer case (on the rear side) will discharge static electricity from your body.
Sound Card Connectors XS 5.1 Line In Mic Front Out Rear Out Center/ Subwoofer Game/ MIDI XS 7.1 Front Out Rear Center/ Out Subwoofer ALT MIC Center In Line In S/PDIF S/PDIF Out In ALT MIC Center In Line In S/PDIF S/PDIF Out In XS 7.
Hardware Installation Please consult your systems user guide for exact instructions regarding opening the computer case and installing new cards. 1. With the computer power turned OFF disconnect the power cable from the computer. 2. Open the computer case following the instructions from your system manufacturer. 3. Locate an available PCI slot on the motherboard. 4. Insert the Xtreme Sound PCI card into the slot that you located in step 3. 5. Screw the metal bracket into place. 6. Close the computer case.
Prior to booting Into Windows Please complete the following steps before your system boots into Windows if your previous sound card was integrated onto your motherboard. 1. Turn on the power to the computer and enter your systems BIOS setup (CMOS). Please consult your system documentation for exact instructions regarding entering and using your system CMOS. 2. Locate and disable the previous sound device. Usually this will be listed within an Integrated Peripherals section. 3. Save and exit from CMOS. 4.
Application Installation The following steps are optional and not required for the general use of the Xtreme Sound card. Audacity Audacity is a sound editing tool that can edit MP3, WAV and other popular sound types. You can use it to cut parts from songs, mix songs together, fade in/out, increase / decrease volume and more! 1. Insert the installation CD and wait for the menu to appear. 2. Click the Bonus Software button. 3. Click the Audacity button. 4. Click NEXT to continue. 5.
WINDVD (XS71DDL ONLY) 1. Insert installation CD into your CD-ROM drive. 2. Double click My Computer on the desktop (or click Start, My Computer). 3. Right click your CD-ROM drive icon. Left click OPEN. 4. Double click the software folder. 5. Double click the WinDVD.exe icon. 6. Click NEXT to begin the installation process. 7. Click YES to the license agreement. 8. Type your name, company name, and in the space for serial number refer to the serial number sticker found on the front of this quick start guide.
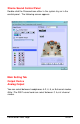
Xtreme Sound Control Panel Double click the Diamond icon either in the system tray or in the control panel. The following screen appears. Main Setting Tab Output Device Analog Output You can select between headphones & 2, 4, 6, or 8 channel modes. Note: The XS51 sound card can select between 2, 4,or 6 channel modes. Continued on Next Page.
Click the hammer icon and the following screen appears. Center/Bass Output Swap Swap the center channel with the bass channel Side/Back Surround Output Swap Swap the side surround channel with the back surround channel Bass Enhancement Increase the bass response by 15% by selecting this box. S/PDIF Output Click the – symbol to activate this option. This is used when you have a coaxial cable connected between the S/PDIF out on the sound card to a S/PDIF on a home receiver.
Mixer Tab The mixer tab is where you control the component volumes on the sound card for both recording and playback. Playback Mixer The playback mixer is used to control all sound components that are playing back through your system speaker system. Balance With this slider set to the middle position an equal volume of sound will be present out the left and right channels. Moving the slider left or right of the middle position will cause the left or right channel o be more prominent.
SW Synth The SW Synth slider controls the volume of any program using the MIDI playback portion of the sound card. This usually will be any file utilizing the .MID file extension or games using MIDI playback for their back ground musical score. Microphone The Microphone slider controls the volume of the microphone component. If the volume is not loud enough please see the advanced setting. The microphone connector is located on the rear of the sound card and is designated by a pink colored connector.
Line In The line in slider controls the volume of the Line In connector which is located of the rear side of the sound card and is designated by a blue colored connector. Recording Mixer The playback mixer is used to control all sound components that are playing back through your system speaker system. SPDIF In Advanced Setting Reverse S/PDIF Format Check this box to reverse the order of the S/PDIF format. Validity Check Check this box to perform a constant validity check. Continued on Next Page.
Monitor S/PDIF-In to Analog Output Checking this box causes all digital input coming in through the S/PDIF input connector on the rear of the sound card to be converted and played back through the analog channels of the sound card. Stereo Mix Selecting Stereo Mix allows audio applications to record sound being played back through the Wave component on the sound card.
Line In Selecting Line In allows for audio applications to record from the Line In connector on the rear of the sound card. The Line In connector is designated by a blue connector. Wave Selecting Wave for the recording device allows for audio applications to record from the wave component on the sound card. Any sound mapped through this device will be recorded. Effect Tab The Effect tab allows for customizing the sound stage.
Select the On button to enable these features. Microphone Echo allows for an adjustable range of echo applied to the incoming sound from the microphone. Key Shifting allows to slow down and speed up Karaoke CD music. Voice Cancellation attempts to remove vocal portions from the current audio CD being played. Information Tab The information tab displays the driver version and various trademarks.
Technical Support Diamond Technical Support staff is here to help resolve any issues that you may be experiencing with the installation of the Diamond sound card. Prior to contacting technical support please make sure you have the following information available. 1. Model #: (Printed on the bar code, located on the box) 2. Installation CD Version: (printed on the CD label) 3. The version of Windows that your system is running. 4. The manufacturer and model # of your computer. 5.
One Year Limited Warranty The warranty described below is extended only to the original buyer and is not transferable. PLEASE NOTE THAT THE PRODUCT YOU HAVE PURCHASED IS DISTRIBUTED AND WARRANTED BY DIAMOND MULTIMEDIA ("DIAMOND") AS DESCRIBED BELOW. QUESTIONS REGARDING THIS WARRANTY AND WARRANTY CLAIMS SHOULD BE MADE TO DIAMOND.
BLANK
Diamond Multimedia 9650 DeSoto Ave. Chatsworth, CA. 91311 www.diamondmm.