
Installation Guide


800019-Rev 0
Wall and Base Cabinet Installation Instructions
CAUTION: Never use nails to mount cabinets. The use of nails may void your factory warranty, written or implied.
Before starting the installation
These instructions are intended as supplemental reference for those who have the appropriate skills and experience to safely and
successfully install cabinetry, including familiarity with basic carpentry principles and safe and proper tool use. Wall framing and construction
can vary greatly, and these instructions may not describe all construction methods. Also, there may be electric, plumbing, gas lines or other
utilities behind the wall, for which contact must be avoided during installation. If for any reason after reading these instructions you do not
feel condent in the ability to safely and successfully install this cabinetry, please contact a licensed contractor for installation. MasterBrand
Cabinets is not responsible for improper installation or property damage.
WARNING: Electric, plumbing, gas lines and other utilities, are frequently installed or embedded behind walls where cabinets are being installed. Before
drilling any holes or driving any screws, be sure you will not be making contact with any of these utilities. Failure to follow these instructions may result in
property damage and serious or fatal injury. If you do not feel condent in your ability to insure that you will not make contact with utilities behind a wall
during installation, please contact a licensed contractor to install the cabinets.
Step 1: Inspect New Cabinets
All cabinets are subjected to quality inspections before leaving the factory, and have been carefully packaged to prevent damage during
shipping and handling. Unfortunately, damage may occur occasionally in handling between the factory and the nal destination. Inspect
each cabinet carefully. If damage is discovered, place the cabinet back into the carton and notify retailer of purchase.
Step 2: Determine Cabinet Placement
Remove baseboard and other objects on the wall area where the cabinets are to be installed. Using a straight
edge and a level, nd the high point in the oor where the cabinets are to be installed. From the high point, mark
a level horizontal line on each wall where the cabinets will be attached. From the level lines, mark additional
parallel, level horizontal lines at 35" (or 34 1/2" if your product dictates) up and at 54" up for the top of base
cabinets and bottom of wall cabinets. These lines will be used for alignment when installing the cabinets.
Step 3: Prepare for Cabinet Installation
Locate the studs with a stud nder and mark where the cabinets are to be installed. Remove all the doors,
drawers and adjustable shelving from the cabinets before installation. This will reduce the weight and allow
easier access during installation. Measure the area to conrm that the kitchen design used will work.
Step 4: Begin Wall Cabinet Installation
Start installing the wall cabinets in the corner (if applicable). Place the wall cabinet at the predetermined
reference line. It is recommended to use a brace (example: t-brace) to help hold wall cabinets in place.
Measure from the corner to the rst wall stud mark. Transfer this measurement to the inside of the wall
corner cabinet. Mark the placement of the next wall stud. Drill through the wall cabinet back into the
prelocated wall studs with a
3
∕
32
" diameter drill bit, approximately 2" deep. The holes should be positioned
2" down from the inside top of the cabinet but should come no closer than 2" to any inside vertical edge
of the cabinet. Cement, block, brick or tile walls will require anchors for screws or toggle bolts. These will
need to be purchased separately if needed. Insert the 2½" round washerhead screws into the holes
until they are nearly tight. Do not tighten the screws until all nal leveling and shimming is completed as
needed. Check the front, sides and bottoms of all wall cabinets with a level. After the cabinet is level and
plumb, tighten the installation screws.
Example of brace used to aid in installing
wall cabinets. Shown is a t-brace made of
scrap 2x4s and 1x4. Place a piece of scrap
carpeting over 1x4 to protect cabinet.
Use level to
draw line
Floor not
level
High point
Level
54″
35″
54″
35″
Stud marks
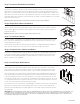
Tools Needed:
• Pencil
• Level
• Tape Measure
• Drill with
3
∕
32
” Bit
• Stud Finder
• Clamps
• Square
• Phillips Head Screwdriver
and drill driver bit
Materials Needed
• Wood Shims
• 2½” Trim Head or Flat Head Wood Screws
• 2" Trim Head or Flat Head Wood Screws and drill
driver bit (utilized for DC2430 ONLY)
• 2½” Round Washer Head Screws