260OM 5/31/06 7:11 PM Page 3 1260Ef Owner’s Manual
1260OM 5/31/06 7:11 PM Page 4 Purchaser’s Reference Information IT IS IMPERATIVE THAT YOU FILL IN THE FOLLOWING INFORMATION AND REFER TO IT SHOULD THE NEED FOR SERVICE ARISE. Product Name: Diamondback 1260Ef Elliptical Serial Number: T__________ To Activate Warranty: SERIAL NUMBER T0409370001 IIII III IIIII IIIIII WARNING REMOVING OR ALTERATION OF THIS LABEL VOIDS WARRANTY REGISTER YOUR WARRANTY AT www.diamondbackfitness.
1260OM 5/31/06 7:11 PM Page 5 Table of Contents Purchaser’s reference information Introduction Safety Instructions and Warnings Assembly Drawing Assembly Instructions Workout Guidelines Maximum Heart Rate & Training Zone Quantity & Quality Heart Rate Monitoring Devices Pulse hand grips Chest strap Console Glossary of Terms Default Values Operating Tips Console Layout Displays Function Keys Workout Programs Warm Up Cool Down Workout Summary Quick Start Classic programs Manual Random Cross Interval Hill
1260OM 5/31/06 7:11 PM Page 6 Introduction Congratulations on your 1260Ef elliptical trainer. You are about to experience one of the most effective and technically advanced methods of lowimpact, cardiovascular exercise available today. Your 1260Ef elliptical trainer was created by Diamondback Fitness, the innovative value leaders in fitness and bicycle equipment for nearly three decades. Your 1260Ef has every possible feature to make your workout extremely efficient, productive and comfortable.
1260OM 5/31/06 7:11 PM Page 7 Safety Instructions and Warnings The 1260Ef is built for optimum safety and is designed to meet or exceed all domestic and international standards. However, certain precautions need to be followed when operating any exercise equipment. BE SURE TO READ THE ENTIRE OWNER’S MANUAL BEFORE OPERATING YOUR 1260Ef UNIT. CAUTION – FOR SAFE OPERATION Figure A 1. Keep your hands and feet away from all moving parts and pinch points. See figure A for possible pinch points. 2.
1260OM 5/31/06 7:11 PM Page 8 Assembly Drawing Console Console Mast Handle Bar Rubber Mat Console Mast Cover Handrail, Right Main Wire Harness Handrail Cover Power Cord Handrail, Left Handrail Cover Main Frame Rear Stabilizer Bar 4 1260Ef Owner’s Manual
1260OM 5/31/06 7:11 PM Page 9 Assembly Instructions Step 1: Rear Stabilizer Bar 1. Place rear stabilizer bar under rear mainframe and align the screw holes. 2. Insert and tighten these two (M8 x 16mm) screws, split lock washer and flat washers using 6mm Allen wrench. Step 2: Console Mast Assembly 1. Slide console mast cover onto console mast, making sure it is facing the right direction. 2.
5/31/06 7:11 PM Page 10 Workout guidelines Good health is an exercise in common sense. The Surgeon General released a new study in 2001, The Surgeon General’s Call To Action To Prevent and Decrease Overweight and Obesity. It indicates that 61% of American adults are either overweight or obese. The story states that overweight increases the risk of health problems, such as heart disease, certain types of cancer, type 2 diabetes, etc.
1260OM 5/31/06 7:11 PM Page 11 Workout guidelines (continued) If exercise intensity is too low or too high, no gains will be made in fitness. If the intensity is too low, the stress levels are ineffective. If the intensity is too high, injury or fatigue may set your exercise program back as you try to recover. The best way to monitor exercise intensity is to accurately count your pulse during exercise.
1260OM 5/31/06 7:11 PM Page 12 Workout guidelines (continued) 1. Always stretch before your workout to loosen muscles, and afterwards to cool down. 2. The first few minutes of your workout should be devoted to warming up muscles before a vigorous workout, and building your heart rate slowly. 3. After your aerobic workout of about 24-32 minutes, spend 10 minutes gradually reducing your heart rate with a lower resistance level.
1260OM 5/31/06 7:11 PM Page 13 Console Glossary of Terms • Idle mode = Console is reset and waiting for an entry. The message display window will flash a message of “Select a program”. • LED = The lights on the face of the console. • Watts = The rate of energy currently being expended. • Work = The amount of energy expended during exercise. • Intensity level = The resistance provided by this elliptical. The resistance gradually increases as the level goes up.
60OM 5/31/06 7:11 PM Page 14 Console (continued) – – – – If “Classic Program” or “HR Interactive” or “Cross Training” program key is pressed during a program-executing mode or Cool Down mode, it will enter program-switching mode. The message display will flash “Program Name“ once and then scroll “PRESS ENTER TO ADJUST OR START TO BEGIN” * If Enter key is pressed, it will enter this program setup mode. The message display will prompt the next setting message for your instruction.
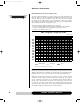
1260OM 5/31/06 7:11 PM Page 15 Console (continued) CONSOLE LAYOUT Dot matrix window Heart Rate bar graph Workout programs Workout program selecting keys Data display selecting keys Alphanumeric /Message window Function keys 1260Ef Owner’s Manual 11
1260OM 5/31/06 7:11 PM Page 16 Console (continued) DISPLAYS a. Dot Matrix /Profile display Dot Matrix/Profile display Heart Rate Bar Graph display The most effective Heart rate zone: 60%-85% 1. It displays the program profile during the program setup and executing modes. • Display the Intensity profile & incline profile during the Classic & Cross training programs. • Display the % Max HR profile & incline profile during the HR interactive programs 2.
1260OM 5/31/06 7:11 PM Page 17 Console (continued) • • • Calories (kcal): Total workout calories. Cal/min (kcal/min): Current workout calories per minute. Speed (mile/hr or km/hr): Current workout speed. It simulates as a jogging exercise. • Pulse (bpm): Your current heart rate. If there is no pulse detected, it will display “ - - - “ instead. RPM: Resolution per minute. Distance (mile or km): Total workout distance. It simulates as a jogging exercise. • • FUNCTION KEYS a. Level Up/Down keys: 1.
1260OM 5/31/06 7:11 PM Page 18 Console (continued) e. Stop/Reset key: 1. Press and hold “Stop” button for 2 seconds to reset the console. 2. Press “Stop” to end program and enter Cool Down. Stop/Reset key 3. Press “Stop” to enter workout summary during Cool Down. 4. Press “Stop” to reset the console during workout summary.
1260OM 5/31/06 7:11 PM Page 19 Workout Programs WARM UP Getting Started 1260Ef automatically initiates a 3-minute Warm Up mode in the beginning of each program. It is designed to prepare your body for an intensive workout and to reduce the possibility of injury during workout. Note: Warm Up is skipped for the Quick Start or Manual programs. Beginning the Program Warm Up is active as soon as a “Start” key is pressed and a program is executed.
1260OM 5/31/06 7:11 PM Page 20 Workout Programs (continued) During the Program Display • • Once it is started, the message window will display the default workout data of “time, level, calories & pulse”. Press “Select” buttons to select the desired data displays. Adjustment • • • • Intensity level = L1. Press “Level Up/Down” key to adjust the intensity level from L1- L5 only. Incline level = L1. Press “Incline Up/Down” key to adjust the incline level from L1- L5 only.
1260OM 5/31/06 7:11 PM Page 21 Workout Programs (continued) – • • MAX HR as maximum heart rate during this program. (There is no AVG HR, MIN HE or MAX HR displayed if there was no heart rate detected during the program.) Press “Level Down” key to jump to the next summary display. Press “Incline Up/Down” key to switch the default profile to the incline profile. Adjustment • Intensity and Incline cannot be adjusted during this time.
1260OM 5/31/06 7:11 PM Page 22 Workout Programs (continued) • • • Press “Incline Up/Down” key to adjust the incline level from L1 to L10. The dot matrix window will update the incline profile accordingly. Personal Trainer program – press “Personal Trainer” key anytime during Quick Start program will start this program on top of Quick Start program. See Personal Trainer program section for details. HR Lock program – Press “HR Lock” key to switch to target HR program if there is a valid pulse.
1260OM 5/31/06 7:11 PM Page 23 Workout Programs (continued) 3. After age adjustment, the message display will switch to display “PRESS ENTER” to indicate next step. Press “Enter” to accept and enter Weight adjustment. Entering Weight 1. If Enter key is pressed, the message window will flash a message of “ENTER WEIGHT”, then “WEIGHT = XXX LB” will be blinking. (WEIGHT = XXX KG” for metric system) 2. You may press “Level Up/Down” key to adjust the weight. 3.
1260OM 5/31/06 7:11 PM Page 24 Workout Programs (continued) Pause, Reset, Switch or Save a program See Console Operating Tips section for details, pages 9 & 10. RANDOM CROSS Getting Started The Random Cross program is designed to allow the user to choose from an unlimited number of computer generated profiles, both intensity and incline. Beginning the Program During idle mode, the message window displays a message “SELECT A PROGRAM”.
1260OM 5/31/06 7:11 PM Page 25 Workout Programs (continued) Ending the Program • • • • When program time is up or Stop key is pressed, this program will end and Cool Down will be active. The message display will flash a message “PROGRAM END”&”COOL DOWN”. See Cool Down for details. “Start” key could be pressed to re-start the Random Cross program again. “Stop” key could be pressed to skip the cool down and active the Workout Summary immediately.
1260OM 5/31/06 7:11 PM Page 26 Workout Programs (continued) Adjustment • • • • • Press “Level Up/Down” key during Rest segment to adjust the intensity level from L2. The message display will display “ RS INTENSITY = 2” and adjust accordingly. The dot matrix window will update the intensity profile accordingly as well. Press “Level Up/Down” key during Work segment to adjust the intensity level from L10. The message display will display “ WR INTENSITY = 10” and adjust accordingly.
1260OM 5/31/06 7:11 PM Page 27 Workout Programs (continued) – • Default Incline level = a preset incline profile with default Incline difficulty level = L1. Or press “Enter” to enter program setup mode. The message display will take you through the program setup mode step by step as below: (same as Manual program setup) – Entering Age – Entering Weight – Entering Time During the Program Once Start key is pressed, the Warm Up will be active. See Warm Up mode section for details.
1260OM 5/31/06 7:11 PM Page 28 Workout Programs (continued) Beginning the Program During idle mode, the message window displays a message “SELECT A PROGRAM”. To begin this program, press “Classic Programs” key until “Sprint” program LED indicator lights up. Accepting default values or Entering the program setup mode When the message display flashes, “SPRINT”, it indicates you are about to select the Sprint program. It then scrolls “PRESS ENTER TO ADJUST OR START TO BEGIN” and wait for an instruction.
1260OM 5/31/06 7:11 PM Page 29 Workout Programs (continued) • “Stop” key could be pressed to skip the cool down and active the Workout Summary immediately. Pause, Reset, Switch or Save a program See Console Operating Tips section for details, pages 9 & 10. HR INTERACTIVE PROGRAMS TARGET HR Getting Started The Target Heart Rate program is designed to keep you training at your chosen heart rate level.
1260OM 5/31/06 7:11 PM Page 30 Workout Programs (continued) If the entry reaches 85% of Max HR, the message display will flash a message of “HR = 85 PERCENT” to indicate that the adjustment is at its maximum. 3. After HR adjustment, the message display will switch to display “SET UP COMPLETED”, then flashes “ PRESS START” to indicate next step. You may press, “Start” to begin this program. (Note: you may press Start key anytime to skip the setup and begin the workout immediately.
1260OM 5/31/06 7:11 PM Page 31 Workout Programs (continued) HR I N T E RVA L Getting Started The Heart Rate Interval program is designed to alternate periods of hard work (Work phase) with periods of easy work (Rest phase). The console will adjust the resistance level up to meet your Work heart rate goal and adjust it down to recover. A HEART RATE MONITORING DEVICE MUST BE USED FOR THIS PROGRAM. FOR BETTER RESULTS, A CHEST STRAP IS RECOMMENDED FOR THIS OPERATION.
1260OM 5/31/06 7:11 PM Page 32 Workout Programs (continued) 85% of your max HR’.If the entry reaches 85% of Max HR, the message display will flash a message of “HR = 85 PERCENT” to indicate that the adjustment is at its maximum. 3. After Work HR adjustment, the message display will switch to display “SET UP COMPLETED”, then flashes “ PRESS START” to indicate next step. You may press, “Start” to begin this program.
1260OM 5/31/06 7:11 PM Page 33 Workout Programs (continued) Pause, Reset, Switch or Save a program See Console Operating Tips section for details, pages 9 & 10. FAT BURNER Getting Started The Fat Burner program is designed to keep your heart rate at your maximum aerobic stage. The heart rate is maintained at 65% of Max heart rate to burn fat most effectively. A HEART RATE MONITORING DEVICE MUST BE USED FOR THIS PROGRAM. FOR BETTER RESULTS, A CHEST STRAP IS RECOMMENDED FOR THIS OPERATION.
1260OM 5/31/06 7:11 PM Page 34 Workout Programs (continued) • will turn into workout data display and display four default data: time, % Max HR, calories & pulse. Press “Select” button under each group to select your desired data display. Adjustment • • • • Press “Level Up/Down” key will do nothing to this program since the % Max HR is set at 65%; and this program automatically controls the resistance. Press “Incline Up/Down” key to adjust the incline level from L1 to L10.
1260OM 5/31/06 7:11 PM Page 35 Workout Programs (continued) To begin this program, press “HR Interactive” key until “HR Hill” program LED indicator lights up. Accepting default values or Entering the program setup mode When the message display flashes, “HR HILL”, it indicates you are about to select the HR Hill program. It then scrolls “PRESS ENTER TO ADJUST OR START TO BEGIN” and wait for an instruction. • Press “Start” key to accept current default values and begin HR Hill program workout.
1260OM 5/31/06 7:11 PM Page 36 Workout Programs (continued) Ending the Program • • • • When program time is up or Stop key is pressed, this program will end and Cool Down will be active. The message display will flash a message “PROGRAM END”&”COOL DOWN”. See Cool Down mode for details. “Start” key could be pressed to re-start the HR Hill program again. “Stop” key could be pressed to skip the cool down and active the Workout Summary immediately.
1260OM 5/31/06 7:11 PM Page 37 Workout Programs (continued) Display • • When warm up mode is completed, the console will detect if there is a valid pulse before starting this problem. – If there is none, this program will not be started. The messages display will scroll “ NO VALID PULSE”, and “CHECK YOUR PULSE SENSOR” until there is valid pulse. – If there is a valid pulse, this program will be active.
1260OM 5/31/06 7:11 PM Page 38 Workout Programs (continued) Beginning the Program During idle mode, the message window displays a message “SELECT A PROGRAM”. To begin this program, press “Cross Training” key until “Glute Burner” program LED indicator lights up. Accepting default values or Entering the program setup mode When the message display flashes, “GLUTE BURNER”, it indicates you are about to select the Glute Burner program.
1260OM 5/31/06 7:11 PM Page 39 Workout Programs (continued) • “Stop” key could be pressed to skip the cool down mode and active the Workout Summary immediately. Pause, Reset, Switch or Save a program See Console Operating Tips section for details, pages 9 & 10. QUAD BUILDER Getting Started The program is targeted at your quads; it includes a preset intensity profile and incline profile, plus message display prompts indicate when to change your body position.
1260OM 5/31/06 7:11 PM Page 40 Workout Programs (continued) • • • Press “Incline Up/Down” key to adjust the incline difficulty level from L1 to L10. The dot matrix window will update the incline profile accordingly. Personal Trainer program – Personal Trainer program cannot be active during Quad Builder program. See Personal Trainer program section for details. HR Lock program – Press “HR Lock” key to switch to target HR program if there is a valid pulse. See HR Lock program section for details.
1260OM 5/31/06 7:11 PM Page 41 Workout Programs (continued) During the Program Once Start key is pressed, the Warm Up will be active. See Warm Up mode section for details. Display • • When Warm Up is completed, the message display will turn into workout data display and display four default data: time, level, calories & pulse. Press “Select” button under each group to select your desired data display.
1260OM 5/31/06 7:11 PM Page 42 Workout Programs (continued) • Personal Trainer will not be active; the current program will be continuing with nothing changed. USER program – – If user program is a Classic program or a Quick start, then Personal Trainer will be active. – For every other program, Personal Trainer will not be active. Beginning the Program To begin this function during a Classic program-executing mode, press “Personal Trainer” key once.
1260OM 5/31/06 7:11 PM Page 43 Workout Programs (continued) Beginning the Program To begin this program, press “HR Lock” key once anytime during a program executing or ending. Its LED indicator will turn on and the messages display will flash a message “HR LOCK” and “PRESS START TO BEGIN”. • Press “Start” key to accept current default values and begin Target HR program workout.
1260OM 5/31/06 7:11 PM Page 44 Workout Programs (continued) USER 1 & USER 2 Getting Started These programs are designed to be user-friendly tools. You can build your own programs and save them for later workout. With this function, you will be able to call up your favorite program, which stores all of your accurate user information, and begin your exercise right away.
1260OM 5/31/06 7:11 PM Page 45 Workout Programs (continued) Adjustment: It depends on the individual program; see the each program section for details. Ending the Program • • • • When program time is up or Stop key is pressed, this program will end and Cool Down will be active. The message display will flash a message “PROGRAM END”&”COOL DOWN”. See Cool Down mode for details. “Start” key could be pressed to re-start the User program again.
1260OM 5/31/06 7:11 PM Page 46 Maintenance CAUTION – FOR SAFE OPERATION Always inspect hardware prior to any exercise session. Look for loose hardware, loose pedals, loose handrails, loose cranks and frayed wires. Repair or replace any damaged or worn parts, tighten all loose hardware. After workout, always wipe down your 1260Ef unit. Perspiration that continuously settles on frame, pads or casing may eventually cause rust or damage to the unit.
1260OM 5/31/06 7:11 PM Page 47 Domestic warranty Information (Applies to all product sold and placed within the continental US, Alaska, Hawaii, and Puerto Rico only) Effective: June 2006 Diamondback warrants its 1260Ef to be free from defects in material and workmanship under normal use in the home and light instructional environments.
1260OM 5/31/06 7:11 PM Page 48 Domestic warranty Information (continued) Warranty voided if: The Warranty does not apply to any failure of the product, or any parts of the product, due to: assembly errors, alterations, modifications, misuse, abuse, accident, improper maintenance, or if the serial number on the product has been removed, altered or defaced. Assembly errors include but are not limited to: Damaged wire harness. Stripped crank arms and/or pedals. Bolts used in the wrong location.
1260OM 5/31/06 7:11 PM Page 49 Warranty card Important! • Important! • Important! • Important! • Important! • Important! Warranty card must be completed and returned to Diamondback within 15 days of purchase. Failure to comply may void manufacturer’s Warranty. Or, you may register your product at www.diamondbackfitness.com. Your Name: Address: City: State: Daytime phone No.: Evening phone No.: Dealer Store Name: Address: City: State: Model: Serial No.
1260OM 5/31/06 7:11 PM Page 2 Diamondback Fitness 300 Camarillo Ranch Road Camarillo, CA 93012 T 800-776-7642 F 805-388-5890 Part no.