
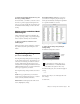
Specifications


Chapter 3: Working with Real-Time Plug-Ins 25
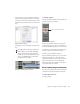
3 Choose the controls to automate and click
Add. If there are multiple plug-ins on the same
track, you can select from among these by click-
ing their buttons in the Inserts section of this di-
alog.
4 Click OK to close the Plug-In Automation di-
alog.
To automate a plug-in:
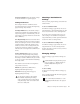
1 In the Automation Enable window, make sure
plug-in automation is enabled.
2 Select an Automation mode for each track
containing plug-ins you want to automate. For
the initial automation pass, choose Auto Write.
3 Click Play to begin writing automation, and
move the controls you want to automate.
4 When you have finished, click Stop.
After the initial automation pass, you can write
additional automation to the track without
completely erasing the previous pass by choos-
ing Auto Touch mode or Auto Latch mode.
These modes add new automation only when
you actually move the control.
Record Safing Plug-In Automation
You can protect plug-in automation from being
overwritten by using Automation Safe mode.
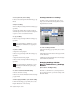
To enable plug-in safe mode:
1 Open a plug-in.
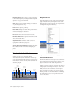
Plug-In automation dialog
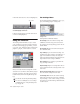
As an alternative to using the Plug-In Auto-
mation dialog, you can enable individual
plug-in controls directly from the Plug-In
window by Control-Alt-Start-clicking (Win-
dows) or Command-Option-Control-click-
ing (Macintosh) the control.
Shortcut for enabling plug-in automation
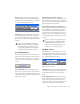
Automation Enable window
Plug--In Automation Enable button