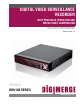
DIGITAL VIDEO SURVEILLANCE RECORDER WITH PENTAPLEX OPERATION AND MPEG4 VIDEO COMPRESSION INSTRUCTION MANUAL English Version 1.0 MODELS: DHU104 SERIES www.digimerge.com Copyright © 2008 Digimerge Technology Inc.
Thank you for purchasing this Digital Video Surveillance Recorder. Digimerge is committed to providing our customers with a high quality, reliable security product. The DHU104 Series combines advanced performance with easy operation and great economy to offer a whole new class of digital video recorders to 'high end' residential, commercial and industrial CCTV applications. The intuitive graphic user interface and mouse driven navigation make the DHU104 easy to program and easy to use.
Important Safeguards Important Safeguards In addition to the careful attention devoted to quality standards in the manufacture process of your video product, safety is a major factor in the design of every instrument. However, safety is your responsibility too. This sheet lists important information that will help to assure your enjoyment and proper use of the video product and accessory equipment. Please read them carefully before operating and using your video product. Installation 1.
Important Safeguards Service Use 13. Servicing - Do not attempt to service this video equipment yourself as opening or removing covers may expose you to dangerous voltage or other hazards. Refer all servicing to qualified service personnel. 19. Cleaning - Unplug the video product from the wall outlet before cleaning. Do not use liquid cleaners or aerosol cleaners. Use a damp cloth for cleaning. 14.
General Precautions NOTE This equipment has been certified and found to comply with the limits regulated by FCC, EMC, and LVD. Therefore, it is designated to provide reasonable protection against interference and will not cause interference with other appliance usage.
DVR FEATURES DVR FEATURES • 4-channel operation • Pentaplex operation allows you to View, Playback and Record video simultaneously (Local & Remote) • Advanced MPEG4 video compression • 120 fps recording • Graphical User Interface • USB ports for data back up & firmware upgrades • VGA and composite video outputs for connection to any computer or security monitor • Custom recording settings for each camera on the system • Covert Camera Viewing vi
Table of Contents Getting Started ............................................................................................................ 1 Front Panel .................................................................................................................. 2 Rear Panel ................................................................................................................... 3 Remote Control ..............................................................................................
NETWORK ................................................................................................................................ 27 MAIL SETUP ............................................................................................................................. 28 USER MANAGEMENT .............................................................................................................. 29 SYSTEM MANAGEMENT ....................................................................................
Getting Started Getting Started The system comes with the following components: DIGITAL VIDEO SURVEILLANCE RECORDER REMOTE CONTROL POWER ADAPTOR HARDWARE & SOFTWARE MANUALS, QUICK START GUIDE & SOFTWARE CD HARD DRIVE SIZE, NUMBER OF CHANNELS, AND CAMERA CONFIGURATION MAY VARY BY MODEL. PLEASE REFER TO YOUR PACKAGE FOR SPECIFIC CONTENT DETAILS. CHECK YOUR PACKAGE TO CONFIRM THAT YOU HAVE RECEIVED THE COMPLETE SYSTEM, INCLUDING ALL COMPONENTS SHOWN ABOVE.
Front Panel Front Panel 1 2 3 4 1. INDICATOR LEDs - Indicates the DVR status: • PWR - Indicates that the DVR is ON/OFF (RED LED). • ALM - Indicates that the unit has an active ALARM. • REC - Indicates that the DVR is currently recording (when the RED LED is ON). • NET - Indicates that the unit is connected to the Network (when the GREEN LED is ON) 2. Function Buttons: Power, Display, Search, and Menu. 3.
Rear Panel Rear Panel 1 2 3 9 4 5 1. NTSC/PAL 6 7 8 10 SWITCH - Set the unit to either NTSC (North America) or PAL (Europe). 2. BNC VIDEO INPUTS - Channel 1~4 Camera inputs (used to connect Cameras with BNC connection type). Cameras with BNC connections require an additional power adaptor. NOTE: Additional BNC Inputs are available on the 8 and 16 channel models. 3. MONITOR OUT - Video Output port to connect the unit to a secondary DVR or TV. Directly reflects the current onscreen images. 4.
Remote Control Remote Control 1. MODE: Press the Mode Button to display the Multi-Function Mode Menu. 2. POWER: Press the Power Button to turn off the Monitor Display. Press to open the Shutdown window. 1 12 2 13 3 14 4 15 5 16 3. F1: Opens the System Information window. 4. F2: N/A. 5. NAVIGATION/PLAYBACK: Press the Navigation Controls to move Up, Down, Left or Right in System and Mode menus. Press Up/Down to change values while in active editing mode for a selected menu option.
Mouse Control Mouse Control Connect a PS/2 mouse to the PS/2 port on the rear panel of the unit. Note: The USB front on the front panel is recommended for media backup. Mouse Controls Use the Left and Right Buttons to open menus and change options: LEFT BUTTON • Double click on a Channel in QUAD or other views to view the single camera in full screen. RIGHT BUTTON Opens a submenu to access a list of options: • Click to use the Controls in PTZ Mode.
Display Modes Display Modes Initial Loading Sequence • Press the POWER button located on the front panel of the DVR to start the unit. • The DVR will perform a Hard Drive check • The unit will initially load to a quad split-screen view. NOTE: If a new HARD DRIVE is detected, the system will prompt you to FORMAT the drive. If you do not choose to format the HARD DRIVE, the drive will not be detected by the system.
Display Modes Network Connectivity Indicator The Network Indicators appear when a remote connection is made to the unit via the Remote Agent software, or through the Internet Explorer Web Client: • Green: Indicates that the network connection is stable. • Blue: Indicates that the network connection is experiencing difficulties. • Red: Indicates that the network is unstable.
PTZ (Pan/Tilt/Zoom) & Focus Controls PTZ (Pan/Tilt/Zoom) & Focus Controls The PTZ / Focus Menus will only work with PTZ type cameras (not included): PTZ Control Screen Press the PTZ Button on the front panel of the system, or on the Remote Control to access the PTZ Control Screen: • The onscreen icons represent buttons on the front panel and remote control (up/down/left/right). The Camera can be adjusted using these buttons • Press the Return Button to exit PTZ Mode.
System Power Off System Power Off System Log Off • Open the system Menu and select LOGOFF. • Select LOG OFF and press the ENTER button. • Select Yes and press the ENTER button to log off. • To log on, open the system Menu and select any option and enter your user ID and password in the login window. Key Lock • Open the system Menu and select LOGOFF. • Select KEY LOCK and press the ENTER button. • Select YES and press the ENTER button to confirm Key Lock.
Menu Navigation Controls & Tips Menu Navigation Controls & Tips Menu Navigation Controls When navigating the system menu, use the navigation buttons on the remote control to peform the following: 1. Press to select a menu option (selected option will be highlighted in BLUE. 2. Once a option is selected, press the ENTER button to confirm the option and enter active editing mode (menu option will be highlighted in RED). 3. Press to change the value of the option in active editing mode. 4.
Menu Navigation Controls & Tips Playback and Navigation Controls 1 2 5 3 4 1. Power: Press to turn on the system; press to open the shutdown menu. 2. 3. 4. 5. Display: Press to open the Display menu. Search: Press to open the Search menu. Menu: Press to open the system Menu. Navigation / Playback: • : Move menu cursor up. • : Move menu cursor down. • : Forward playback; move menu cursor right. • : Reverse playback; move cursor left.
Recording Menu Controls Recording Menu Controls PANIC RECORDING From the sub-menu, select REC START to begin Panic Recording. To stop panic recording, open the sub-menu and select REC STOP. Record Setup Menu • Right-click anywhere on the screen to open the sub-menu. • Select RECORD SETUP. • RECORDING OPERATIONS - General setup of Recording Features • SIMPLE RECORDING - Setup for the Continuous and Motion recording types. Can be set to Advanced.
Recording Menu Controls SIMPLE RECORDING Simple Recording allows you to easily set recording parameters for each camera using the Time Interval bar. • RECORD QUALITY - Set from Normal, Fine, High, and Highest. • RECORD SIZE - Sets the video capture size for each camera to 352x240, 704x240 or 704x480. NOTE: As you change the Record Size, FPS also changes to best match the record size. However, you can change FPS to your own setting as desired.
Recording Menu Controls ADVANCED RECORDING Under Recording Operations, select Advanced and select APPLY to view the Advanced Recording tab. Use Manual Recording to customize recording size, FPS, image quality, and audio for each camera. You can also set Manual (Panic) Recording Time. Setting Edit parameters for each camera using the Time Interval Bar. Using the Time Interval Bar Parameters for each camera are set by hour using the Time Interval bar.
Recording Menu Controls Activation Select Activation to apply Event Recording (Continuous, Motion, Alarm) to each channel per hour. Note: The changes you make in the SETTINGS menu will be reflected in the ACTIVATION menu. Select the Channel grid and press ENTER. Select individual hour block and press ENTER to open the setup menu. Check the boxes for the following: • Continuous (Dark Blue) - The system constantly records the camera based on the hourly setting.
Recording Menu Controls MANUAL RECORDING Use Manual Recording to customize recording size, FPS, image quality, and audio for each camera. You can also set Panic Recording Time. Parameters for each camera are set by hour using the Time Interval bar. Press the ENTER key to select the Interval Bar, and navigate using the arrow keys. Select an Hour (highlighted in Green), and press ENTER again to open the Camera Settings for the selected hour.
Search Mode Search Mode Search mode allows you to locate previously recorded video by Date and Time, or by Event Type. • Press the Search Button on the front panel or Remote Control, or open the system Menu and select SEARCH. • Enter the User Name and Password (if required). • Use the Left / Right arrows on the Front Panel or Remote Control to switch between the Search By Time and Search By Event screens. Search By Time Searches the system based on date and time.
Search Mode Search By Event Searches the system based on Event Type (Alarm, Motion, Continuous or System). • Press the right arrow button on the front panel or remote control to access the Search By Event screen. • Select From and To dates, Events (Alarm, Continuous, Motion and Other) and Cameras • Navigate within the options using the Arrow Keys on the front panel or remote.control. Press the Enter button to select or deselect options (Note: Multiple event types can be selected).
System Setup Controls System Setup Controls • Open the MENU screen by pressing the MENU button. Login with your user ID and password if required. • Select SYSTEM SETUP and press the ENTER button. • Scroll through the options by pressing the UP, DOWN buttons on the Front Panel or Remote Control. • To enter a sub-menu, select the option and press the ENTER button. To exit a SUBMENU, press the RETURN button. • The 4-channel version also contains a “Shutdown” button on the ENTERING SETUP Menu.
System Setup Menu System Setup Menu • Open the Menu and select SYSTEM SETUP. • Select DISPLAY and press the ENTER button. The Display Menu controls: OSD - Onscreen display settings control the camera titles, event indicators, and general screen settings. MONITOR - Display settings for Alarm and Events OSD (Onscreen Display) • Status Bar - Turns the status bar ON/OFF.
System Setup Menu OSD (Onscreen Display) • Motion Sensor Display - Turns the display of the Motion Sensor to: • Active: Display motion sensor of motion detection area. • Inactive: Display motion sensor except motion detection area. • Off: No display of motion sensor. • Motion Color - Sets the motion sensor color. When Motion is detected on a channel, the moving parts of the image will be highlighted with colored squares (i.e. Blue Squares). • Language - Select the system language.
Camera Menu Camera Menu The Camera Settings and Controls: CAMERA TITLE - Settings for the onscreen display of individual Camera Titles. COLOR SETUP - Color settings for individual cameras. PTZ SETUP - Configuration for PTZ type cameras (not included with the system). MOTION SENSOR - Configuration for Video Motion Detection. CAMERA TITLE • CAM # - Indicates the Camera Number (corresponds to the BNC connection port on the back of the system). • Covert - Turns the onscreen display of the Camera ON/OFF.
Camera Menu COLOR SETUP Displays the settings for Brightness, Contrast, Tint and Color for individual cameras. • Press the ENTER Button and select a camera, or double-click using the mouse. • Set the Brightness, Contrast, Tint and Color for each camera. These settings can be set to a range of 1(low)~100(high) • Press the RETURN button to return to the Camera Color Setup screen. PTZ SETUP PTZ Setup is for PTZ Type Cameras ONLY, which are not included with this system.
Camera Menu PTZ PROPERTIES • Channel No. - Camera Number. • PTZ Driver - The compatible driver selected for the PTZ Camera. • Auto Focus - Sets the Automatic camera focus to ON/OFF. • Auto Iris - Sets the Automatic Shutter to ON/OFF. • Speed Controls - Sets the Pitch, Zoom, Focus and Iris speeds between 1~5. MOTION SENSOR • Sensitivity - Controls the Motion Sensitivity for the individual camera between 1 (low) ~ 10 (high).
Sound Menu Sound Menu The System Sound settings: AUDIO - Settings for the system Audio for Live and Remote monitoring. BUZZER - Settings for System Buzzer (audible alerts). SOUND • Live Audio - Turns Live System Audio (from the Audio on the terminal) to ON/ OFF. • Audio Monitoring Channel - Select the channel for Listen-in Audio (1~4). NOTE: Listen In Audio only works with Channels 1~4 (4CH). • Network Audio TX - Sets Network Audio Transmission to ON/OFF.
System Menu System Menu The System Setting controls contain: DATE/TIME - Date and Time controls for the system. NETWORK - Network and remote access controls. MAIL - Mail setup USER MANAGEMENT - Controls for system users. SYSTEM MANAGEMENT - System specific settings and controls CONTROL DEVICE - Settings for an external control device (e.g. a PTZ camera) not included with the system DATE/TIME • Date/Time - Sets the current system Date and Time.
System Menu NETWORK • DHCP (Dynamic Host Configuration Protocol) - Allows the System to receive Network Information from the DHCP Server (i.e. The local Router). • If DHCP is set to ON, the IP Address, Gateway and Subnet Mask will be assigned by the DHCP Server (i.e. The local area network Router. The Router is not included with this system). • If DHCP is set to OFF, the Network Information will need to be assigned manually.
System Menu NETWORK • 1st / 2nd DNS Server - Automatically detected if DHCP is set to ON. Displays the IP address of the local DNS Server (i.e. local Router). • DDNS Server - Set to the free DDNS Server provided by Digimerge (ddns.digimerge.net). • Net Client Port - Default port of 6100. Used for remote connection. • Web Server Port - Default port of 80. Used for remote connection. • Max TX Speed - Sets the default Maximum Data Transfer speed for the remote connection (default of 8192 KB/ sec.).
System Menu USER MANAGEMENT • User setup consists of three groups: Administrator, Manager or User. • Up to seven new users can be added to the system. • ADD - Opens the ADD New User screen to configure the new user settings NOTE: A maximum of 4 users can be remotely connected to the System simultaneously. ADD User Screen • User ID - Enter an ID (Name) for the new user • Password - Enter a password for the New User • Group - Enter the permissions level: • Manager - Mid Level Access.
System Menu SYSTEM MANAGEMENT • System Information - Navigate to the PRESS button, and choose ENTER to display the System Information. • System Name - Input a name for the system using the Virtual Keyboard. • FW Update - Navigate to the PRESS button, and choose ENTER to update the System Firmware. • Factory Default - Navigate to the PRESS button, and choose ENTER to reset the System to Factory Defaults. • System Data - Saves or Loads the System Data (system settings).
System Menu SYSTEM MANAGEMENT Firmware Update New firmware is periodically available for download from www.digimerge.com. The firmware on the unit can be updated via the USB port: • Download the new firmware from the website. Copy the files from the PC to the USB flash drive. • Insert the USB flash drive into the System. Select the ‘Firmware Update’ option by selecting the PRESS button. • Login with your user ID and password.
System Menu SYSTEM MANAGEMENT Factory Defaults The System can be returned to the Factory default settings: • Select the ‘Factory Defaults’ option by selecting the PRESS button. • Login with your user ID and password. • Choose OK to reset the unit, or CANCEL to exit without resetting. NOTE: If the System is reset to Factory Defaults, all settings will be lost (except the Date and Time).
Event / Sensor Event / Sensor The Event Sensor Setting controls contain: HDD EVENT - Checks the Hard Drive for errors. ALARM INPUT - Configuration settings for an external Alarm sensor (i.e. Door / Window Sensors). ALARM OUTPUT - Sends a signal to an external device when an alarm is detected. BUZZER OUTPUT - Turns the audible Buzzer ON/OFF for selected event types. E-MAIL NOTIFICATION - Sends and E-Mail notification when a selected event occurs (based on User Configuration settings).
Event / Sensor ALARM INPUT Configurations for any external alarm device (i.e. a Door or Window Sensor). Refer to the appendices for hardware configuration details. • Operation - Sets the Alarm Sensor Connection Status (Enable / Disable) for an external alarm (i.e. Door or Window Sensors). • Type: Sets the Alarm Sensor type to N/O (Normally Open) or N/C (Normally Closed). • N/O (Normally Open) - Select for an Alarm that has a Normally Open circuit (such as a door that remains open).
Event / Sensor ALARM OUTPUT • Duration - Sets the Reacted Relay Time. (5sec~5min or Until key-in) • HDD Event - Turns the Alarm ON/OFF when the Hard Drive experiencing problems. • Alarm - Sends the Alarm Out when an Alarm Event is detected (set to ON/ OFF). • Video Loss - Sends the Alarm Out when a Video Loss Event is detected (set to ON/OFF). • Motion - Sends the Alarm Out when a Motion Event is detected (set to ON/ OFF). BUZZER OUTPUT Generates a Buzzer when an alarm is detected.
Event / Sensor EMAIL NOTIFICATION Note: You must have the option, “Notification,” set to ON in order to configure the options in this menu. • Notification - Sets the E-Mail notification ON/OFF. • HDD Event - A notification is sent if a Hard Drive event is detected (set to ON/ OFF). • Setup Event - A notification is sent when changes are made to the system configurations. • Booting Event - A notification is sent when system powers on.
Disk Management Disk Management • Overwrite - Determines how data is maintained when the Hard Drive is full. • ON - When Overwrite is set to ON, data will be overwritten when the Hard Drive is full, starting with the Oldest recording. • OFF - When Overwrite is set to OFF, the data will not be overwritten when the Hard Disk is Full. Recording will Stop, and the Buzzer will be Activated. • Format - Erases all Hard Drive data: • Press start button.
Archiving Archiving The Archive feature copies data from the internal hard drive to backup media such as an external USB hard drive, USB flash drive., or DVD-R/RW drive. • Open the sub-menu and select ARCHIVING. Archiving Menu • From - Select the Start Time and Date for Backup. • To - Select the End Time and Date for Backup. • A/V channel - Select the Video and Audio Channel(s) for backup • Device - Displays all detected backup media devices (USB Flash Disk or USB Hard Drive).
Archiving Archiving Options Once the Start Time, End Time and Channel Selections have been completed, select the START Button A Drive Usage report will be displayed: • Amount of space (in MB) needed • Start and End Times for Each Channel, with size of recordings (in MB) • Size of the Log File Select OK to begin the backup The Writing status window displays the completion state of the Backup (in%) The Extracting status window displays the completion state of the Extraction of previously archived data (in%
Network Connectivity Overview Network Connectivity Overview The DVR can be remotely controlled using your existing network and the provided software. 1. Connect the DVR to the Router using an Ethernet Cable (not included). Power on the DVR. NOTE: The DVR must be connected to the router prior to powering on the system. This allows the system to communicate on your network 2. Find the IP address of your DVR through the Menu System on the unit. 3. Set up a web account at http://ddns.digimerge.net. 4.
Network Connectivity Overview IP & MAC Address The IP & MAC Addresses are necessary for DDNS Setup (for remote access to the DVR). To Locate the System information, Press the ENTER button on the Front Panel or Remote Control while viewing the Cameras. The System Info window will be displayed. - OR 1. Press the Menu Button on the Front Panel or Remote Control to access the Menu. Select System Setup and press the Enter button. 2. Select SYSTEM and press the ENTER button. 3.
Network Connectivity Overview Setting Up Your DDNS Account Digimerge offers a free DDNS service for use with your System. A DDNS account allows you to setup a web site address that points back to your Local Network. The following outlines how to set up your free DNS account. 1. Navigate to http://ddns.digimerge.net 2. Select the Create Account option from the list on the left side of the screen. 3. Complete the Account Information fields with your personal information 4.
Network Connectivity Overview 5. Click the Create New Account link at the bottom of the form to submit your request. 6. Your Account information will be sent to you at the E-mail Address you used in Step 3. You will need this information for remote access to your System.
Network Connectivity Overview Router Port Forwarding How do I enable Port Forwarding on my Router? You will need to enable port forwarding on your Router to allow for external communications with your DVR for ports: • TCP/IP PORT 6100 • WEB PORT 80 Computers, DVRs, and other devices inside your network can only communicate directly with each other within the internal network. Computers and systems outside your network cannot directly communicate with these devices.
Network Connectivity Overview DDNS SETUP Once the DDNS settings have been configured online, the information must be entered on the DVR to allow for remote connection via the Digimerge Client Software (or through Internet Explorer): 1. Open the MENU and select SYSTEM SETUP. 2. Select SYSTEM and press the ENTER button. 3. Select the NETWORK tab. Press the Enter button to access the Network settings. Select the DDNS SERVER option, and press the ENTER button to enter the DDNS SETUP. 4.
Troubleshooting Troubleshooting When a malfunction occurs, it may not be serious and can be corrected easily. The following describes the most common problems and solutions. Please refer to the following before calling Digimerge Technical Support: Problem: DVR Unit is not receiving power, or is not powering up Check: • Confirm that all cables are connected correctly. • Confirm that the power adaptor is securely connected to the back of the unit.
Appendix 1: System Specifications Appendix 1: System Specifications General Specifications Video Standard NTSC / PAL Video Inputs 4 BNC @ 1.
Appendix 1: System Specification (cont’d.) Appendix 1: System Specification (cont’d.) Alarm Specifications Alarm Inputs 4 x TTL, programmable as NC or NO Alarm Outputs 1 x relay with NO/NC Contact 30V DC/1A, 125 VAC/0.
Appendix 1: System Specification (cont’d.) Appendix 1: System Specification (cont’d.) DVR Specifications Supply Voltage Input: 100 VAC - 240 VAC, 5A, 60/50Hz Output: 12V DC / 5 A Power Consumption Approx. 60 watts Temperature Rating 41°F ~ 122°F 5°C ~ 50°C Housing Steel / Metal (DHU500R Series); Plastic Metal/ Plastic (DHU104 Series) Color Silver (DHU500R Series); Black & Burgundy (DHU104 Series) Dimensions (WxDxH) 11.4" x 12.5" x 2.3" 290 mm x 318mm x 58mm Weight 9.3 lbs 4.
Appendix 2: Digimerge Client Software Requirements Appendix 2: Digimerge Client Software Requirements The Digimerge Client software (included with the DVR) has the following installation requirements. Minimum System Requirements: Operating System Windows 2000 Windows XP Home Edition Windows XP Professional Processor .Pentium 4 - 1.5 GHz Processor (or equivalent) Memory 256 MB RAM Hard Drive 50 MB - Installation space required * Additional Hard Drive space required for recording.
Appendix 3: Monitor Out Appendix 3: Monitor Out Connect the system to an external monitor or to another DVR or observation system the MONITOR OUT port on the back of the DVR. • MONITOR OUT - Displays exactly what is shown from the DVR (Camera View, Menus, etc.) to a TV or VCR.
Appendix 4: Connecting Motion/Alarm Devices Appendix 4: Connecting Motion/Alarm Devices Motion detection and Alarm controls are enabled through the Menu system on the DVR. Additional motion sensor devices can be connected to the system (Motion Sensors, Door/ Window Sensors). A motion detection or sensor unit can be used to send a signal to the DVR to begin camera viewing on the matching Video Channel (when enabled in the Menu): • Example: A Window sensor unit has been installed on Alarm Block port #4.
Appendix 5: Connecting a PTZ Camera Appendix 5: Connecting a PTZ Camera PTZ Cameras (not included with this system) can be connected to the PTZ Control Block on the back panel of the System. The PTZ Controls are enabled through the Menu system on the DVR. Additional PTZ Cameras are available at www.digimerge.com Installing a PTZ (RS-445 Type) PTZ Camera: 1. Connect the Transmit Cable to the D+ port on the PTZ Control Block on the DVR. 2.
Appendix 6: Full Connectivity Diagram Appendix 6: Full Connectivity Diagram The following diagram outlines a general set of connections available with the DVR.
Appendix 7: Replacing the Hard Drive Appendix 7: Replacing the Hard Drive The system comes with a pre-installed, security-grade 3.5" SATA Hard Drive, however the unit will work with a replacement single SATA Hard Drive (up to 1 TB). NOTE: Make sure that the system is OFF and the power cable has been disconnected before changing the Hard Drive. Replacing the Hard Drive Press the metal clip and gently pull each cable. To replace the current hard drive: 1.
Appendix 7: Replacing the Hard Drive Formatting the New Hard Drive The new hard drive must be formatted. If a new HARD DRIVE is detected, the system will prompt you to FORMAT the drive. If you do not choose to format the HARD DRIVE, the drive will not be detected by the system. To format the new hard drive: 1. From the system prompt, press the Right Arrow key on the front panel to select YES. 2. Press the Enter key on the front panel.
Appendix 8: Using the Storage Calculator Appendix 8: Using the Storage Calculator The Storage Calculator application is used to calculate the amount of recording time available on your Hard Drive, based on the System Recording Settings. This application is located on the Software Installation CD (provided with your System) 1.
Appendix 9: System Setup Tips Appendix 9: System Setup Tips There are several tips outlined below that will assist you in setting up your system: Navigating within the System Menu • Open the MENU screen by pressing the MENU button. Enter the password if required. • The Menu contains the following options: Search, Archiving, Record Start (Panic Recording), Sequence, PTZ, System Setup, Record Setup, Logoff, and Shutdown.
Appendix 9: System Setup Tips 3. Select the DATE AND TIME Menu. Change the settings by navigating with the UP/ DOWN/LEFT and RIGHT arrow keys. Set the following based on your local Time (and Timezone), and set the current date for the system. • Date/Time - Sets the current system Date and Time.* • Date Format - Sets the Date Display format (MM-DD-YYYY, YYYY-MM-DD, etc.). • Time Format - Sets the Time Display format to either 12 or 24 hour display.
Appendix 9: System Setup Tips Formatting the Hard Drive Formatting the hard drive after changing the date, and before beginning the recording of YOUR data is recommended, as the system is set to Automatically start recording when powered on (continuous recording setting). NOTE: Formatting the Hard Drive will erase any previously recorded data. This will NOT affect your system configurations. 1. From the system MENU, select SYSTEM SETUP and press the ENTER button. 2.
Appendix 9: System Setup Tips Camera Setup Each camera should be assigned a name that corresponds to its use (i.e. Dock1, BackDoor, Cash3, etc.). This name is displayed onscreen, and helps to identify the camera location easily. 1. Enter MENU mode by pressing the MENU button on the front panel of the system (or on the Remote Control). Select the SYSTEM SETUP Option. 2. Select the CAMERA menu from the MAIN menu. Navigate using the up and down arrows on the front panel (or remote control).
Appendix 9: System Setup Tips Backing up your System Configurations it is recommended to back up your system configurations to a Memory Stick. Configuring your system to meet your specific needs can be time consuming having a backup of your settings will allow you to reset your unit with your personalized settings in the event of an unwanted change. 1. Enter MENU mode by pressing the MENU button on the front panel of the system (or on the Remote Control). Select the SYSTEM SETUP Option. 2.
Appendix 10: Using Listen-In Audio Appendix 10: Using Listen-In Audio How do I enable Listen-In Audio, and how do I set the Listen-in channel? Listen-In Audio is the ability to listen to live audio on ONE channel at a time, between channels 1~4. To listen to live audio on a channel: 1. Open the system MENU, select SYSTEM SETUP and press the ENTER button. 2. Select SOUND and press the ENTER button. 3.
Appendix 11: Playing Recorded Video Data Appendix 11: Playing Recorded Video Data Search mode allows you to locate previously recorded video by Date and Time, or by Event Type. • Press the Search Button on the front panel or Remote Control • Enter the User Name and Password (if required). • Use the Left / Right arrows on the Front Panel or Remote Control to switch between the Search By Time and Search By Event screens. Search By Time Searches the system based on date and time.
Appendix 11: Playing Recorded Video Data Search By Event Searches the system based on Event Type (Alarm, Motion, Continuous or System). • Press the right arrow button on the front panel or remote control to access the Search By Event screen. • Select From and To dates, Events (Alarm, Continuous, Motion and Other) and Cameras • Navigate within the options using the Arrow Keys on the front panel or remote control.
Appendix 12: Recording Modes Appendix 12: Recording Modes The system is set to automatically start recording when powered on. You may wish to change these settings to better suit your security needs. These settings can be changed for an individual camera on one time block, or can be set for multiple cameras for multiple time blocks. Setting An Individual Time Block 1. Enter MENU mode by pressing the MENU button on the front panel of the system (or on the Remote Control). Select the RECORD MENU Option. 2.
Appendix 12: Recording Modes Setting Multiple Time Blocks 1. Enter MENU mode by pressing the MENU button on the front panel of the system (or on the Remote Control). Select the RECORD MENU Option. 2. Select the SIMPLE RECORDING MODE menu. Navigate using the up and down arrows on the front panel (or remote control). Navigate using the arrow keys 3. Use the navigation arrows on the remote control to select the Time Grid and press the ENTER button. Once selected, the Time Grid is highlighted in light blue.
Appendix 13: Setting Up Remote Viewing Appendix 13: Setting Up Remote Viewing Setting up the Remote Viewing Feature requires several steps. Networking skills are required to correctly configure the remote viewing functions.
Appendix 13: Setting Up Remote Viewing IP & MAC Address The IP & MAC Addresses are necessary for DDNS Setup (for remote access to the DVR). To Locate the System information, Press the ENTER button on the Front Panel or Remote Control while viewing the Cameras. The System Info window will be displayed. - OR 1. Press the Menu Button on the Front Panel or Remote Control to access the Menu. Select System Setup and press the Enter button. 2. Select SYSTEM and press the ENTER button. 3.
Appendix 13: Setting Up Remote Viewing Setting Up Your DDNS Account Digimerge offers a free DDNS service for use with your System. A DDNS account allows you to setup a web site address that points back to your Local Network. The following outlines how to set up your free DNS account. 1. Navigate to http://ddns.digimerge.net 2. Select the Create Account option from the list on the left side of the screen. 3. Complete the Account Information fields with your personal information 4.
Appendix 13: Setting Up Remote Viewing 5. Click the Create New Account link at the bottom of the form to submit your request. 6. Your Account information will be sent to you at the E-mail Address you used in Step 3. You will need this information for remote access to your System.
Appendix 13: Setting Up Remote Viewing Network - Router Port Forwarding You will need to enable port forwarding on your Router to allow for external communications with your DVR for ports: • TCP/IP PORT 6100 • WEB PORT 80 Computers, DVRs, and other devices inside your network can only communicate directly with each other within the internal network. Computers and systems outside your network cannot directly communicate with these devices.
Appendix 13: Setting Up Remote Viewing DDNS SETUP Once the DDNS settings have been configured online, the information must be entered on the DVR to allow for remote connection via the Digimerge Client Software (or through Internet Explorer): 1. Open the MENU and select SYSTEM SETUP. 2. Select SYSTEM and press the ENTER button. 3. Select the NETWORK tab. Press the Enter button to access the Network settings. Select the DDNS SERVER option, and press the ENTER button to enter the DDNS SETUP. 4.
Appendix 13: Setting Up Remote Viewing Digimerge NetViewer Software - Connection Manager The Connection Manager contains the setup information to allow the user to remotely connect to the DVR. Adding a Group Group - Right click on ‘Site’ to add a New Group. A group can represent one or more DVRs. For Example, you may have more than one system in your office, so would name your group ‘OFFICE’. Each individual unit can then be configured separately for connection. Enter a name for the Group.
Appendix 13: Setting Up Remote Viewing Adding a Site (Individual Unit Configuration) DVR Information - Enter the information specific to the unit: • Name - Enter a name for the unit. • IP / Domain Name - Enter the IP address or Domain Name for the System. This will vary depending on setup (Internal Network Connection or External Remote access through the Internet). • Port - Set to 6100 by default. • User ID - Enter the USER ID to connect to the system (the USER ID is configured on the System - i.e.
Appendix 13: Setting Up Remote Viewing Digimerge NetViewer Software - Remote Connection Once the site setup profile has been created, a connection can then be made to the DVR: 1. Select the Site profile from the Dropdown List. 2. Press the CONNECT button. The Connection Status window displays the state of the connection. Once a successful connection to the System has been made, the black screen view will switch to Live Camera View mode.
LIMITED WARRANTY Digimerge Digital Video Recorder (DVR) – 5/3/1 Year Limited Hardware Warranty Updated 08.12.08 Warranty: Subject to the exclusions, limitations and exceptions, Digimerge warrants to the initial end-user purchaser that this hardware product is free from manufacturing defects in material and workmanship under normal use for a period of three (3) years from the documented date of purchase.
DIGIMERGE MAKES NO CLAIMS OR WARRANTIES OF ANY KIND WHATSOEVER REGARDING THE PRODUCT’S ABILITY OR EFFECTIVENESS IN PREVENTING OR REDUCING THE RISK OF, OR DAMAGES RESULTING FROM, LOSS OR THEFT OF PROPERTY OR PERSONAL INJURY. THIS LIMITED WARRANTY IS IN LIEU OF ALL OTHER WARRANTIES, EXPRESS OR IMPLIED, INCLUDING, BUT NOT LIMITED TO, ANY IMPLIED WARRANTY OF MERCHANTABILITY OR FITNESS FOR A PARTICULAR USE OR PURPOSE.
IT’S ALL ON THE WEB! Product Information Specification Sheets User Manuals Software Upgrades Quick Start Guides Firmware Upgrades VISIT www.digimerge.co www.digimerge.com Digimerge Technology Inc.