En The Guide to Digital Photography with the DIGITAL CAMERA En Printed in Japan S2BB000201(11) 6MAA1511-02
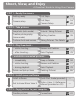
Shoot, View, and Enjoy A Flowchart Guide to Using Your Camera STEP 1—Ready the camera Getting ready First Steps 16 Camera setup First Steps Camera Setup 16 69 Snapshots (auto mode) Tutorial: Taking Pictures 24 Creative photography (scene mode) Getting Creative 36 Custom shots and movies Taking Pictures: The Details 51 STEP 2—Take pictures STEP 3—Play them back… …while shooting… Review and Deletion 31 …after shooting… Basic Playback 78 …and delete unwanted pictures… …immediately Keep o
Product Documentation The documentation for this product includes the manuals listed below. Please be sure to read all instructions thoroughly to get the most from your camera. Quick-Start Guide The Quick-Start Guide takes you through the process of unpacking and setting up your Nikon digital camera, taking your first pictures, installing software, and transferring pictures to your computer.
For Your Safety To prevent damage to your Nikon product or injury to yourself or to others, read the following safety precautions in their entirety before using this equipment. Keep these safety instructions where all those who use the product will read them.
• Batteries are prone to leakage when fully discharged. To avoid damage to the product, be sure to remove the battery when no charge remains. • When the battery is not in use, attach the terminal cover and store in a cool place. • Immediately after use, or when the product is used on battery power for an extended period, the battery may become hot. Before removing the battery, turn the camera off and allow the battery to cool.
Caring for the Camera and Battery Keep dry This product is not waterproof, and may malfunction if immersed in water or exposed to high levels of humidity. Rusting of the internal mechanism can cause irreparable damage. Keep free of salt, sand, and dust After using your camera at the beach or seaside, wipe off any sand or salt with a lightly dampened cloth and then dry your camera thoroughly.
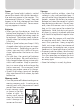
Smear When you frame bright subjects, vertical comet-like streaks that whiten toward either end may appear in the monitor. This phenomenon, known as “smear,” does not appear in the final photograph and does not indicate a malfunction. Some smearing may appear in movies. Batteries • When you turn the device on, check the battery-level displayed in the monitor to determine whether the battery needs to be replaced. The battery needs to be replaced when the battery-level indicator is flashing.
Notices • No part of the manuals included with this product may be reproduced, transmitted, transcribed, stored in a retrieval system, or translated into any language in any form, by any means, without Nikon’s prior written permission. • Nikon reserves the right to change the specifications of the hardware and software described in these manuals at any time and without prior notice. • Nikon will not be held liable for any damages resulting from the use of this product.
Notice for customers in the U.S.A. Federal Communications Commission (FCC) Radio Frequency Interference Statement This equipment has been tested and E2500 found to comply with the limits for a Tested To Comply Class B digital device, pursuant to Part With FCC Standards 15 of the FCC rules. These limits are FOR HOME OR OFFICE USE designed to provide reasonable protection against harmful interference in a residential installation.
Notice Concerning Prohibition of Copying or Reproduction Note that simply being in possession of material that has been digitally copied or reproduced by means of a scanner, digital camera or other device may be punishable by law.
Table of Contents Product Documentation .................................................................................. For Your Safety ............................................................................................... Caring for the Camera and Battery ................................................................. Notices ........................................................................................................... Introduction: Before You Begin ..............................
Taking Pictures: The Details ............................................................................ 51 Beyond Point-and-Shoot: Camera Controls .................................................. 52 , , or Movie: Choosing a Shooting Mode ......................................... 52 Flash Photography: The Button .................................................................. 53 Delaying Shutter Release: Choosing a Self-Timer Mode ...................................
Introduction Overview 2–3 Before You Begin Getting to Know the COOLPIX 2500 4–8 Menu Guide This chapter is divided into the following sections: Overview Read this section for a description of how this manual is organized and for an explanation of the symbols and conventions used. 9–14 Getting to Know the COOLPIX 2500 Bookmark this section and refer to it as you read through the manual for information on the names and functions of camera parts.
Overview About This Manual Introduction—Overview Thank you for your purchase of a COOLPIX 2500 digital camera. This manual has been written to help you enjoy taking digital pictures with your COOLPIX 2500. Read this manual thoroughly before use, and keep it handy when using the product. Use Only Nikon Brand Electronic Accessories Your Nikon COOLPIX digital camera is designed to the highest standards and includes complex electronic circuitry.
To make it easier to find the information you need, the following symbols and conventions are used: This icon marks tips, additional information you may find helpful when using your camera. This icon marks notes, information that you should read before using your camera. This icon indicates that more information is available elsewhere in this manual.
Getting to Know the COOLPIX 2500 The Parts of the Camera and Their Functions Introduction—Getting to Know the COOLPIX 2500 Take a few moments to familiarize yourself with camera controls and displays. You may find it helpful to bookmark this section and refer to it as you read through the rest of the manual. Where to Find It—Parts of the COOLPIX 2500 The parts of the camera are identified below. For more information on the function of each part, refer to the page numbers listed.
6 Introduction—Getting to Know the COOLPIX 2500 B C 7 8 17 9 16 13 / 15 14 13 12 11 10 button .. 36, 46, 79, 80 A Mode selector ......................... 6 14 Tripod socket B Monitor ................................... 6 15 / button .... 33–34, 53, 78, 80 C Multi selector .......................... 8 16 Flash-ready lamp ...................
How to Use It—Camera Controls and Displays Introduction—Getting to Know the COOLPIX 2500 A The Mode Selector mode The mode selector selects the operating mode and to take turns the camera on and off. Choose (playback still pictures and movies ( 52), mode) to play them back ( 78). Slide the mode selector to OFF when you have finished using the camera. Playback mode B The Monitor The monitor is where you compose pictures before shooting.
The monitor is also used to play pictures back. When a picture is played back full screen, information about the image is shown superimposed on the photo. 1 2 3 1600 NORMAL 9 8 4 5 6 0012/0015 1 Current folder ....................... 49 2 File number and type ............. 49 3 Battery level indicator* ........... 19 4 Transfer icon ........ 33, 34, 44, 79 5 Print-order icon ..................... 88 6 Protect icon ........................... 90 7 7 Current frame number/ total number of frames ...
C The Multi Selector Introduction—Getting to Know the COOLPIX 2500 The multi selector is used to navigate through camera menus, to page through or select pictures during playback ( 78), and to control the display of indicators in the monitor. In mode, the multi selector is also used to select the shooting mode and to turn the self-timer on and off. Self-timer on/off ( ON OFF 55) Press up to display self-timer menu, press up or down to highlight option. Press right to exit menu.
Menu Guide Index to Menu Options Mode Menu Description In (auto) and scene modes, the SHOOT10, ING menu is used to set image quality and size, 59– and to adjust exposure for very bright, very dark, 63 or high-contrast subjects. SHOOTING SET-UP PLAY BACK (manual) mode gives you full control over camera settings. In addition to the settings avail- 11, able in auto and scene modes, the manual- 59– mode SHOOTING menu contains four advanced 68 shooting options.
The Shooting Menu SHOOTING MENU Introduction—Menu Guide MENU OFF SELECT IMAGE QUALITY MENU OFF SELECT SET IMAGE SIZE MENU OFF SELECT SET EXP.+/– MENU OFF 10 SELECT SET SET / Scene Pressing the MENU button when the mode selector is set to displays the SHOOTING menu. In (auto) and scene modes, this menu contains three basic shooting options. IMAGE QUALITY Choose FINE for printing and enlarging, BASIC to reduce file size.
The Shooting Menu SHOOTING MENU MENU OFF SELECT IMAGE QUALITY FINE NORMAL BASIC MENU OFF SELECT SET IMAGE SIZE MENU OFF SELECT SET WHITE BALANCE MENU OFF SELECT SET EXP.+/– MENU OFF SELECT SET CONTINUOUS Single Continuous Multi-Shot 16 MENU OFF SELECT SET BEST SHOT SELECTOR On Off MENU OFF SELECT SET IMAGE SHARPENING Auto High Norma l Low Of f MENU OFF SELECT SET SET IMAGE QUALITY FINE Choose FINE for printing and enlargNORMAL ing, BASIC to reduce file size.
The Setup Menu Introduction—Menu Guide SET-UP Brightness CF Card Format Date Auto Off Language USB Reset All MENU OFF SELECT SELECT SET CF CARD FORMAT WARNING ! All images will be deleted ! No Format MENU OFF SELECT SET DATE MENU OFF SELECT SET AUTO OFF Brightness CF Card Format Date Auto Off Language USB Reset All MENU OFF SELECT SET LANGUAGE Brightness CF Card Format Date Auto Off Language USB Reset All MENU OFF SELECT SET USB Brightness CF Card Format Date Auto Off PTP Language Mass St
The Playback Menu SELECT MENU OFF Delete Delete all or selected pictures.
Introduction—Menu Guide The Scene Menu ( and Modes) Your Nikon digital camera offers a choice of twelve “scene” modes for common compositions. When a scene is selected from the SCENE menu, camera settings are automatically adjusted to produce optimal results for the selected scene, sparing you the necessity of adjusting camera settings one-by-one. Mode Portrait Description Use for portraits. 37 Party/Indoor Use to capture background details or the effects 37 of candlelight and other indoor lighting.
Tutorial First Steps 16–23 Getting Started Taking Pictures 24–30 Review and Deletion This chapter is divided into the following four sections: First Steps This section details the steps you will take before using your camera for the first time. Taking Pictures Read this section for a step-by-step guide to the basics of taking pictures with the COOLPIX 2500. 31–35 Getting Creative 36–40 Review and Deletion Learn how to review and delete pictures while setting up your next shot.
First Steps Getting Ready to Use Your Camera Before using your camera for the first time, you will need to complete the steps shown below.
2.5 C Insert the battery and memory card Insert a fully-charged EN-EL2 battery with the “+” and “–” contacts oriented as shown in the label on the underside of the batterychamber/memory card slot cover (A). Insert the memory card as shown in the label at the entrance to the memory card slot (B), sliding it in until it is firmly in place and the eject button pops up (the card is fully inserted when the top of the card is level with the top of the eject button). EN-EL 2 A EN- EL 2 2.
Step 3—Check the Battery Level Tutorial—First Steps Before using the camera, check the battery level in the monitor to make sure that the battery is charged. 3.1 Turn the lens section to shooting position Before taking pictures, rotate the lens section to bring the lens into shooting position, as shown at right. If you omit this step before sliding the mode selector to , a message will be displayed in the monitor. To clear the message from the screen, rotate the lens section to shooting position. 3.
3.3 Check the battery level in the monitor NO ICON Meaning Camera status Battery fully Camera functions charged normally. Recharge or replace Low battery battery without delay. 15 1600 NORMAL No pictures can be WARNING ! ! Battery taken until battery BATTERY exhausted has been recharged EXHAUSTED or replaced. The Clock Battery The camera’s internal clock-calendar is powered by a separate, rechargeable power source, which is charged as necessary when the main battery is installed.
Step 4—Choose a Language Tutorial—First Steps Camera menus and messages can be displayed in your choice of German, English, French, Japanese, and Spanish. 4.1 4.2 IMAGE QUALITY MENU OFF Slide mode selector to 4.3 4.4 SHOOTING MENU MENU OFF SELECT SET SELECT SET Position cursor in SET-UP menu 20 SET-UP Brightness CF Card Format Date Auto Off Language USB MENU OFF 4.
4.7 4.8 MENU OFF SELECT SET Display options 4.9 LANGUAGE Brightness CF Card Format Date Auto Off Language USB MENU OFF SELECT SET Choose a language from: De Deutsch (German) En English Fr Français (French) Japanese Es Español (Spanish) LANGUAGE Brightness CF Card Format Date Auto Off Language USB MENU OFF SELECT SET Return to SET-UP menu. If you have yet to set the time and date, proceed to Step 5.6 on the following page to set the time and date.
Step 5—Set the Time and Date Tutorial—First Steps Information on the time and date of recording is included with all pictures taken with your Nikon digital camera. To set the camera’s internal clock to the correct time and date: 5.1 5.2 IMAGE QUALITY MENU OFF Slide mode selector to 5.3 SELECT 5.4 SET Highlight page tab 5.5 SELECT MENU OFF 5.
5.7 5.8 DATE SELECT SET Display DATE menu 5.9 5.10 DATE MENU OFF SELECT MENU OFF SELECT SET Choose order in which year, month, and day will be displayed SELECT SET Highlight Y M D 5.12 DATE MENU OFF SET DATE MENU OFF SET Edit selected item. Repeat steps 5.8– 5.9 until all items have been set. 5.
Taking Pictures The Basics Tutorial—Taking Pictures This section details the basic steps involved in taking pictures in mode. In this automatic, “point-and-shoot” mode, the majority of camera settings are controlled by the camera in response to shooting conditions, producing the best possible results in most situations.
1.3 The monitor also shows the number of pictures that can be taken at current settings (B). If the message “OUT OF MEMORY” appears in monitor, the memory card is full. 33–34), use a new Delete pictures ( memory card, or choose a lower quality or image size ( 60). Step 2—Choose A 15 1600 NORMAL B Mode 2.1 2.2 1600 NORMAL 15 Press multi selector down to display shooting-mode menu* 2.
Step 3—Adjust Camera Settings (Optional) Tutorial—Taking Pictures The following table shows the default settings for mode. For more information, refer to the page numbers in the rightmost column. Setting Default Description Flash mode Auto Flash fires automatically when lighting is poor. Self timer Off Image quality Self-timer off. 53 55–56 Pictures compressed for balance between NORMAL quality and file size that is ideal for snapshots.
Ready the camera Hold the camera steadily in both hands. 4.3 Frame your subject Use the zoom buttons to frame your subject against the background. Indicator in monitor shows amount of zoom while either button is pressed Zoom out Zoom in 1600 NORMAL 15 When the camera is zoomed all the way in, holding the button down for about two seconds extends the zoom range digitally (digital zoom; 57). The zoom indicator turns yellow when digital zoom is in effect.
Step 5—Focus and Shoot Tutorial—Taking Pictures 5.1 Focus Press the shutter-release button halfway to set focus and exposure. The camera will focus on the subject closest to the camera, and lock focus at this distance while the shutter-release button is pressed halfway. With the shutter-release button pressed halfway, check the focus indicator and flash-ready lamp.
5.2 Tutorial—Taking Pictures Take the picture Smoothly press the shutter-release button the rest of the way down to take a picture. After each shot, the picture you have just taken will be displayed briefly in the monitor before being recorded to the memory card. If you are not satisfied with the results, you can delete the picture instantly by pressing the ( ) button. If you need more time to study the picture, you can pause the display for up to ten seconds by pressing ( ) button.
Step 6—Put the Camera Away Tutorial—Taking Pictures 6.1 Turn the camera off Turn the camera off to save battery power. 6.2 Return the lens section to the closed position To protect the lens, return the lens section to its housing in the camera body.
Review and Deletion Quick Review To use quick review, the camera must be in mode. Press the button once to display the most recent picture at the top left corner of the monitor, twice to display pictures full screen. Pressing the button a third time returns you to mode. 1 14 1600 NORMAL Mode 1600 NORMAL 14 Quick Review Pictures are displayed in the top left corner of the monitor, allowing you to view the results of previous attempts while setting up your next shot.
Quick Review Tutorial—Review and Deletion The following operations can be performed in quick review: 1 1600 NORMAL To Press 14 Description View other pictures Press the multi selector up to view pictures recorded before the current photo, down to view pictures recorded after the current photo. View current picture full screen Enter full-screen review (see opposite) with the current picture displayed full screen.
Press View multiple pictures ( Delete current picture Description Press the ( ) button to display up to ) nine pictures at a time as small thumbnail previews (see following page). A confirmation dialog will be displayed. Press multi selector up or down to highlight option, press to right to select.
Thumbnail Review Tutorial—Review and Deletion Pressing the ( ) button in full-screen review displays a menu of four thumbnail images. The following operations can be performed while thumbnails are displayed: To Press Description Highlight pictures Press the multi selector up, down, left, or right to highlight thumbnails. Change number of pictures displayed With four thumbnails displayed, press the button once to view nine thumbnail images.
Playback Mode ( 77) 35 Tutorial—Review and Deletion This section describes quick review, which allows you to view pictures without leaving mode. To learn about additional playback options available in (playback) mode, see “Playing Pictures Back” ( 77).
Getting Creative Scene Selection Tutorial—Getting Creative Your Nikon digital camera offers a choice of “scene” modes for common compositions, such as portraits, landscapes, and close-ups, which require special combinations of settings that apply to any scene of the same type. When a scene is selected from the SCENE menu, camera settings are automatically adjusted to produce optimal results for the selected composition, sparing you the necessity of adjusting camera settings one-by-one.
The following pages describe when to use each scene mode. Portrait Use for portraits. Main subject stands out clearly while background details are softened, lending the composition a sense of depth. • Degree to which background details are softened depends on the amount of light available Party/Indoor Use for shots that include details of the background behind the main subject, or to capture the effects of candlelight and other indoor background lighting.
Night Portrait Tutorial—Getting Creative Use for shots that provide a natural balance between the main subject and the background when shooting portraits against a backdrop of night scenery. • Flash mode is set to (auto with red-eye reduction; 53). Camera Shake: ✯ Beach/Snow Vividly captures the brightness of such subjects as snowfields, beaches, or sunlight expanses of water. Landscape Use for vivid landscape shots that enhance outlines, colors, and contrast in such subjects as skyscapes and forests.
Sunset Camera Shake: ✯ Night Landscape A slow shutter speed is used to produce stunning night landscapes. • Focus is fixed at infinity; the focus indicator (AF●) is not displayed. • Flash turns off ( ) automatically. Camera Shake: ✯✯ Museum Flash turns off ( ) automatically. Use indoors where flash photography is prohibited (for example in museums and art galleries) or in other settings in which you do not want to use the flash.
Close Up Tutorial—Getting Creative Camera is set to focus on objects as close as 4 cm (1.6˝) from the lens, making it possible to capture vivid colors in close-up shots of flowers, insects, and other small objects, with the background artistically blurred. • Camera automatically selects middle zoom position for a minimum focus distance of 4 cm/1.6˝ (measured from lens). Minimum focus distance will increase if camera is zoomed in or out. • Camera focuses on subject at center of frame.
Connections Your Camera and Your Computer Your Nikon digital camera stores pictures as digital data. Instead of making the trip to a developer and getting negatives, you can simply copy your pictures to a computer for long-term storage using the Nikon View 5 software provided with your camera. Once transferred to your computer, your pictures can be viewed, printed, sent to your acquaintances via email, or saved to a Zip disk or other removable media for delivery to a photofinisher.
Before You Begin: Installing Nikon View 5 Connections Before copying pictures to your computer, you will need to install Nikon View 5, an application that allows you to transfer pictures from the camera memory card to a computer hard disk and view them on the computer monitor.
Adobe Acrobat Reader 2 Install The installation instructions are in Portable Document Format (PDF). To install Adobe Acrobat Reader, open the folder for the language of your choice and double-click the installer icon. The installer start-up screen will be displayed; follow the onscreen instructions to complete installation.
Making the Connection: Connecting to Your Computer Connections Once you have installed Nikon View 5, you are ready to transfer photographs and movies to your computer. Pictures can be transferred via a direct USB connection between the camera and computer, or by removing the memory card from the camera and inserting it in a card reader or PC card slot.
the camera and computer 5 Connect Connect the UC-E3 USB cable as shown below. Use the flat connector for the camera on 6 Turn Slide the mode selector to or . If the UCE3 is connected, the monitor will remain off, and all controls except the ( ) button and power switch will be inactive. Choosing a USB Protocol The COOLPIX 2500 supports two USB protocols: Mass Storage (the default option) and Picture Transfer Protocol (PTP).
) button the ( 7 Press When the camera is connected and turned on, Connections Nikon View 5 will start automatically (see the reference CD for details). Once Nikon View 5 ) button to behas started, press the ( gin copying the pictures selected in Step 2 to the computer. The message “PREPARING TO TRANSFER” will appear in the camera monitor.
Connections Windows 2000 Professional Click the “Unplug or Eject Hardware” icon ( ) in the taskbar and select Stop USB Mass Storage Device from the menu that appears. Windows Millennium Edition (Me) Click the “Unplug or Eject Hardware” icon ( ) in the taskbar and select Stop USB Disk from the menu that appears. Windows 98 Second Edition (SE) In My Computer, click with the right mouse button on the removable disk corresponding to the camera and select Eject from the menu that appears.
Reading Pictures from Memory Cards Connections If you have a CompactFlash™ card reader or your computer is equipped with a PC card slot, you can transfer pictures directly from the memory card. Before inserting the memory card in a card reader or card slot, turn the camera off and remove the card from the camera. the computer on 1 Turn Turn the computer on and wait for the operating system to start up.
Removing the Memory Card Before removing the memory card from a PC card slot or card reader, you will need to remove the card from the system: Windows XP Home Edition/Windows XP Professional Click the “Safely Remove Hardware” icon ( ) in the taskbar and remove the memory card from the system. Windows 2000 Professional/Windows Millennium Edition (Me) Click the “Unplug or Eject Hardware” icon ( ) in the taskbar and remove the memory card from the system.
50
Beyond Point-andShoot Taking Pictures 52–58 The Details Fine-Tuning Camera Settings 59–68 In “Tutorial: Taking Pictures,” you learned the basic mode. order of operations for taking pictures in This chapter details the options available for taking pictures in all shooting modes.
Beyond Point-and-Shoot Camera Controls , , or Movie: Choosing a Shooting Mode Taking Pictures—Beyond Point-and-Shoot In mode, you have a choice of four basic shooting modes (for information on choosing a shooting mode, see “Tutorial: Taking Pictures”; 24): Auto Auto produces good results in a wide range of situations. Use for snapshots or when you want control over image quality ( 61), image size ( 62), and exposure compensation ( 63) while leaving the camera in charge of other settings.
AUTO Flash Photography: The Button Mode AUTO Auto Auto with red-eye reduction How it works When to use it Flash fires when Best choice in most circumstances. lighting is poor. Pre-flash fires before main flash. This causes subjects’ pupils to contract before photo is taken, minimizing “red-eye” effect caused by flash reflecting from retina. Use for portraits (works best when subjects are well within range of flash and looking at pre-flash).
The flash mode can be selected with the Taking Pictures—Beyond Point-and-Shoot 1 button: 2 AUTO AUTO 1600 NORMAL 15 Press button to display flash-mode menu 1600 NORMAL 15 Press multi selector up or down until desired mode is highlighted 3 Press multi selector to right to exit menu (flash-mode menu will also close if no operation is performed for about two seconds). Current flash mode is shown by icon at bottom of monitor.
ON OFF Delaying Shutter Release: Choosing a Self-Timer Mode To use the self-timer: the camera 1 Position Mount the camera on a tripod (recommended) or rest it on a flat, stable surface. the self-timer on 2 Turn The self-timer setting is controlled with the multi selector. 2.1 2.2 ON OFF 1600 NORMAL ON OFF 15 1600 NORMAL 15 Press multi selector up or down to highlight ON Press multi selector up to display self-timer menu 2.
the picture 3 Compose Adjust camera settings and frame the picture. Remember that the camera the timer 4 Start Press the shutter-release button all the way down to lock focus and activate the timer. Count-down timer in monitor shows number of seconds remaining until picture is taken 1600 NORMAL 15 I II II The self-timer lamp on the front of the camera will start to blink when the shutter-release button is pressed, and continue to blink until one second before the photo is taken.
Framing Pictures: Optical and Digital Zoom Optical Zoom Photos can be framed in the monitor using the zoom buttons. Indicator in monitor displays amount of zoom while either button is pressed Zoom out Zoom in Optical zoom is not available in movie mode, although digital zoom can be used to magnify the subject up to about 3 ×. Digital Zoom At the maximum optical zoom position, holding the seconds triggers digital zoom.
Keep or Delete: Picture Review Taking Pictures—Beyond Point-and-Shoot After each shot, the picture you have just taken will be displayed briefly in the monitor until being recorded to the memory card. The following operations can be performed while the picture is displayed: To Delete picture Press Description A confirmation dialog will be displayed. Press multi selector up or down to highlight option, press to right to select.
Fine-Tuning Camera Settings The -Mode Menu In mode, changes to some settings are made with the help of a SHOOTING menu that appears when the MENU button is pressed.
The options available in the SHOOTING menu depend on the shooting mode selected. No menu is available in movie mode. Taking Pictures—Fine-Tuning Camera Settings SHOOTING MENU MENU OFF SELECT Option IMAGE QUALITY 61 IMAGE SIZE 62 EXP. +/– 63 SET Shooting menu , scene) ( SHOOTING MENU Option IMAGE QUALITY MENU OFF SELECT Shooting menu ( mode) SET 61 IMAGE SIZE 62 WHITE BALANCE 64–65 EXP.
8-MB memory card 16-MB memory card 1600 1280 1024 640 1600 1280 1024 640 FINE 8 12 18 43 16 24 37 86 NORMAL 15 23 34 71 31 47 69 144 BASIC 29 43 60 113 59 86 121 229 *Figures are approximate. File size of JPEG images depends on scene recorded, producing wide variations in number of images that can be stored. Image Quality To reduce the amount of memory that each shot IMAGE QUALITY occupies, pictures are compressed as they are saved to the memory card.
Image Size Taking Pictures—Fine-Tuning Camera Settings Image size refers to the physical dimensions of the image, measured in pixels. Choose an image size according to the space available on the memory card and the task at hand. IMAGE SIZE MENU OFF SELECT SET Option Size (pixels) Description 1600 1,600 × 1,200 Suited to print sizes ranging from large photo album through to A5 (roughly 8˝ × 6˝). 1280 1,280 × 960 Suited to postcard-size prints.
Adjusting Exposure: Exp. +/– The Exp. +/– (exposure compensation) menu allows you to alter exposure from the value suggested by the camera, making pictures brighter or darker. EXP.+/– SELECT SET At values other than ±0, exposure compensation is shown in the monitor. 1600 NORMAL +0.
Keeping Colors True: White Balance Taking Pictures—Fine-Tuning Camera Settings White balance is used to preserve natural colors under different types of lighting. At settings other than Auto, the current white balance setting is shown in the monitor.
WHITE BALANCE PRESET Cancel Measure MENU OFF SELECT SET Option Description Cancel Recalls the most recent setting for preset white balance from memory and sets white balance to this value. Measure To measure a new value for white balance, place a white object, such as a piece of paper, under the lighting that will be used in the final photograph. Frame this object so that it fills the square in the center of the menu shown above.
Taking Pictures in a Sequence: Continuous Taking Pictures—Fine-Tuning Camera Settings The options in the “continuous” menu are used to take pictures in a continuous sequence. This can be useful when, for example, you are trying to capture a fleeting expression on a portrait subject, or photograph a subject that is moving unpredictably. With the Multi-Shot 16 option, you can record movement in a single picture consisting of sixteen consecutive frames.
Getting Sharper Pictures: BSS (Best Shot Selector) BEST SHOT SELECTOR On Off MENU OFF SELECT SET BSS may not produce the desired results with a moving subject or if you change the composition while the shutter-release button is pressed all the way down. Option Description On Camera takes photos as long as the shutter-release button is held down, to a maximum of ten. These images are then compared and the sharpest photo (the image with the highest level of detail) saved to the memory card.
Making Edges More Distinct: Image Sharpening Taking Pictures—Fine-Tuning Camera Settings The camera automatically emphasizes the borders between light and dark areas of each picture, making the image seem sharper. The effects are too subtle to be seen in the camera monitor, but are visible when the picture is viewed on a computer monitor or printed. mode gives you control over the amount of sharpening performed (in and scene modes, the camera adjusts sharpening according to the subject).
Camera Setup The SET-UP Menu This chapter details the options available in the SETUP menu, where you can adjust basic camera settings and perform such tasks as formatting memory cards and restoring settings to their default values.
Camera Setup The SET-UP menu contains options for basic camera setup. The SET-UP menu is accessed from the SHOOTING menu for , , or scene mode (no menu is available in movie mode).
7 8 MENU OFF SELECT SET Display options 9 SELECT MENU OFF SELECT SET Highlight option (to return to previous menu, press multi selector to left) To exit the menu and return to shooting mode, press the MENU button.
Adjusting Monitor Brightness: Brightness Camera Setup This option controls monitor brightness. Press the multi selector up or down to increase or decrease the brightness of the monitor by moving the arrow to the right of the display up or down. BRIGHTNESS MENU OFF SELECT SET Formatting Memory Cards: CF Card Format The memory card provided with your camera is formatted at shipment.
Setting the Time and Date: Date This option is used to set the camera to the current date and time. For more information, see “Tutorial: First Steps” ( 22). DATE SELECT SET Conserving Battery Power: Auto Off When operated on battery power, the camera will enter sleep mode if no operations are performed for thirty seconds (or three minutes when menus are displayed).
Choosing a Language: Language Camera Setup This option is used to choose the language in which camera menus and messages are displayed. For more information, see “Tutorial: First Steps” ( 20). LANGUAGE Brightness CF Card Format Date Auto Off Language USB Reset All MENU OFF SELECT SET Choosing a USB Protocol: USB Before pictures can be copied to a computer via direct USB connection ( 44), you will need to select a USB transfer protocol that matches that used by your computer’s operating system.
Do not select PTP when connecting the COOLPIX 2500 to a computer running one of the above operating systems (there is no need to change the USB setting when using the camera for the first time, as Mass Storage is selected at shipment). If you have already changed the USB setting to PTP, be sure to select Mass Storage before connecting the camera to your computer.
Restoring Default Settings: Reset All ( Mode Only) Camera Setup Reset All is used to reset settings to their default values. This option is only available in the SET-UP menu for mode, but resets settings for all modes. RESET ALL Reset all settings to default values No Reset MENU OFF Option No Reset SET SELECT Description Exit menu, leaving settings unchanged. Restore settings to default values. Choosing Reset restores the settings listed below to their default values.
Playing Pictures Back Playback Mode Basic Playback 78–84 The Playback Menu 85–91 This section details the operations that can be performed when the mode selector is set to . It is divided into the following two sections: Basic Playback This section covers playback operations that can be performed using the buttons on the back of the camera and the multi selector. The Playback Menu Read this section for a description of the operations that can be performed in the playback menu.
Basic Playback Full-Frame and Thumbnail Playback Playing Pictures Back—Basic Playback When the mode selector is set to , the camera enters playback mode with the most recent picture displayed in the monitor. 1600 NORMAL 1/0011 The following operations can be performed in playback mode: To Press Description Press the multi selector up to view pictures recorded before the current photo, down to view pictures recorded after the current photo.
Press Description Zoom photo in ( Press the ( ) button for an enlarged view of the current photo ( 81). Select current picture for transfer to a computer ( ) ) Pictures selected for transfer are marked with a icon. Turn this marking on or off to select the pictures that will be transferred to a computer at a later date ( 44). Create small SMALL If the current picture is a photograph, pressing the copy of PIC.
Thumbnail Review Playing Pictures Back—Basic Playback Pressing the ( ) button in full-screen review displays a menu of four thumbnail images. The following operations can be performed while thumbnails are displayed: To Press Highlight pictures Description Press the multi selector up, down, left, or right to highlight thumbnails. Change number of pictures displayed ( ( Delete highlighted picture butWith four thumbnails displayed, press the ton once to view nine thumbnail images.
Taking a Closer Look: Playback Zoom X2.0 SCROLL To ZOOM Press Description ( Zoom increases each time button is pressed, to a maximum of 6.0 ×. While image is zoomed in, icon and zoom ratio are displayed in upper left corner of monitor. Zoom photo in View other areas of image Cancel zoom ) Press the multi selector to scroll to areas of the image not visible in the monitor. Press to cancel zoom.
Creating a Small Copy of a Picture: Small Picture Playing Pictures Back—Basic Playback Pressing the SMALL PIC. ( ) button in full-frame or thumbnail playback creates a small copy of the current picture. Copies are 320 × 240 pixels in size and have an image quality of BASIC, making them ideal for distribution by email or for use in web pages.
When displayed in full-frame playback and full-screen review, copies will occupy roughly one-quarter of the monitor and are surrounded by a gray frame. In thumbnail playback and review, copies are indicated by a gray border. Copies can not be viewed using playback zoom ( 81); pressing the ( ) button when a copy is displayed has no effect. Restrictions on Small Picture The small picture function described in this section can not be used in quick review. Copies can not be created from movies.
Movie Playback Playing Pictures Back—Basic Playback Movies are indicated by a icon. In full-frame playback, movies can be viewed using the button. Movies can not be played back when thumbnails are displayed. START To Press 9/0019 Description Start playback When movie ends, final frame is displayed for one second, followed by a still image of the first frame. Pause/resume playback Pressing the button while playback is in progress pauses display. To resume playback, press the button again.
The Playback Menu Managing Pictures To view the playback menu: 1 2 DELETE Delete Print Set Protect Auto Transfer CF Card Format Brightness MENU OFF Select SET SELECT Press MENU button to display playback menu The playback menu contains the following options: DELETE Delete Print Set Protect Auto Transfer CF Card Format Brightness MENU OFF SELECT Option SET Delete 86–87 Print Set 88–89 Protect 90 Auto Transfer 91 CF Card Format 72 Brightness 72 Memory Card Format/Brightness The CF Car
Deleting Pictures: Delete The Delete menu contains the following options: Playing Pictures Back—The Playback Menu Option DELETE Description Selected Images All Images Delete selected photoSelected Images graphs and movies. All Images MENU OFF Delete all pictures.
5 DELETE SELECT MENU OFF SET Deleting All Photographs and Movies To delete all pictures on the memory card: 1 2 DELETE ERASE ALL IMAGES Erasing All Images ( Exclude ) Selected Images All Images No Yes MENU OFF SELECT Highlight All Images SET MENU OFF SELECT SET Confirmation dialog displayed.
Ordering Prints: Print Set Playing Pictures Back—The Playback Menu Selecting Print Set from the playback menu disPRINT SET plays the menu shown at right. Using the Print set option, you can specify the pictures to be Print set Delete print set printed, the number of prints, and the information to be included on each print. This information is stored on the memory card in Digital Print SET SELECT MENU OFF Order Format (DPOF).
3 PRINT 4 SET QUICK DONE PRINT SET Done Info Date MENU OFF SELECT SET Press to complete operation and display menu of print options. To highlight option, press multi selector up or down. • To print shutter speed and aperture on all selected photographs, highlight Info and press multi selector to right. Check will appear in box next to item. • To print date of recording on all selected photographs, highlight Date and press multi selector to right. Check will appear in box next to item.
Safeguarding Valuable Pictures: Protect Playing Pictures Back—The Playback Menu Selecting Protect from the playback menu displays the menu shown at right, where you can select pictures to protect from accidental deletion. PROTECT SELECT 1 2 PROTECT SELECT SET QUICK DONE Highlight picture 3 DONE SET QUICK DONE PROTECT SELECT SET QUICK DONE Press multi selector up or down to select picture. Selected pictures are marked by icon. Repeat steps 1 and 2 to select additional pictures.
Marking All Pictures for Transfer: Auto Transfer AUTO TRANSFER All ON All OFF MENU OFF Option SELECT SET Description All ON Mark all pictures on the memory card for transfer to a computer. All OFF Remove transfer marking from all pictures on the memory card. Transferring More than 999 Pictures No more than 999 pictures can be transferred at one time using the ( ) button ( 44). To copy more pictures, use Nikon View 5. See the Nikon View 5 Reference Manual (on CD) for details.
92
Technical Notes Camera Care, Options, and Resources This chapter provides tips on cleaning and storing your camera, a list of optional accessories available for the COOLPIX 2500, information on where to get help on line, troubleshooting advice, and camera specifications.
Caring for Your Camera Technical Notes Cleaning Lens One key to cleaning the lens is to not touch it with your fingers. Use a blower (typically a small device with a rubber bulb attached to one end that you pump to produce a stream of air out the other) to remove dust or lint. To remove fingerprints or other stains that can not be removed with a blower, wipe the lens with a soft cloth, using a spiral motion that starts in the center of the lens and works out to the edges.
Optional Accessories Rechargeable battery Additional EN-EL2 Li-ion batteries are available from your retailer or local Nikon representative AC adapter EH-60 AC adapter kit Carrying case CS-E2500 soft case CompactFlash™ memory EC-AD1 PC-card adapter card adapters Monitor (LCD) hood HL-E2500 LCD hood Approved Memory Cards The following memory cards have been tested and approved for use in the COOLPIX 2500: SanDisk SDCFB series 16 MB, 32 MB, 48 MB, 64 MB, 96 MB, 128 MB 4× USB series 8 MB, 16 MB, 32 MB, 48 MB
Web Resources Technical Notes At the time of writing, the following on-line resources were available for users of Nikon digital imaging equipment: For Product Information and Tips • For users in the USA: http://www.nikonusa.com/ • For users in Europe: http://www.nikon-euro.com/ • For users in Asia, Oceania, the Middle East, and Africa: http://www.nikon-asia.com/ For Contact Information Contact information for the Nikon representative in your area may be found at: http://www.nikon-image.
Problem • Ambient lighting is too bright: move to a dark- 95 er location or use HL-E2500 LCD hood (available separately). • Monitor is dirty. 94 • Monitor brightness requires adjustment. 72 • Camera is in playback mode. • Battery is exhausted. • Message “Please turn the lens to the shooting position” appears in monitor: lens is blocked by camera body. Rotate lens section until message is no longer displayed.
Problem Technical Notes Photos are blurred Possible cause • Camera shook during shot. Blurring caused by camera shake can be reduced by: – Using the flash 53 – Using the Best-Shot Selector (BSS) 67 – Using the self-timer 55 – Using a tripod — • Shutter speed too slow. Use the flash. 53 Randomly-spaced • Noise reduction, which helps reduce noise at 38, bright pixels slow shutter speeds, is available in the follow- 39 ing scenes: Night Portrait and Night Land(“noise”) appear in image scape.
Problem • Picture has been overwritten or renamed by a — computer or other make of camera. • Picture is displayed in full-screen review. Small Pressing pictures can only be created in playback mode. button when picture • Picture is a movie. Small pictures can only be is displayed full created from photos. screen does not • Picture is already a small picture. create small picture • There is not enough free space on the memory card for a small picture. 82 82 83 83 Can not zoom in on • Picture is a movie.
Error Messages Technical Notes The following table lists the error messages and other warnings that appear in the monitor and how to deal with them. Display (Flashes) Problem Clock calendar not Set clock calendar to cur- 22– set. rent date and time. 23 WARNING ! ! BATTERY EXHAUSTED AF● (● flashes red) Solution Battery exhausted. Turn camera off and re19 place battery. Use focus lock to focus on another subject at same Camera cannot focus. 28 distance, then recompose photograph.
Display THIS CARD IS INCOMPATIBLE Solution • Use approved card. 95 • Check that connectors — Error accessing memare clean. If card is damory card. aged, contact retailer or Nikon representative. mode: • Reduce image quality or Camera in Insufficient memory size. to record pictures at • Delete photographs. current settings. • Insert new memory card.
Display Problem Solution If error appears in computer monitor, click OK to exit 16, Nikon View 5. Turn cam44, era off, reconnect cable or 47 replace memory card, then turn camera on. COMMUNICATIONS Protocol selected in ERROR USB menu does not match that used by computer operating system, causing error when ( ) button is pressed to transfer pictures. Turn camera off and disconnect USB cable, then change USB selection in camera setup menu and 74 reconnect camera.
Specifications E2500 digital camera Effective pixels 2.0 million CCD 1 Image size (pixels) Lens Technical Notes Type /2.7˝ high-density CCD; total pixels: 2.11 million • 1600 × 1200 (1600) • 1280 × 960 (1280) • 1024 × 768 (1024) • 640 × 480 (640) 3 × Zoom Nikkor Focal length F = 5.6 – 16.8 mm (35-mm [135] camera format equivalent: 37 – 111 mm) f/-number f/2.7 – f/4.8 Construction Seven elements in six groups Digital zoom 4.
Shutter Technical Notes Speed Aperture Range Mechanical and charge-coupled electronic shutter 2 – 1/3000 s Electronically-controlled preset aperture Two steps (f/2.7 and f/4.5 [W]) Sensitivity Approximately equivalent to ISO 100 (auto gain to ISO 400 equivalent) Self-timer Ten-second duration Built-in Speedlight Range 0.4 – 3.0 m (1´4˝ – 9´10˝) (W) 0.4 – 1.
System requirements (Nikon View 5): Windows Pre-installed versions of Windows XP Home Edition, Windows XP Professional, Windows 2000 Professional, Windows Millennium Edition (Me), Windows 98 Second Edition (SE) Models Only models with built-in USB ports supported CPU 300 MHz Pentium or better RAM 64 MB or more recommended Hard-disk space 25 MB required for installation, with additional free disk space of 10 MB plus double the capacity of camera memory card available on system disk when Nikon View 5
Index Symbols Index 1600, 1280, 1024, 640, 62 (shooting) mode, 6 (playback) mode, 6 button, 4, 33, 34, 78, 80 button, 4, 33, 79, 81 button, 5, 53 button, 5, 33, 34, 78, 80 button, 5, 33, 34, 79, 80 . See shooting mode; movies , See self timer , 6, 19 , 6, 23 , 6, 37, 54 , , , , , , , , , , , , 37– 40 AUTO, , , , 53 , 6, 63 A, , , , , , , 64 , , , 66 , , , , , 68 , , , 88, 90, 91 A . See shooting mode, auto Accessories. See optional accessories AF●.
O On/off. See mode selector Optional accessories, 95 P Party/Indoor, 37 Photo information, 7, 33, 79 Picture Transfer Protocol. See USB. Playback, 78. See also quick review full frame, 78 movie, 84 thumbnail, 80 zoom, 81 PLAY BACK menu, 85 Portrait, 37 Print Set, 88–89 Protect, 90 PTP. See USB. Q Quality. See image quality button, 5, 31 Quick review, 32 full screen, 32 thumbnail, 34 QuickTime. See movies QVGA. See movies R Red-eye reduction.
En The Guide to Digital Photography with the DIGITAL CAMERA En Printed in Japan S2C05000401(11) 6MAA1511-04