
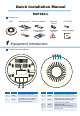
User's Manual

≤15mm
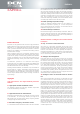
Ceiling Mount
Take down the ceiling and use 4mm drill to open two hole on ceiling. The distance between
two hole is 40mm.
Use locking slide to screw up sheet metal mount and ceiling. Mounting kit and locking slide
will be put at different side of ceiling and install by using screw.
Put the mounting holes behind of the AP onto the mounting kit’s pegs and then pull the AP
slowly until copper direction to complete installation.
2
1
3
Ceiling mount need to use screws which is 30mm long. It is suitable for 15 mm thick ceiling. When need
to use for thicker ceiling, customers need to prepare for longer screws.
1
2
3
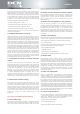
T-keel installation
Use M4 screw to screw up to sliding lock’s hole like above picture and leave 3~5 mm space.
Put mounting kit’s card slot into card slot of the keel.
Put the screw of sliding lock through hoist hole and adjust the position of sliding lock to the other side of
keel.
Finally, screw up the screw so that the mounting kit is fixedly mounted in the T-keel.
Put the mounting holes behind of the AP onto the mounting kit’s pegs and then pull the AP slowly until
copper direction to complete installation.
2
1
3
3~5mm
1
2
3
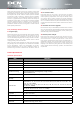
Ceiling mount need to use covert security installation to prevent AP take off from the mount.
T-keel Installation need to use covert security installation to prevent AP take off from the mount.
5
4
5
4
Attention
Warning
Warning