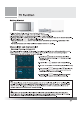
Getting Started 1. Plug the Power Cable Intel AC In on the back of the TV {When you Input power cord, LED turn on after S~8 second.) 2. Press [Power] button on the Remote Controller or Front Panel of it. 3. Change Channel by pushing Channel [£81151] button or number keys on the Remote Controller 4. Press Volume adjust vanadium level. *The current source mode and the channel number are shown up in the top-right comer of the screen. *Check the Antenna and Power Cable Connection if thees is no display.
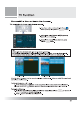
Channel Edit ~ Store or Delete the channels. This explains how to store or delete channels manually. 1. Press Menu button and then Select [Channel iy many by manipulating Channel { +] button. 2. In this menu, Channel [i elect [Channel Edit] by pressing i} button. 3. Channel Edit many wail be up when you press Volume {1 button, Tip Channel Edit Mode manages Digital and Angina channels separately. {For example, only available DTV channels will be displayed In DTV mods, no analog channels at all}.
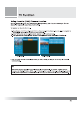
Using Favorite (FAY) Channel Function Favorite Channel Function is to ease channel change among your frequent watching or favorite channel! by separately memorizing them in FAV. To Register as Favorite Channel 1. Press Channel [E78 or Volume bunions to select the channel you would like te register in the available channel menu on the right side of display. 2. Press FAY’ button on the selected one to register it as a favorite changing 3.
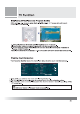
Displaying EPG (Electronic Program Guide) EPG is available only when you watch Digital TV. EPG displays TV Programs with reference to a channel and me Interval. 1. Press [EPG] button on the remote contra! during watching HD TV Program. 2. Press Direction buttons to navigate Programs with reference to each channel, 3. You can check the program schedule with reference to 3 channel and see program information by pushing [INFORM] button. *Not all the programs have Information in it.
Changing the Input mode This explains how to change and watch other Input Sources by pushing AVERSE buttons. 1. Press [AVERSE] button on the Remote control, {5-VICED — AVL — AV2 — Component 1 —» Component 2} 2. You can change Input Source to be displayed every time you press the button. * You can select TV, PG/HDMIE Mode directly by pressing [HDTV] f [PC/HDMI] button on the remote contra accordingly. Tip Concerning how to connect external devices, you can consult “Installation” section.
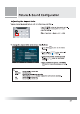
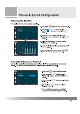
Picture & Sound Configuration Adjusting the Aspect Ratio You can change the Aspect Ratio to 4:3, 14:9, Panorama and Wide. Press [PIC SIZE] button on the remote control. The Aspect Ratio is changed in turn as you press the button, Wide — Panorama — Zoom — 4:3 — 14:9 To change the Aspect Ratio In On Screen Display Menu 1. Press MENU [E button on the remote control. 2. Press Volume {: 12 button and select [Size] in “Picture [£1] menu. 3.
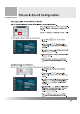
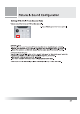
Picture & Sound Configuration Changing the Preset Picture Mode Your TV has several factory presets which allow you to control the picture. Press [PIC. MODE] button on the remote control. The picture mode is changed as you press the button. Custom —> Dynamic —» Standard — Movie — Mild To change the Picture Mode In On the Menu 1. Press MENU [a button on the remote control. 2. Press Channel [603/37] button to select ‘[Picture]” 41] menu and push Volume [1] button. * 3.
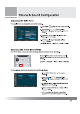
Picture & Sound Configuration Adjusting the Color Tone This explains how to change the tone of the screen. 1. Press MENU [3 button on the remote control. 2. Press Channel | 1} bitten to select ‘[Picture]’ [fi}] menu and push Volume | button. 3. In [Picture] menu, select [Color Tone] with Channel [Z0909] button 4.
Picture & Sound Configuration Adjusting the Equalizer This explains how to set and adjust equalizer. 1. Press MENU button on the remote control. 2. Press Channel [01/111] button to select *{Sound]’ [8 1] menu and push Volume [31] button. 3. In [Sound] menu, select [Qualifier] with Channel [33/3] button and push Volume | button. 4. Select the Frequency to be set by pressing Volume [1/11] button. just the level properly by pressing Channel 2] button, * 6.
Picture & Sound Configuration Setting MTS (Multi Track Sound) Mode You can adjust the Stereo or MTS function manually. 1. Press [MTS] button on the remote control. » Stereo / Mono You can select between "Stereo’ and "Ming” when the Sterne broadcasting Is received. — Stereo: Two speakers out {2 Channels, Left/Right} and the different sound per channel. ~Mono: Two speakers out but both channel has the same signal (the identical sound).
Additional Function Changing the OSD Menu language You can change the OSD Menu Language. 1. Press MENU 1&1 button on the remote controller 2. Press Channel button te select [Set Up]" [#4] menu and push Volume Ih button 3. In [Set Up] menu, select [Language] with Channel [$3154 4. Change Language by pressing Volume [J button. Setting the Blue Screen IF no signal is being received or the signal Is very weak, a blue back screen is automatically displayed instead of the nosy image. 1.
Additional Function Setting the Current Time (Time Zone} Time Zone setting is required for setting the time and receiving EPG properly. Once system time is set, all the relevant functions such as timer are available. 1. Press MENU [ 1 button on the remote control! 2. Select Setup [ “4,] menu by pressing Shanna! 3. Crass Volume button again. } 4. Select [Time Zone] by pressing Volume [ix/ 5.