
User guide


MR-1000 user guide V1.3
24
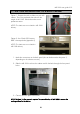
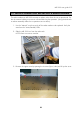
8. Place a new radio modem in the slot. Execute instruction items 1 to 7 backwards.
NOTE! Remember to configure the radio modem before placing it into MR-1000.
This allows you to start automatic controlling immediately after installations, without
a break in the network operation.
9. Slide the MR-1000 back to the cabin rack.
The radio modem firmware can be updated via the MR-1000 front panel DATA/DATA 1
port (depending on device configuration).
NOTE! This operation will break the data transfer until the FW-update is correctly
completed.
NOTE! Update progress is not possible when “Auto switch function” is activated.
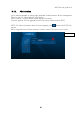
1. Download the correct FW update package to the operative PC.
Used example:
“flashupdate_3AS_NMS_4.0.13.28_VHF_NOdebug.exe” (Appendix A)
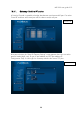
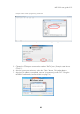
2. Start “SaTerm” terminal program.
3. Choose the modem to update by using MODBUS commands (correct virtual COM-
port2, used example below COM12). The commands are explained on page 10 in
section “Remote modem switch”. Option: Use the “Manual”switch on the front
panel of the MR-1000 device to make a selection.
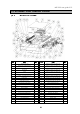
4. Use the commands to execute modem “programming mode” ON. Example
command table below:
Operation
Command
MAIN modem prog mode ON (digital out 2)
\01\05\00\65\FF\00\9C\25
MAIN modem prog mode OFF (digital out 2)
\01\05\00\65\00\00\DD\D5
STANDBY modem prog mode ON (digital out 3)
\01\05\00\66\FF\00\6C\25
STANDBY modem prog mode OFF (digital out 3)
\01\05\00\66\00\00\2D\D5
13. SERVICE OPERATION: RADIO MODEM FIRMWARE
UPDATE