TM Model MF-8000, MF-8104, MF-8115 Premium Edition User Manual Version 2.3.0.
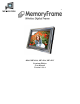
Product Introduction Congratulations! You are the proud owner of a MemoryFrameTM Wireless Digital Picture Frame. Boasting high-quality image resolution the MemoryFrameTM is the perfect product for displaying your favorite digital images, video files, or listening to your favorite MP3’s. The MemoryFrameTM includes a patented changeable frame capture system. This allows you to use a standard 8x10 and 15” frame so your MemoryFrameTM never goes out of style.
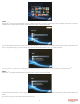
Replacing Remote Control Battery On Screen Menu Controls This feature is included so that content can be managed and controlled. The menu system is activated by pressing the Menu button. The Main Menu is shown below. Main Menu The Main Menu is the starting point to navigate to the desired function. Function Description Picture User can play a picture slideshow. User can specify the source location for picture files and can select specific pictures to play.
Pictures Function Description Play slideshow Play picture slideshow and specify source location. Playback functions support Play All, Choose Individual, or Pictures by date. Copy picture(s) Copy pictures from a specified source location into internal memory Delete picture(s) Delete pictures memory Share picture(s) Share pictures from device to another MemoryFrameTM Premium Edition.
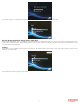
Video MemoryFrameTM can play properly formatted WMV video files. A WMV converter utility is provided on the software CD to ensure a consistent video experience, and to allow compatibility with a variety of popular video formats. From the Main Menu, navigate to Video and press ENTER. The Video Menu features the option to play a specific video file as well as the ability to copy video files into MemoryFrame’sTM internal memory or delete video files from internal memory.
The procedures to play, copy, or delete music files are the same as the corresponding procedures to play, copy, or delete picture files. Playing Background Music during Picture Slide Show While a song list is being played, the user can resume the previous picture slideshow by pressing the PLAY button on the remote control. Volume can be adjusted using the Vol+ and Vol- buttons on the remote control.
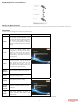
Function Description Sample Screen Resume slideshow Exits the Settings menu and resumes playback of previous picture slideshow Frame orientation Toggles between landscape (horizontal) and portrait (vertical) display settings Slideshow Settings Sets slideshow preferences, including slide duration, transition type, picture order, and music options Slide Duration This is used to set the slideshow timing. The setting are 5, 10, 15, 30 seconds, and 1, 5, 30 minutes, and 1 hour.
Picture Order This lets you select the ordering of images during a slideshow. The selections are sequential or random. Music Option This lets you select the way music is played. This includes Music order and loop control. Auto Slideshow Update This lets the frame automatically update a slideshow when new images are added to a photo sharing account. Show Online Status This is a small antenna icon in the lower right of the screen that shows whether the network is connected or not.
Prompt me for new Pictures This lets you approve each picture that is in your photo sharing account and prompts you when a new image has arrived. When set to No new pictures will automatically be added to the slideshow. Video Repeat This lets you set the loop control for video playback. When set to No, video will be played once. When set to Yes, the video will loop. Set time Sets the date and time. Set time zone Specify the local time zone Language Specify the language.
Configure Photo Sharing Network Info Enter User Account information for photo sharing site. User may enter more than 1 account. User may also input RSS Feeds by inserting RSS URL. Displays network status and configuration information Check Updates Checks if a software update is available. This feature requires an Internet connection. Copyright & about Click on “About” to get frame information, including FrameID, Frame Email, Software version #, Firmware version #.
Auto check update Toggles Auto Update checking. Press Enter to toggle between On/Off. Set standby time This lets you set the time to “sleep” and “wake”. In this way the frame will automatically turn Off and On at a time you desire. The Enable Standby activates the Sleep timing. Daylight time Reset Frame ID Restore factory settings Set frame to synchronize with world clock (with Daylight saving time) This is used in the possible case where 2 frames have the same ID.
Bluetooth Allows Bluetooth connectivity to either Accept all pictures (Default), Reject all pictures, or by prompt upon receipt. Network Requirement: If your home network already has a wireless router, you are set. If your home network has a regular router, you need to purchase a wireless access point. Please refer to the manufacturer of the router and access point to configure them.
MemoryFrameTM will automatically save connection settings for the networks which have been previously accessed, so that the user will not need to re-enter them every time a connection is made. If MemoryFrameTM does not have the selected network security information cached, it will prompt the user to specify additional information such as the type of authentication which is required to connect to the wireless access point and an encryption key, if necessary.
Play Slideshow from Photo Sharing Site: A. From MemoryFrame.com Get a FREE account Sign up for a free account at www.MemoryFrame.com. You can upload your favorite pictures and send them directly to your frame. Give it a try, it’s FREE.
• • • • • • • • • Navigate to “Photo sharing website” press Enter on the remote control You will then see a list of website select FrameChannel press enter on the remote control. The MemoryFrame display presents an activation code which is up to six digits and is case sensitive. Log In to your FrameChannel account from the PC. Select the “My Account” link (top right of screen). Select “Frame Activation” Scroll down to the blank box named “Code”. Insert the activation code from the MemoryFrame display.
D. From Webshots: Get a FREE account If you don’t have an account with Webshots, go to http://www.webshots.com and create your account. Once you have an account, upload your pictures.
See example on how to upload pictures. Set all your pictures privacy settings to ‘public’ Configure Digital Picture Frame: • • • • • • • • • • Press ‘Menu’ on the remote control to go to the Main Menu Navigate to ‘Settings’ and press ‘Enter’ on the remote control Navigate to ‘Configure photo sharing’ and press ‘Enter’ on the remote control Navigate to ‘Set Flickr site info’ and press ‘Enter’ on the remote control Navigate to ‘Add new id’ and press ‘Enter’ on the remote control Enter your Flickr User ID.
Configure Media Server: Launch Windows Media Player 11 • • • • • • • • • • Access right: Click on ‘Library’ and select ‘Media Sharing…’ Click on the ‘Settings’ button, place check on check box ‘Allow new devices and computers automatically (not recommended)’. Click on ‘OK’ button. Place check on check box ‘Share my media to’. Click ‘OK’ button. Media sharing: Click on ‘Library’ and select ‘Add to library…’. Select button ‘My personal folders’. Click on ‘OK’ button.
• • • To play all pictures, navigate to ‘Play all pictures’ and press ‘Enter’ To play selected pictures, navigate to ‘Choose individual pictures’ and press ‘Enter’ To sort pictures by date, navigate to ‘Choose picture(s) by date’ and press ‘Enter’. Then select the date by pressing ‘Enter’ on the remote control to select/deselect it. When you are done, navigate to ‘Select’ and press ‘Enter’ on the remote control.
• Once the photo has been transferred, if the Bluetooth setting on the MemoryFrameTM is set to “Prompt me”, the user will be presented with a prompt to accept the photo. If set to “Accept all pictures”, the frame will automatically display the transferred photo. Press “Menu” to close the transferred photo and return to the Main Menu. Display the Time: While the slideshow is playing, press ‘Clock’ on the remote control to display the current time.
Set Time: • • • • • • • • • • • • • • Press ‘Menu’ on the remote control to go to the Main Menu Navigate to ‘Set Time’ and press Enter on the remote control.
• • Navigate to ‘Enable standby - yes’ or ‘Enable standby - no’ and press ‘Enter’ on the remote control If standby is disabled, the Digital Picture Frame will not turn off at preset standby time.
PC Connection: Via USB cable: • • • • Connect your computer to the Digital Picture Frame using the USB cable. Click on ‘Explore’ to view the file contents of the Digital Picture Frame. To drop media to internal storage, double click on the drive letter that pertains to the picture frame. You can drag and drop media in here. The internal storage capacity is 256Mb, of which 40Mb is reserved. There is roughly 216Mb of user space.