Digital Spectrum Solutions, Inc. Irvine, CA 92614 www.dsicentral.com Contact us at support@dsicentral.
Product Introduction Congratulations! You are the proud owner of a MemoryFrametm Wireless Digital Picture Frame. Boasting high-quality image resolution the MemoryFrametm is the perfect product for displaying your favorite digital images and video files, or listening to your favorite MP3’s. Because MemoryFrametm includes a patented changeable frame capture system * you can use a standard 8x10 and 15” frame.
Setting up the MemoryFrame Specifications: Model Unit Size H x W x D Display Area Resolution Colors Brightness Contrast ratio Viewing angle Input voltage: : Operating Temperature Unit Weight Formats Media Max Image Size Default Start Mode Photo Playback Mode Music Playback Mode Video Playback Mode Accessories MF-8000 Premium 8.5” x 10.5” x 2” 4.8” H x 6.4” W MF-8104 Premium 8.5” x 10.5” x 2” 6.5” H x 8.5” W 800x600 800x600 262,144 250cd/m2 max. 250cd/m2 max.
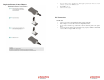
Replacing Remote Control Battery • • • If you encounter an error “ClassFactory cannot supply requested class” when you convert your video, go to the folder ‘WMVConverter’ Install WMEncoder.exe. Convert your video again PC Connection: Via USB cable: • • • • Connect your computer to the Digital Picture Frame using the USB cable. Click on ‘Explore’ to view the file contents of the Digital Picture Frame. To drop media to internal storage, double click on the drive letter that pertains to the picture frame.
• • • • • • • • • • • Press ‘Right’ on the remote control to select ‘Off mins’ Use ‘Up’ ‘Down’ buttons on the remote control to set the ‘minutes’ when the Digital Picture Frame will turn off Press ‘Right’ on the remote control to select ‘Off AM/PM’ Use ‘Up’ ‘Down’ buttons on the remote control to set the AM or PM Press ‘Right’ on the remote control to select ‘On hours’ Use ‘Up’ ‘Down’ buttons on the remote control to set the ‘hours’ when the Digital Picture Frame will turn on Press ‘Right’ on the remote co
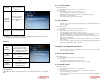
Settings Search wireless network To view Network Info: Search for available wireless networks in the area With slideshow playing: • Press ‘Menu’ on the remote control to go to the main menu Or at the main menu: • Select ‘Settings’ and press ‘Enter’ on the remote control • Select ‘Network info’ and press ‘Enter’ on the remote control • The Digital Picture Frame network info (IP address, dhcp, etc) will be displayed • Press ‘Enter’ to go to the main menu • (Optional) Press ‘Play’ to play the previous slid
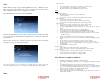
Or at the main menu: • Select ‘Settings’ and press ‘Enter’ on the remote control • Select ‘Slideshow settings’ and press ‘Enter’ on the remote control • Select ‘Music option’ and press ‘Enter’ on the remote control • Select ‘Music repeat - Yes’ or ‘Music repeat – No’ and press ‘Enter’ on the remote control. This will enable/disable replaying of the music playlist. If this feature is disabled, music will stop at the end of the current playlist.
Photo Sharing MemoryFrame is web enabled; allowing content to be retrieved over the Internet if a network connection is available. The MemoryFrame Premium Edition is also capable of sharing pictures to another MemoryFrame Premium Edition. MemoryFrame is pre-configured to be compatible with several popular photo sharing sites such as Flickr, FrameChannel, Microsoft Live Space, and Webshots. As other sites are integrated, updates will be posted at www.dsicentral.com.
• Once the photo has been transferred, if the Bluetooth setting on the MemoryFrame is set to “Prompt me”, the user will be presented with a prompt to accept the photo. If set to “Accept all pictures”, the frame will automatically display the transferred photo. Press “Menu” to close the transferred photo and return to the main menu. Display the Time: While the slideshow is playing, press ‘Clock’ on the remote control to display the current time.
Video MemoryFrame can play properly formatted WMV video files. A WMV Converter utility is provided on the software CD to ensure a consistent video experience, and to allow compatibility with a variety of popular video formats. From the Main Menu, select Video and press ENTER. The Video Menu features the option to play a specific video file as well as the ability to copy video files into MemoryFrame’s internal memory or delete video files from internal memory.
Play content, copy content, or delete content from internal storage, CF storage, USB storage, or SD/MMC storage MemoryFrame can play MP3 and WMA music files. From the Main Menu, select Music and press ENTER.
The procedures to play, copy, or delete music files are the same as the corresponding procedures to play, copy, or delete picture files.
• • • • Select ‘SHIFT’ key and press ‘Enter’ on the remote control for capital letters or other characters. Select ‘SHIFT’ key and press ‘Enter’ on the remote control to return to current keyboard. Once, you are done entering your Windows Live Space User ID, select ‘NEXT’ on the keyboard, and press ‘Enter’ button on the remote control to go to the main menu.
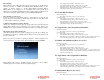
Retrieve your Pictures: Set time zone Specify the local time zone With slideshow playing: • Press ‘Menu’ on the remote control to go to the main menu Or at the main menu: • Select ‘Pictures’ and press ‘Enter’ • Select ‘Play Slideshow’ and press ‘Enter’ • Select ‘Photo Sharing website’ and press ‘Enter’ • Select ‘From Flickr’ and press ‘Enter’ on the remote control • In a few minutes, the albums in your Flickr account will be displayed • Press ‘Play’ to play the slideshow. C.
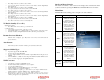
Check Updates Checks if a software update is available. This feature requires an Internet connection. Copyright & about Click on “About” to get frame ID information Register your frame To register your frames go to http://aol.memor yframe.com and sign up for a free account. This allows pushing albums/pictures to the frame from the “My MemoryFrame” photo sharing site.
Auto check update Toggles Auto Update checking. Press Enter to toggle between On/Off. Set standby time Set the time duration in which the frame will go to ‘sleep mode’. While the frame is in ‘sleep mode’ pressing any button will resume previous slideshow Enable standby mode Enable/disable standby feature Bluetooth Allows Bluetooth connectivity to either Accept all pictures (Default), Reject all pictures, or by prompt upon receipt.
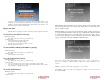
Network Requirement: Configure Digital Picture Frame: With slideshow playing: • Press ‘Menu’ on the remote control to go to the main menu Or at the main menu: • Select ‘Settings’ and press ‘Enter’ on the remote control • Select ‘Configure photo sharing’ and press ‘Enter’ on the remote control • Select ‘Set Webshots site info’ and press ‘Enter’ on the remote control • Enter your Webshots User ID. Use the ‘left’, ‘right’, ‘up’, ‘down’ buttons to navigate the keyboard.
Push Slideshow to your Digital Picture Frame: Get a FREE account If you don’t have an account with aol.memoryframe.com, go http://aol.memoryframe.com to create your account. Once you have an account, login and upload your pictures. You can also set caption for each slide, choose color for the caption.