Technical data
Manuals
Brands
Digital Manuals
Home building and Decor
TSZ07
131
132
133
134
135
136
137
138
139
140
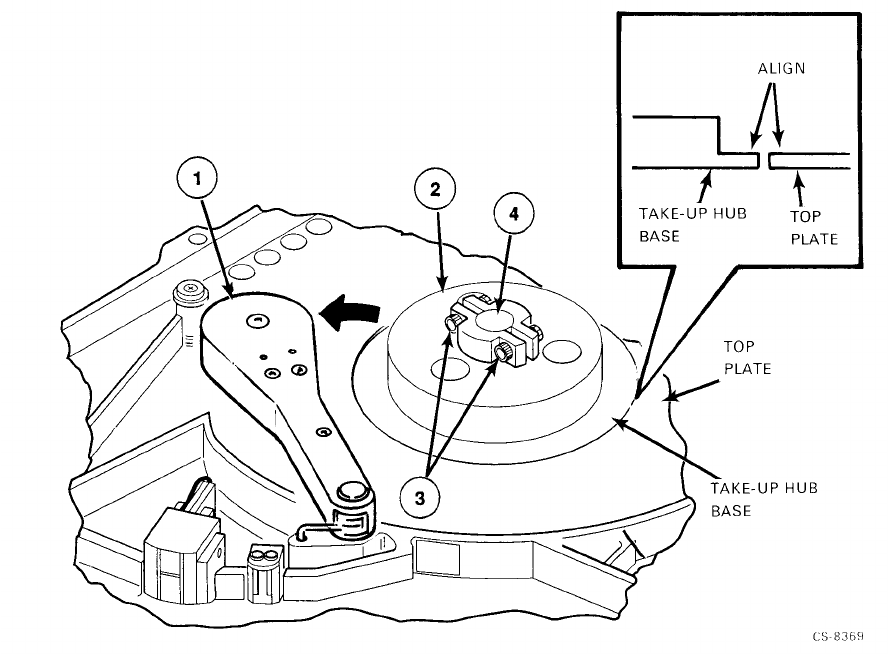
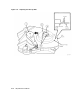
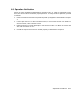
Figure
6–6:
Adjusting
the
T
ake-Up
Hub
6–10
Adjustment
Procedures
1
...
...
135
136
137
138
139
...
...
155