
User`s guide


36 Copyright © Acronis, Inc., 2000-2010
2. This window also allows choosing the computer from which you backed up the files and folders
you need to recover. Select the computer by its name on the directory tree under Online Storage
in the left pane.
3. By default the state of the Online Storage after the latest backup is displayed, so the latest
versions of the files and folders will be recovered. If you need to recover earlier versions, select
the date and time on which you want to recover the state of the files and folders.
4. Select the folder containing the files you want to recover in the left pane. The right pane lists the
files in that folder. Select the files to recover. When selecting multiple files you can use the Ctrl
and Shift keys like in Windows Explorer. Having finished selection, click the Recover icon on the
toolbar.
5. Acronis True Image OEM Quick Backup opens the Browse for folder dialog. By default the
original location from which the files were backed up will be selected. If necessary, you can select
another folder or create a new folder for the files to be recovered to by clicking the Make New
Folder button. After selecting the folder click OK.
If you recover the files to the original folder and Acronis True Image OEM Quick Backup finds a file
with the same name there, it will open a dialog window where you can choose what to do with the
file: Recover and replace the file on the disk, Do not recover (to keep the file on the disk), and
Recover, but keep both files (the recovered file will be renamed). If you want to use the choice for all
files with identical names, select the Apply to all files check box.
It is impossible to Recover and replace files on the disk which are being used or locked by the operating system
at the moment of recovery.
If you need to recover a specific version of a file, select the file, right click and choose View Versions
in the shortcut menu. This opens the File Versions window. Select the required version by its backup
time and click Recover on the toolbar. You can also recover the version by dragging it into a selected
folder.
To choose the correct version, you can open the version in the associated application and view the
file contents. Select the file in the right pane and the bottom line of Time Explorer will show the
times of backing up all its versions kept on the Online Storage. Choose a version by its backup time,
then right-click on the file in the right pane and choose Open in the shortcut menu. Acronis True
Image OEM Quick Backup will recover the file version to a temporary folder and then will open the
file using the associated application.
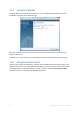
7.4 Managing Online Storage
As the available space on Acronis Online Storage is limited depending on the chosen backup plan,
you need to manage your Online Storage space by cleaning up the obsolete data. Cleanup can be
done in a variety of ways. The most "drastic" one is removing a computer registered on the Online
Storage, if you have registered more than one. Removing a computer results in deleting all data that
was backed up from that computer, so such an operation must be carried out with caution. To
remove a computer, select it on the Online storage screen by its name and click Remove
<Computer_name>, then click Yes in the confirmation window. After the deletion finishes, click
Refresh on the toolbar to refresh the storage state shown.
The Online backup options provide for automatic cleanup of the Online Storage. You can specify
deletion of files that have been kept on the storage longer than the specified number of months or
days. In addition, you can set the maximum number of file versions to be kept on the Online Storage.
You can accept the default settings for those options shown above the Change cleanup options...
link or set the values you need. To change the above options, click the link and set the desired values.