ADVANCED NETWORK SURVEILLANCE CAMERA User Manual Please read instructions thoroughly before operation and retain it for future reference.
IMPORTANT SAFEGUARD All lead-free products offered by the company comply with the requirements of the European law on the Restriction of Hazardous Substances (RoHS) directive, which means our manufacture processes and products are strictly “lead-free” and without the hazardous substances cited in the directive. The crossed-out wheeled bin mark symbolizes that within the European Union the product must be collected separately at the product end-of-life.
TABLE OF CONTENTS 1. OVERVIEW......................................................................................................................................... 1 1.1 Product Features ......................................................................................................................................... 1 1.2 Package Content ......................................................................................................................................... 1 1.
1. OVERVIEW 1.1 Product Features Low-latency video streaming with H.264 compression format for sharp and clear images Hybrid digital / analog video output It is friendly to use by wizard with browser Motion detection Complete IP surveillance system, such as the Central Management System (CMS) software, Network-Attached Storage (NAS), Network Video Recorder (NVR), etc. 1.
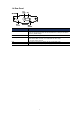
1.4 Rear Panel CONNECTOR / BUTTON DESCRIPTION Reset Default This button is hidden in the pinhole. Press and hold the reset button until the network camera rebooted. This will reset all parameters, including the IP address to factory default settings. Power Indicator When the camera is power-supplied, this indicator will be on as red. Video Output Connect to the video input connector of your monitor with a video cable (i.e. a RCA cable with the BNC connector, or a coaxial cable for video output.
2. BEFORE USING THE NETWORK CAMERA Before using the network camera, make sure: 1) You have installed the supplied CMS software, “Video Viewer”. 2) You have configured the network settings, and the network connection is fine. If not, please refer to your the installation guide. This network camera can be accessed via our supplied CMS software “Video Viewer”, or the web browser “Microsoft Internet Explorer” or “Mozilla Firefox” depending on different using situations.
3. ACCESSING THE CAMERA VIA VIDEO VIEWER 3.1 Accessing the camera Step1: Double-click “ ” on your PC desktop to open Video Viewer. By defaults, the “Address Book” panel will be displayed on the right side of the control panel. Step2: Click “ it. ” to select the IP address of the camera you intend to connect, and double-click Step3: The live view is displayed in the Video Viewer. 3.2 Control panel overview Two control panels are available and can be switched depending on your using habit. 3.2.
3.2.2 Full Function Version 3.2.3 Main Button Overview Button Simplified Full Function Function Address Book Description Click to show the predefined IP address(es). You can add, remove or search the IP address to log in the DVR remotely. Miscellaneous Control Log Remote Config Click to go to the detailed system configuration. For details, please refer to “4. SYSTEM CONFIGURATION” at page 12. Record Setting Click to go to the detailed record setting. For details, please refer to “3.3.
3.3 Frequently-used functions 3.3.1 Record To record remotely, click “ ” or “ ” → “ ” to go to the “Record Setting” page. In the “Record Setting” page, you can set the following items: ‧Record type ‧Pre- / post-event record time (0~10 seconds) ‧Record time setting ‧Record path Note: The record function will be disabled when the reserved disk capacity in “Reserved(MB)” is larger than the current disk capacity in “Free(MB)”.
3.3.3 Firmware Upgrade This function is used when users need to upgrade the network camera for function scalability. Note: Before using this function, make sure you have the correct upgrade files provided by your installer or distributor. Step1: Click “ Step2: Click “ ”, and select the IP address of your network camera in the address book. ” to show the upgrade page, “Update Server”. Step3: Click “Add” to browse to the upgrade files. Step4: Click “Upgrade Firmware” to start firmware upgrade.
STEP2: Right-click to show the shortcut menu on the top-left panel, and select the E-Map group you want to add. There are three E-Map groups you can add: Google E-MAP, Single E-MAP, and Building E-MAP.
STEP3: When the E-Map group is created, you will see the tree on the top-left panel, showing all the devices you’ve added to this group. Icon Description The connected device is camera. When it’s selected, it will become red. The connected device is DVR. When it’s selected, it will become red. For any motion or alarm event, it will appear on the screen to catch your attention. To know what’s happening quickly, double-click the device icon on the E-Map to show the live view.
How to Edit / Remove an Existing E-Map Group For Google E-Map Group Right-click on the group name to show the shortcut menu list, and select “Edit E-MAP” or “Remove E-MAP” as needed. You can also add a single E-Map group (Add Single E-MAP) or Building E-Map group (Add Building E-MAP) into the existing Google E-Map group. For Single E-Map Group Right-click on the group name to show the shortcut menu list, and select “Edit E-MAP” or “Remove E-MAP” as needed.
For Building E-Map Group Right-click on the group name to show the shortcut menu list, and select “Edit Building E-MAP” or “Remove E-MAP” as needed.
4. SYSTEM CONFIGURATION Before using the network camera, make sure you have installed the supplied software, “Video Viewer”, and configure network settings. If not, please refer to your installer or the installation guide. Note: It’s recommended to consult with your installer before changing system configurations. Note: You need to be the supervisor to enter the system configuration page. If not, please re-log into the camera with the supervisor user level.
4.1 General In “General”, you can check the general information for your network camera, such as the firmware version and MAC address, and also modify the identification name of your camera (up to 15 alphanumeric characters). 4.1.1 Log To quickly search the system log you want by event type, click the drop-down list to select the system log type you want to check, and click “Reload” to refresh the list. To clear all system event logs, click “Clear”. 4.1.
Column Description User Name Set a user name that will be used for camera access. The user name allows up to 16 alphanumeric characters. Password Set the password that will be used for remote login. The password allows up to 16 alphanumeric characters. User Level Set the security level of an account to give the permission to control different functions. There are four user levels: Supervisor, Power User, Normal User and Guest.
4.1.3 OnLineUser You can check the current online user(s) with respective online information. To refresh the list, click “Refresh”. 4.1.4 Trigger You can set the motion or alarm detection and select the notification function. Trigger Setting In this section, you can select to enable or disable the alarm or motion detection. Item Description Motion Select to enable or disable the motion detection function.
Notification Setting In this section, you can select to enable E-mail and/or FTP notification when an alarm or a motion happened. Item Description Method ‧Email When this option is checked, the network camera will upload the captured video clip to the assigned E-mail address(s) once motion or alarm recording happened. ‧FTP When this option is checked, the network camera will upload the captured video clip to the specified FTP site once motion or alarm recording happened.
4.2.3 SNTP SNTP (Simple Network Time Protocol) is used to synchronize your camera time with the networked computer systems. Function Description GMT (Greenwich Mean Time) Once users choose the time zone, the network camera will adjust the local area time of the system automatically. Server Name Simply use the default SNTP server (For example, tock.stdtime.gov.tw) or change to another server with which users are familiar. Sync.
Function Description Server Enter the SMTP server address provided from your e-mail system supplier. Mail From Enter the entire mail address to ensure E-mails will not be blocked by SMTP. Verify Password Some mail servers are required to verify the password. Please enter the “user name” and “password”. Email Address Add the E-mail address(s) of the assigned recipient(s). 4.2.6 Filter Choose to permit or block the IP address(es) which can access this camera.
When this function is activated, the other PC within the same domain as this camera will be able to search this camera in “Network Neighbor” with the identification name set in “Friendly name”. Double-click it to quickly open the web browser for camera access. For details about camera access via the web browser, please refer to “5. ACCESSING THE CAMERA VIA WEB BROWSER” at page 21. 4.3 Video Set the image resolution, quality and frame rate.
4.5 Time Set daylight saving time and the current time. Function Description Daylight Saving Specify whether to use daylight saving time (ON / OFF). If this function is enabled, set the time period (START / END), and adjust the daylight saving time in hours (ADJUST). Time Set the current time.
5. ACCESSING THE CAMERA VIA WEB BROWSER Users can also access the network camera via a web browser, such as Microsoft Internet Explorer or Mozilla Firefox. However, the web browser is only available for single device access. If users want to access more than two devices through one interface, it’s recommended to use our supplied CMS software, Video Viewer. For details, please refer to “3. ACCESSING THE CAMERA VIA VIDEO VIEWER” at page 4.
5.2 Control panel overview 5.2.1 Live View Panel Function Icon Media Type -- User Level Description Supervisor / Power User / Normal User / Guest Select the web transmission format from the drop-down list: H.264 / MPEG-4 / Motion JPEG / QuickTime For users using Mozilla Firefox, only “QuickTime” is selectable. QuickTime is Apple Inc.’s multimedia software. You need to have QuickTime installed in you operating system before selecting “QuickTime”.
Function Icon User Level Description Flip Supervisor / Power User / Normal User Click to rotate the image 180 counterclockwise when necessary. Full Screen Supervisor / Power User / Normal User Click to display the image in full screen. captured image. 0 5.2.2 System Configuration Panel Click “Configuration” to enter the configuration page. Note: You need to be the supervisor to enter the system configuration page. If not, please re-log into the camera with the supervisor user level.
Main Menu Sub-menu Network Network Remote Config Network QoS Remote Config Network QoS DDNS Remote Config Network DDNS SNTP Remote Config Network SNTP FTP Remote Config Network FTP Mail Remote Config Network MAIL Filter Remote Config Network Filter UPnP Remote Config Network UPnP Color Remote Config Color Time Remote Config Time General Custom Setting Server Log Remote Config General Log Login Remote Config General
APPENDIX PRODUCT SPECIFICATIONS ▓ Network LAN Port YES LAN Speed 10/100 Based-T Ethernet DDNS, PPPoE, DHCP, NTP, SNTP, TCP/IP, ICMP, SMTP, FTP, HTTP, RTP, RTSP Supported Protocols Frame Rate NTSC:30, PAL:25 Number of Online Users 10 Security Web management software Multiple user access levels with password YES (Control up to 16 network cameras simultaneously) ▓ Video Video Compression H.