MOCCA CUBIC AUS/NZ 08/53066/0 Issue 2 The product complies with the European Safety Standards EN60335-2-30 and the European Standard Electromagnetic Compatibility (EMC) EN55014, EN60555-2 and EN60555-3 These cover the essential requirements of EEC Directives 2006/95/EC and 2004/108/EC
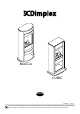
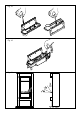
Fig. 1 MOCCA CUBIC Fig. 2 Fig. 3 Fig. 4 Fig.
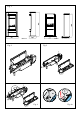
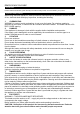
Fig. 5 Fig. 5a Fig. 5b Fig. 6 Fig. 7 Fig.
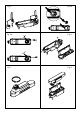
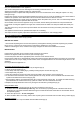
Fig. 9 Fig. 10 Fig. 11 Fig. 12 Fig. 13 Fig.
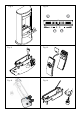
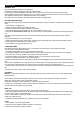
Fig. 15 Fig. 16 Fig.
DIMPLEX MOCCA/CUBIC Introduction Please read this information guide carefully to be able to safely install, use and maintain your product. Important Safety Advice When using electrical appliances, basic precautions should always be followed to reduce the risk of fire, electrical shock and injury to persons, including the following: 1. OVERHEATING WARNING: In order to avoid overheating, do not cover the heater.
General Information Only use decalcified water in this appliance. This model is designed to be free standing and is normally positioned near a wall. Always ensure that the appliance is sitting on a level surface. Although this heater complies with safety standards, we do not recommend its use on deep pile carpets or on long hair type of rugs. Please note: Used in an environment where background noise is very low, it may be possible to hear a sound which is related to the operation of the flame effect.
Operating the Fire This section describes how to activate your fire using either the manual controls or remote control. MANUAL CONTROLS The manual controls are located beneath the hinged flap. (Fig.10 for Manual Control lay out) Switch ‘A’:- Controls the electricity supply to the Fire. Note: This switch must be in the ‘ON’ ( I ) position for the Fire to operate either with or without heat. Switch ‘B’:- Press once to turn on the flame effect. This will be indicated by an audible beep.
Maintenance GENERAL TIPS Only use decalcified tap water in this appliance. Always ensure that the appliance is sitting on a level surface. If you intend not using the appliance for longer than 2 weeks, remove and empty the sump and water tank. Once installed, never move this appliance or lay on its back, without draining the water from sump and water tank. The appliance should never be operated if the lamps are not working. The lamps should be regularly inspected as described under ‘Changing lamps’.
4. Disconnect the electrical connector, located on the right side of the sump. (Fig.5) . 5. Release the right sump locking tabs by turning 90º. This allows the sump to be lifted completely from its location. (Fig. 11) 6. Gently lift up the sump, taking care to keep level so as not to spill any water. Sit the assembly in the sink. 7. Release the left sump locking tabs by turning 90º, then lift off the Nozzle. (Fig.3) 8.
Troubleshooting Symptom Cause Corrective Action The flame effect will not start. Mains plug is not plugged in. Check plug is connected to wall socket correctly. Low water level. Check that the water tank is full and there is water in the sump. Low voltage connector not connected properly. (Fig.5) Check that the connector is inserted correctly. (Fig.5) The Transducer Unit is not sitting correctly in Ensure the Transducer in sitting down into the sump the moulded recess in the sump.