PORTABLE AIR-CONDITIONER Model DAC12AC ☆Please read and retain this manual for future reference
Contents Introduction............................................................................................................... 2 Important Safeguards ............................................................................................... 3 Energy Saving Tips .................................................................................................. 3 Features And Parts List ............................................................................................ 4 Installation ......
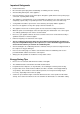
Important Safeguards • Read all instructions. • Disconnect the power plug before dismantling, assembling or before cleaning. • Avoid touching mobile parts of the appliance. • Never insert fingers, pencils or any other objects though the guards whenever the power plug is connected, especially while running. • The appliance is not intended for use by young children or infirm persons unless they have been adequately supervised by a responsible person to ensure that they can use the unit safely.
Features And Parts List Features: • No installation is required. • Easily moved with castors and handle grip holes. • Control panel with colourful LCD display. • Remote control. • Water-cooled mode can save running costs. • Low noise and strong breeze. • On/off timer function. • Three-minute restart delay to protect compressor. Part Names: 1. Control panel 2. Air outlet grille 3. Remote control sensor 4. Adjustable air flow 5. Transport handle 6. Castors 7. Evaporator air inlet 8.
Installation Before you use this unit please ensure it has been kept upright for at least 2 hours. 1. The unit should be installed in a flat dry place. Leave at least 50cm space around the unit (Fig. 1). 2. Fix the exhaust hose adapter to the exhaust terminal of the unit (Fig. 2). 3. Screw one end of the exhaust hose into the exhaust hose adapter and screw the window exhaust adapter to the other end of the exhaust hose. 4. The window kit has been designed to fit most standard vertical (Fig.
Control Panel Key Functions 1. ON/OFF: Press this button to turn the unit on or off. 2. MODE: Press this button to select from three modes: COOL, DRY and FAN 3. SPEED: Press this button to select high, medium or low fan speed 4. TIMER: Press this button to set timer-on, timer-off or no-timer. 5. UP & DOWN: Press these buttons to set the room temperature or time when in Time On/Off mode. 6. LCD DISPLAY: Displays the different signals accordingly.
Operating Instructions Cooling Mode • Press MODE (Cool on remote) button to choose cooling mode. The LCD will display • Press UP or DOWN buttons to set the desired temperature between 18-300C. • Press SPEED button (Low/Med/High on remote) to select the fan speed. The LCD will display accordingly. • Press SWING button to make the fins swing for oscillation (available on the remote control only). The LCD will display Dry (Dehumidifying) Mode • Press MODE button (or DRY on remote) to choose Dry mode.
Water Drainage • This product has a self-evaporative system. The condensing water will be recycled to cool the condenser. This will improve the units cooling efficiency and save on energy consumption. • When the unit is in cool or fan modes there is usually no need to drain any water from the unit. • During dry (dehumidifying) mode, remove the drain plug from the back of the unit (Fig. 7) and install a drain hose (Fig.
3. End of Season 1. Pull out the plug from the drain mouth and remove the water from the drain pan (Fig. 10). 2. Keep the unit running in Fan mode for several hours to ensure the inside of the unit is dry. 3. Switch off the unit and disconnect the plug from the power supply. Fig. 10 4. Remove the exhaust duct and keep stored in a safe dry place. 5. Take the batteries out of the remote control and keep in a dry place. 6. Wrap the unit with the plastic bag, and keep it in a dry place.
Dimplex 24 Months Repair / Replacement Guarantee Hagemeyer guarantees this product against defects caused by faulty workmanship and materials for 24 months domestic use (12 months commercial use) from the date of purchase. During this guarantee period, Hagemeyer will repair or replace any defective product. However, if the product includes a number of accessories, only the defective product or accessory will be replaced.