Owner's Manual Model PF2325 PF3033 690932XXXX IMPORTANT SAFETY INFORMATION: Always read this manual first before attempting to install or use this fireplace. For your safety, always comply with all warnings and safety instructions contained in this manual to prevent personal injury or property damage. To view the full line of Dimplex products, please visit www.dimplex.
Table of Contents Welcome & Congratulations . . . . . . . . . . . . . . . . 3 IMPORTANT INSTRUCTIONS. . . . . . . . . . . . . . . 4 Fireplace Installation . . . . . . . . . . . . . . . . . . . . . . 6 Operation . . . . . . . . . . . . . . . . . . . . . . . . . . . . . . . 9 Maintenance . . . . . . . . . . . . . . . . . . . . . . . . . . . 14 Warranty. . . . . . . . . . . . . . . . . . . . . . . . . . . . . . . 15 Replacement Parts . . . . . . . . . . . . . . . . . . . . . . .
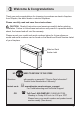
Welcome & Congratulations Thank you and congratulations for choosing to purchase an electric fireplace from Dimplex, the world leader in electric fireplaces. Please carefully read and save these instructions. CAUTION: Read all instructions and warnings carefully before starting installation. Failure to follow these instructions may result in a possible electric shock, fire hazard and will void the warranty.
IMPORTANT INSTRUCTIONS When using electrical appliances, basic precautions should always be followed to reduce the risk of fire, electric shock, and injury to persons, including the following: ① Read all instructions before using this appliance. ② The heater is hot when in use. To avoid burns, do not let bare skin touch hot surfaces. The trim around the heater outlet becomes hot during heater operation.
IMPORTANT INSTRUCTIONS ⑮ Always plug heaters directly into a wall outlet/receptacle. Never use with an extension cord or relocatable power tap (outlet/ power strip). ⑯ Do not burn wood or other materials in the electric fireplace. ⑰ Do not strike the fireplace glass. ⑱ Always use a certified electrician should new circuits or outlets be required. ⑲ Always use properly grounded, fused and polarized outlets. ⑳ Disconnect all power supply before performing any cleaning, maintenance or relocation of the unit.
Fireplace Installation WARNING: Ensure the power cord is not installed so that it is pinched or against a sharp edge and ensure that the power cord is stored or secured to avoid tripping or snagging to reduce the risk of fire, electric shock or injury to persons. WARNING: Construction and electrical outlet wiring must comply with local building codes and other applicable regulations to reduce the risk of fire, electric shock and injury to persons.
Fireplace Installation Custom Mantel Construction 1. Frame an opening of, see dimensions in Figure 1: ! NOTE: On elevated installations, the bottom edge and ½ in. (13 mm) up either side will be easily visible after installation (Figure 2). This area should be finished in a manner that is visually appealing and does not restrict air flow to the unit. Figure 1 B C Bathroom Installation A A 25.0in. PF2325 (635mm) 32.1in.
Fireplace Installation Media Installation Figure 2 Depending on the model, the media may come installed in the unit or packaged seperately. Installed Media • No additional steps are required. Media Seperately Packaged 1. Remove the front glass by lifting the 2 hooks off of the 2 mounts on the firebox. 2. Place the large media in the Media Tray in the center at the back (for optimum media effect), then carefully pour and evenly distribute the smaller media into the Media Tray. 3.
Operation General Operation WARNING: This electric firebox must be properly installed before it is used. This firebox operates with Comfort$averTM technology, which automatically adjusts the fan speed and heater wattage to safely and precisely match the requirements of the room based on the thermostat setting. The heater operates such that once the room reaches the set point, the fan and heater will continuously run at a low level, to maintain the desired room temperature.
Operation On and "Waving" down will turn the unit Off. is turned off or the flames are turned back on. • The unit will turn on with the same functions that it was set to when it was turned Off and the intake temperature will be indicated on the On Screen Display. 4. → Adjusted by repeatedly pressing the corresponding button on the remote.* ! NOTE: When any button is pressed the intake temperature will be displayed on the On Screen Display for 5 seconds. 2.
Operation Figure 3 ① gWaveTM Controls LED Pilot Light Gesture On/Off ③ ⑦ ⑥ ⑩ ② ③ ④ ⑤ ⑥ ⑦ ⑧ ⑨ ⑩ ⑪ responding button on the remote when the heater is on. • Indicated by the icon being illuminated on the Floating Display™ and the speed of the fan will decrease proportionally. 7. Boost: Turns On/Off the heater boost function. Runs the unit at the full rated wattage. → Activated and adjusted by repeatedly pressing the corresponding button on the remote.
Operation using the buttons on the remote the lighting of the unit can be adjusted to any shade of any colour. The initial setting is no light (R=0, B=0, G=0) and can be adjusted, while the display is flashing, by pressing the outlined buttons (below) to adjust the tones. • Red Tones: increase and the decrease. • Green Tones: increase and decrease. • Blue Tones: decrease. increase and 9. Brightness: Changes the brightness of the lights in the unit.
Operation Resetting the Temperature Cutoff Switch Should the heater overheat, an automatic cut out will turn the fireplace off and it will not come back on without being reset. It can be reset by unplugging the unit and waiting 15 minutes before plugging the unit back in. Once power is restored the unit will start to reset itself. During this process you will hear repeated beeps and the display may turn on and off.
Maintenance WARNING: Disconnect power before attempting any maintenance or cleaning to reduce the risk of fire, electric shock or damage to persons. CAUTION: Allow adequate time for the element and body casing to cool before attempting to cleaning of the unit. It is suggested that the heater be inspected regularly, for cleanliness of the fan exhaust and intake grille (if applicable) and air filter, to ensure optimal performance is maintained.
Warranty Products to which this limited warranty applies period of 1 year from the date of the first purchase of such products. This limited warranty applies to the following models of your newly purchased Dimplex electric fireplace 690932XXXX and to newly purchased Dimplex fireplace surrounds and trims.
Warranty product or part without charge. If Dimplex is unable to repair or replace such product or part, or if repair or replacement is not commercially practicable or cannot be timely made, Dimplex may, in lieu of repair or replacement, choose to refund the purchase price for such product or part. • Limited warranty service will be performed solely by dealers or service agents of Dimplex authorized to provide limited warranty services.
Replacement Parts Flicker Motor. . . . . . . . . . . . . . . . . . . . . . . . . . . . . . . . . . . . . . . 2000480100RP Heater Assembly (with cutouts) . . . . . . . . . . . . . . . . . . . . . . . . . 2203650100RP Cord Set . . . . . . . . . . . . . . . . . . . . . . . . . . . . . . . . . . . . . . . . . . 4100090204RP Remote Control . . . . . . . . . . . . . . . . . . . . . . . . . . . . . . . . . . . . . 3001250100RP Main Control Board. . . . . . . . . . . . . . . . . . . . . . . . . . . . . . . . . .