Switzerland Dino-Lite digital microscope User Manual FR - Mode d’emploi www.ideal-tek.
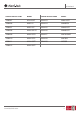
Switzerland CONRAD ARTICLE CODE MODEL CONRAD ARTICLE CODE MODEL 1284397 AD4113ZT 1284413 AM4116ZT 1284406 AM2111 1284414 AM4023X 1284407 AM3113T 1284415 AM4515ZT 1284408 AM4112PZT 1284416 AM4815ZT 1284409 AM4113T5 1284417 AM7013MZT 1284410 AM4113TL 1284418 AM7023 1284411 AM4113ZT 1284419 MS35B 1284412 AM4115ZT www.ideal-tek.
Switzerland FRANÇAIS Merci pour l’achat d’un microscope numérique Dino-Lite. Le logiciel DinoCapture est conçu pour vous donner la meilleure expérience possible de la microscopie digitale par les inventeurs du microscope numérique de poche. Le logiciel Dino-Capture fonctionne sur des ordinateurs avec un système d’exploitation Windows XP, Windows Vista ou Windows 7/8. Le logiciel DinoXcope est conçu pour fonctionner avec Apple Macintosh OS.
Switzerland INSTALLATION DU LOGICIEL Le logiciel DinoCapture ou DinoXcope est sous licence de Anmo Electro Corporation et est soumis à un Contrat de Licence Utilisateur Final (CLUF) que les utilisateurs devront accepter pendant le processus d’installation. Avis important: NE PAS brancher le câble USB de la Dino-Lite ou DinoEye à l’ordinateur avant d’installer le logiciel. 1. Utilisez le CD livré avec votre Dino-Lite pour installer le logiciel et les pilotes DinoCapture et DinoXcope.
Switzerland INSTALLATION DU MATÉRIEL 1. Après l’installation complète du logiciel et du pilote DinoCapture, connectez le Dino-Lite à l’un des ports USB de votre ordinateur. 2. Veuillez utiliser un port USB 2.0 qui est entièrement alimenté. Certains ports USB sur les ordinateurs portables ne fournissent pas suffisamment de puissance. 3. Le pilote sera installé automatiquement. Veuillez ATTENDRE que la notification : ‘logiciel pilote de périphérique installé avec succès’ apparaisse. 4.
Switzerland 5. Les modèles avec la lettre L fonctionnent à une distance de travail plus longue. Ces modèles atteignent la mise au point seulement à une certaine distance de l’objet. 6. Les modèles AD et Edge ont des couvercles / capuchons échangeables. Quelques couvercles sont conçu pour être cliqué sur le microscope, Pour des autres, il faut aligner les lignes rouges sur le capuchon avec la face avant du Dino-Lite pour le retirer ou le placer, puis tourner le couvercle à 180 degrés. 7.
Switzerland Réglages – personnaliser la façon dont le logiciel fonctionne comme: • Montrer ou cacher des éléments sur l’écran • Les propriétés de mesures • La manière dont le Microtouch ou la pédale à pied (si elle est jointe) fonctionne • Moteur pas à pas • La connexion sur IP • La fonction du reconnaissance de code à barres • GPS externe • La fonction de mise à jour automatique Aide – accéder au manuel d’utilisation complet sur l’écran, ou lire des informations sur le DinoCapture 2.
Switzerland BARRE DE GESTION DE LA FENÊTRE DE PRÉVISUALISATION Cette fenêtre nous permet de basculer entre les fenêtres, si deux ou plusieurs Dino-Lite sont connectés en même temps ou si plusieurs images sont ouvertes. BARRE D’OUTILS La barre d’outils est divisée en quatre parties : Des outils de dessin – Le jeu d’outils de dessin vous permet d’écrire du texte et dessiner sur les images. La barre est située en dessous de la barre de gestion de la fenêtre de prévisualisation.
Switzerland LIGNE Faire un clic gauche et glisser à la longueur désirée, et cliquer à nouveau pour terminer. LIGNE CONTINUE Cliquer et faire glisser pour former une section de la distance. Cliquer à nouveau pour commencer une autre section. Continuer jusqu’à ce que la distance totale désirée soit mesurée. Double-cliquer pour terminer. POINT À LIGNE Créer une ligne pour représenter la base en cliquant une fois pour commencer, faire glisser, puis cliquer à nouveau pour mettre le point final.
Switzerland CERCLE DE GRILLE La hauteur correspondra à l’agrandissement choisi. POINTEUR EN CROIX La position XY du pointeur en croix peut être déplacée lorsqu’elle est sélectionnée. La position du curseur est l’emplacement du pointeur de la souris et l’emplacement 0,0 correspond aux coordonnées du centre du pointeur en croix. ECHELLE DU RÉTICULE Le incréments du réticule d’échelle peuvent être comparée à l’échelle afficher dans le coin inférieur gauche. Le centre de la croix peut être déplacée.
Switzerland AGRANDISSEMENT Entrer l’agrandissement dans la zone bleue. Le grossissement peut être lu sur le cadran qui est sur le microscope. UNITÉS Sélectionner les unités de mesure, pouce, mil, mm ou um. MENU D’ÉTALONNAGE Sélectionner l’étalonnage, créer un nouveau profile d’étalonnage ou ouvrir le dossier d’étalonnage. LECTEUR DE CODE BARRES Cliquez sur l’icône pour activer et désactiver la détection de code à barres.
Switzerland Maximaliser - Permet de voir la vidéo en temps réel ou une image en plein écran.
Switzerland INTERFACE DU LOGICIEL DINOXCOPE / MAC Il y a quatre sections principales dans la fenêtre du programme DinoXcope: 1. Barre d’action • Prendre une photo. Si vous voulez faire des mesures sur la photo plus tard, ouvrez l’image en double-cliquant et ajoutez le grossissement d’entrée que vous avez lu de la molette de mise au point. • Prendre une vidéo. Choisissez le taux d’armature, le temps d’enregistrement, la qualité et de compression.
Switzerland • Utilisez le menu de commandes (la barre de menu est en haut de l’écran) pour modifier les paramètres, utilisez le zoom (numérique), figer l’image, changez la résolution ou modifiez le fonctionnement du bouton Microtouch. • Utilisez la fonction de mesure en direct (dans le menu outils) pour ouvrir une fenêtre de sélection spéciale pour le dessin et les outils de mesure. Après la sélection, cliquez sur ok et utilisez l’outil sur l’image en direct. 4.
Switzerland pas couverts par la garantie. Pour des questions de garantie veuillez contacter le revendeur ou le magasin où vous avez acheté le produit. SUPPORT Si vous avez un problème ou une question avec votre Dino-Lite ou le logiciel DinoCapture, veuillez contacter votre revendeur. Un manuel d’utilisation étendu pour DinoCapture peut être trouvé dans le logiciel. Dino-Lite Mode d’emploi www.ideal-tek.