
Instructions

www.ideal-tek.com
Switzerland
5
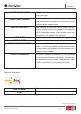
2. Please use a USB 2.0 port that is fully powered. Some USB ports on por-
table computers do not supply sufcient power.
3. The driver will be automatically installed. Please WAIT until the notica-
tion appears: ‘Device driver software installed successfully’.
4. Now start DinoCapture 2.0 by double clicking on the desktop icon.
5. The LED lights should go on and an image should appear in DinoCapture.
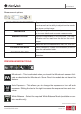
HARDWARE FEATURES
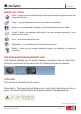
1. At the center of the device, the adjustable dial is used to set the focus.
The focus of the image depends on the distance to the object. Once you
have focused on the object, you can read the magnication rate achieved
from the number next to the symbol.
2. The models in the AM/AD 411X series feature a magnication lock. The
magnication lock is particularly useful for repetitive inspection at a given
level of magnication.
3. Dino-Lite models with the letter T in their product name have a Micro-
touch function at the cable end of the device. Touching this sensor will
capture the current image or start/stop video recording (for usb-devic-
es). On the Dino-Lite high speed real time models the Microtouch sensor
can be used to switch the LEDs on/off (all models) or freeze the image
(AM5116 models only).
4. Models with the letter Z in their product name have a polarization func-
tion, that can be controlled by turning the adjustable cap.
5. Models with the letter L operate at a longer working distance. These mod-
els only achieve focus at some distance from the object.
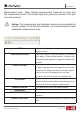
6. The AD and Edge models have exchangeable front covers/caps. Align the
red lines on cap and frontend of the Dino-Lite to remove or place the cap,
then turn the cap 180 degrees. Some caps are designed to be clicked
onto the microscope. In this case, there is no red line on the cap.
7. The DinoEye models are designed as a replacement of the existing ocular
of a traditional microscope. The U model is intended to be placed over
Dino-Lite User manual
ENGLISH