
Instructions

www.getdio.com
EN | 7
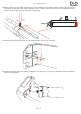
Important: If you install several roller shutter motors, please install each motor separately with
its remote control unit.
The motor is connected (paired) with its remote control unit the rst time the shutter motor is
switched on. Please do not connect all your shutter motors at the same time or they will all be
linked to the same control unit.
The motor will retain the first remote control unit in memory in the event of a power failure.
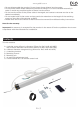
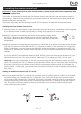
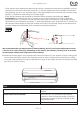
Installing the first remote control unit:
1 Turn the power on; the wireless motor will make two back-and-forth movements confirming that
it is in pairing mode; in other words that it is ready to be linked to a control unit.
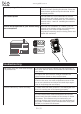
2 Within 2 minutes of connecting the motor to the power supply, press
the ON ('I') button on the remote control unit for 2 seconds; the motor
will make a brief to-and-fro movement to confirm that the link has been
established.
3 Within 2 minutes of connecting the control unit, check the up or down movement of the shutter
(the ON ('I') button to raise and the OFF ('O') button to lower). If the movement is not correct,
within 12 secondes, you can reverse the direction of the movements by pressing the OFF ('O')
button for 2 seconds; the shutter motor will make a brief to-and-fro movement to conrm the
change.
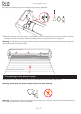
If you use the DiO 1.0 brightness detector (Ref. 54783), you must reverse the direction of your
shutter control unit for it to work correctly. Select ON ('I') to lower and OFF ('O') to raise.
Warning: During the installation, if you are not performing the next operation within the time
given (i.e.: pressing the ON (‘I’) button on the remote control unit for 2 seconds after connecting
the motor), the motor wil make a brief to-and-fro movement informing that it’s no longer on
pairing mode. In that case, you should turn the power o and on in way to restart the installing
from step 1.
Adding an additional control unit in 2 clicks
4 To add an additional DiO 1.0 control unit (remote control, wireless switch, LiteBox or HomeBox
to control using your smartphone, etc.), press the ON ('I') button of the main remote control
(rst control unit installed) for 2 seconds. The motor will make a brief to-and-fro movement to
conrm the pairing mode, then within 12 seconds press the ON ('I') button of the new control
unit. The motor will make a brief to-and-fro movement once more to confirm that the new
control unit has been added.
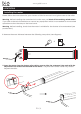
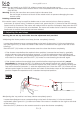
III. Installing the remote control unit
I
O
On
O
1 2
2s.