DRD303RA OWNER’S MANUAL SATELLITE RECEIVER
Safety Information WARNING To reduce risk of fire or shock hazard, do not expose this receiver to rain or moisture. WARNING RISK OF ELECTRIC SHOCK DO NOT OPEN Cautions TO REDUCE THE RISK OF ELECTRIC SHOCK, DO NOT REMOVE COVER (OR BACK). NO USER SERVICEABLE PARTS INSIDE. REFER SERVICING TO QUALIFIED SERVICE PERSONNEL. This symbol indicates “dangerous voltage” inside the product that presents a risk of electric shock or personal injury.
Table of Contents First Things First ............................................................3 What’s in the Box ............................................................................. 5 Using This Manual ........................................................................... 6 The Only Rule: Point and select ................................... 7 Program Guides .............................................................9 Bringing Up the Program Guides .......................................
Table of Contents Using Fetch .................................................................................... 32 The Mailbox ................................................................................... 32 Alternate Audio Programs ............................................................ 34 Picture Size ..................................................................................... 34 System Test .....................................................................................
First Things First Hi, my name is jay... ➣ and I wrote this User Manual. You can believe me when I tell you that you should read this page first because it gives you a game plan for attacking this rather large manual. 1 First Things First Only Rule: 2 The Point and select ➣ Read the First Four sections 3 Program Guides 4 The Menu System 5 Lists & Limits ➣ The first four sections of the manual introduce you to your DSS® system, and show you how to use the on-screen guides and menus.
First Things First What is the DSS® System? You’ve purchased the DSS® Digital Satellite System, so you already know a lot of the great things it offers. You know that the DSS® system uses the latest satellite technology to deliver television programming to your home. And you know that the transmissions are digital, so the quality of the picture and audio rivals that of laser discs and CDs. You know the dish is small—18 inches wide—and that it often can be installed in a matter of hours.
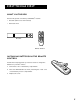
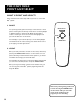
First Things First What’s in the Box The following items come with your RCA DSS® receiver: • Receiver (with access card inserted) • Remote Control • OFF ON VCR TV DSS ALT • MENU SELECT ON/OFF GUIDE DISPLAY DISPLAY MENU SELECT ANTENNA PREV CH CLEAR 1 2 3 4 5 6 7 8 9 Receiver CHAN VOL 0 ANT • FAV INPUT ALT AUD REW STOP REC MUTE PLAY PAUSE FF FETCH Remote Control Installing Batteries In the Remote Control Follow these steps whenever you need to install or change the bat
First Things First Using This Manual There are a couple of conventions used in this manual that might help you read it. • Words that appear in ALL CAPS indicate the name of a button. • The names of on-screen menu option are shown in italics. Important Note about This User’s Manual This manual assumes that your DSS® system has been installed, meaning: 1. The DSS® satellite dish has been installed, correctly pointed at the satellite, and connected to your DSS® receiver. 2.
The Only Rule: Point and Select What? There’s a Rule? ➣ Well, it’s not exactly a rule, but more of a guideline for using the on-screen displays. If you understand this one thing, you have enough knowledge to get around the menuing system and program guides. 1 First Things First Only Rule: 2 The Point and select ➣ 3 Program Guides ➣ The Menu System 5 Lists & Limits ➣ 4 Once you understand Point and Select, you can do just about anything you want with the menuing system.
The Only Rule: Point and Select What is Point and Select? Point and Select is the two-step method you use to control the DSS® system. 1. Point You point by pressing the arrow keys on the remote or front panel. Pressing the arrow keys moves the on-screen highlight to different items in the Program Guide and the menu screens. Pressing an arrow once moves the highlight one space in the direction of the arrow.
Program Guides What is a Program Guide? Only Rule: 2 The Point and select ➣ Using the Program Guide is easy as long as you remember the Point and Select rule. Point to items on the screen by pressing the arrow keys on the remote or front panel. Then, press MENU•SELECT to tune to that program. 1 First Things First ➣ A program guide is an on-screen programming schedule. There are several types of guides, each presenting the schedule in a different format.
Program Guides Bringing Up the Program Guides You can access the program guides by using the GUIDE button on the remote, or by selecting Program Guide from the Main menu. Using the GUIDE Button Each press of the GUIDE button takes you to an alternate type of program guide: • Press GUIDE once to see the seven-channel Grid Guide. • Press GUIDE again to see the five-channel Info Guide which contains program information.
Program Guides Scrolling Page By Page If you want to scroll up or down through the Program Guide faster, press the Channel Up/Down buttons on the remote control. The highlight scrolls a page at a time. This is called “paging.” Tuning to a Program • To tune directly to a program listed in the guide, point to the program and press MENU•SELECT. • To see information about a program in the guide, press DISPLAY. Then, you can select View Channel to tune to that channel.
Program Guides Types of Program Guides There are five types of program guides: the Grid Guide, the Info Guide, the Topic Guide, the Channel Guide, and the Attractions Guide. The Grid Guide Shows the schedule in a time-and-channel format, similar to a TV schedule listed in a newspaper. The seven-channel Grid Guide. The Info Guide Shows you five channels and includes a brief description of the selected program. The five-channel Info Guide gives you a brief program description.
Program Guides The Topic Guide Lets you sort the programming schedule to show certain topics, such as “movies” or “sports.” The Topic guide. The Channel Guide Displays the programming schedule in a channel-by-channel format. The Channel guide. The Attractions Guide Displays coming attractions and special events information. See the section on purchasing pay-per-view programs for more information on the Attractions guide. The Attractions guide.
Program Guides Sorting the Grid and Info Guides There are six on-screen choices—called “buttons”— at the bottom of the Grid Guide and the Info Guide: down arrow, Movies, Sports, Other, All, and Sort. The Sorting buttons are at the bottom of the screen. The arrow button allows you to scroll down through other channels in the guide. Point to the down arrow, and then press MENU•SELECT to scroll down through the program guide.
Program Guides Allows you choose from a list of sorting topics. Once you have selected a sorting topic from the list, your guide will be simplified to show only that type of program. After selecting a topic, a Themes button may appear in the place of the Other button. Resets the guide to show all available channels and listings.
The Menu System What’s a Menu? ➣ The DSS® menu is a list of choices, just like a menu in a restaurant. And, just as a restaurant menu is divided into sections such as appetizers, entrees, and desserts, the on-screen menus are also separated into sections to help you find the information you need. 1 First Things First Only Rule: 2 The Point and select ➣ Don’t Forget Point and Select Program Guides 4 The Menu System ➣ As with all of the on-screen displays, you use Point and Select to navigate.
The Menu System Using the Menu System To bring up the Main Menu, press MENU•SELECT on the remote. The Main Menu. To use the menu system, you need to know the Point and Select rule. Use the arrows on the remote to point to an item on the screen, and then press MENU•SELECT to select it. Exit and Help There are Exit and Help buttons at the top of most screens. Point to Exit and press MENU•SELECT to leave that screen. Point to Help and press MENU•SELECT to see more information about that screen.
The Menu System Menu Descriptions This section briefly describes each of the available Main Menu options. Detailed information about each menu is included in the sections of the manual which describe each menu. Program Guide Shows the on-screen programming schedules. Mailbox Use to read your mail messages. Purchases Use to review or cancel upcoming purchases, and to review past purchases.
The Menu System 20
Lists & Limits Different Drummers 3 Program Guides 4 The Menu System ➣ In addition to activating the ratings, spending, and channel limits, the system lock feature keeps anyone from changing any of the limits without first entering a four-digit password. The Only Rule: Point and select ➣ You can set up a parent approved channel list so that selected channels cannot be viewed when the system is locked unless the system password is entered.
Lists & Limits An Overview When you select Lists & Limits from the Main Menu, the first screen you see is the Ratings Limit screen. By moving down through the other options, you can set per-event spending limits, create favorite channels lists, and also lock the system by assigning a password. Setting the Ratings Limit The Ratings Limit menu enables you to set a maximum viewing limit for rated movies (based on the MPAA ratings system), as long as the program provider has transmitted the proper code.
Lists & Limits Setting Up Spending Limits Use the Spending Limit option to indicate a per-event spending limit for pay-per-view programs. 1. Point to Spending Limit, and press MENU•SELECT. Set a per-event spending limit. 2. Use the arrow keys to enter a single-program spending limit. After a spending limit is set and the system is locked, you must enter the system password to purchase a pay-per-view program that costs more than your spending limit allows.
Lists & Limits 1. Point to Channel Lists and press MENU•SELECT. Select a Favorite channel list to edit. 2. Point to a channel list option and press MENU•SELECT. Channels containing a checkmark are included in the channel list . 3. Use the arrow keys to point to a channel, and press MENU•SELECT to remove (or replace) the check mark. After you have set up the channel lists and locked the system, you will need to enter the system password before you can modify the existing channel lists.
Lists & Limits Parent Approved Channel List The Parent Apprv channel list enables you to limit access to channels by creating a list of acceptable channels, and then locking the system. When the system is locked, the Parent Apprv list overrides all other channel lists, and requires that you enter the four-digit system password to view an unapproved channel.
Lists & Limits 2. Use the arrows or the digit keys to enter a four-digit system password. 3. Enter the password a second time to confirm it. After the system has been locked, you must enter the correct password in order to access the Lists & Limits menu, so Don’t Forget Your Password! If you do forget your password, contact your program provider’s authorization center. Unlocking the System When the system is unlocked, the spending and ratings limits, that you have set are no longer in effect. 1.
More Features What? There’s More? If you’ve read this far, then you’ve seen how to use the on-screen program guides, how to get around in the menu system, and how to use the Lists & Limits feature. This section highlights the rest of the features offered by your DSS® system. Don’t be afraid to use Point and Select to explore all of the features on your own.
More Features Pay-Per-View Programs Pay-per-view programs (PPV) are programs that you purchase— like a movie ticket—on an event-by-event basis. For instance, there might be a specific channel that runs nothing but previews for movies. After previewing the movie, you can purchase it or find out more details about it. PPV programs can also be found in the Program Guide.
More Features Using the Program Guide for PPV Programs When you use the Program Guide to select a PPV program, the Program Details screen gives you a few more options. Use the Program Guide to get to the Program Details screen. Selecting View Channel gives you additional information about the program (such as a preview, if available). Selecting Channel Guide gives you a channel guide in list format.
More Features Using the Purchases Menu The Purchases menu allows you to review upcoming and past purchases. The Purchases menu shows you upcoming or past purchases. The list of purchases may be longer than one screen; use the down arrow keys to see more items. The display also shows the title, channel, date, time, and cost of each program. • Note that the Past Purchases list might be modified after each billing cycle and still show purchases for which you have already paid.
More Features Timer Feature The Timer feature allows you to preset your system to automatically tune to a particular channel at a predetermined time. To use the Timer feature, select Timers from the main menu to bring up the Timers screen. Select a Timer (1, 2, 3, or 4) and then use the arrow keys to complete the on-screen sentence. When the sentence is complete, select Run Timer. Complete the sentence to set up the timer for each of the four available Timer options.
More Features Using Fetch Press the FETCH button on the remote to bring up the current channel list. Then Point and Select a channel from the fetch list. The Fetch menu gives you a logo-based channel list. The Mailbox The mailbox shows you messages that are sent—or “mailed”— from your program providers. For example, you may receive a message calling your attention to a new service.
More Features Checking your mail Select Mailbox on the Main menu to view your mail. 1. Point to a message and press MENU•SELECT. The message is opened for you to read. The Mail menu. 2. Press MENU•SELECT again to close the letter. After you read a message and want to erase it, point to Erase and press MENU•SELECT. When you exit the display screen, messages not erased are saved in memory. Mailbox Size The mailbox has enough memory to store as many as ten (10) 200-character messages.
More Features Alternate Audio Programs Alternate Audio allows you to select different audio programs (when available) to be played with the video. For example, audio broadcast in a second language may be available for certain programs. There are two ways to change the audio: • Press ALT AUD on the remote. • Point to Alternate Audio from the Preferences menu and press MENU•SELECT. ALT AUD Remote Button Temporary audio selections are made by pressing ALT AUD on the remote.
More Features System Test The System Test display screen is accessed through the Options menu, and allows you to initiate diagnostic procedures on the DSS® system. You should use this feature to get your Access Card number, or when your receiver doesn’t seem to be working correctly. There are four separate tests: signal, tuning, phone connection, and access card. A message screen appears, telling you whether the system passed each test.
More Features Help Buttons Help buttons appear in many display screens. To see information about the display screen you are using, point to the Help button and press MENU•SELECT. Press MENU• SELECT again to remove the message from the screen. Menu Help Select About DSS from the Assistance menu to choose from a list of on-line Help topics.
Connections Things to Know Before Connecting Components Protect Your Components from Power Surges • Connect all components before plugging any power cords into the wall outlet. • Always turn off the DSS® receiver, TV and other components before you connect or disconnect any cables. Position Cables Correctly to Avoid Audio Hum or Interference • Insert all cable plugs firmly into their jacks.
Connections Connecting Your DSS® Receiver to Your TV If your DSS® system has not been professionally installed, or if you move your system or add a component, refer to these pages to help you connect your system. Jacks and Cables S-Video Jack and Cable (S-VHS) The S-Video jack provides the best picture quality for your DSS® system. This jack is available on many TVs and is used in conjunction with audio cables to connect the DSS® receiver to your TV.
Connections Choosing a Connection The following pages show four examples of hookups commonly used to connect the DSS® receiver with a TV and other components. Refer to your TV and VCR Owner’s Manuals for more information on hooking up your specific components. Connection A Provides the best possible picture and stereo audio quality. To use Connection A, you must have: • TV with S-Video input, plus separate RF and audio/video inputs (jacks).
Connections Connection A TV IN S-VIDEO VIDEO R AUDIO L Best Picture and Sound Quality SATELLITE DISH To use this connection you must have: • TV with separate RF, audio/video, and S-Video inputs (jacks) • VCR with RF and audio/video inputs • Coaxial, audio/video, and S-Video cables To connect TV, VCR and antenna or cable box. 1. Connect coaxial cables as shown.
Connections Connection B TV IN VIDEO R AUDIO L SATELLITE DISH Very Good Picture and Sound Quality To use this connection you must have: • TV with separate RF and audio/video inputs (jacks) • VCR with RF and audio/video inputs • Coaxial and audio/video cables To connect TV, VCR and antenna or cable box. DSS RECEIVER OUT TO TV IN FROM ANT VCR CH3 CH4 1. Connect coaxial cables as shown.
Connections TV Connection C IN SATELLITE DISH Good Picture and Sound Quality To use this connection you must have: • TV with RF input (jack) • VCR with RF and audio/video inputs • Coaxial and audio/video cables To connect TV, VCR, and antenna or cable box. DSS RECEIVER OUT TO TV VIDEO R VIDEO R CH4 CH3 VCR IN FROM ANT CH3 CH4 VIDEO IN L AUDIO L SATELLITE IN CABLE OR OFF-AIR ANTENNA AUDIO IN R 1. Connect coaxial cables and audio/video cables as shown.
Connections Connection D TV IN Good Picture and Sound Quality) SATELLITE DISH To use this connection you must have: • TV with RF input DSS RECEIVER CABLE OR OFF-AIR ANTENNA OUT TO TV CH4 CH3 • VIDEO R VIDEO R AUDIO L IN FROM ANT Coaxial cables AUDIO L SATELLITE IN To connect TV and antenna or cable box: 1. Connect coaxial cables as shown. To receive DSS® programming: • Tune TV to channel 3 or 4 (depending on how you set the CH3/CH4 switch on the back of the receiver.
Connections Interactive Setup If you self-installed your satellite dish, you may have already used the interactive setup to find the dish pointing coordinates, acquire and fine-tune the signal, and run a system test. If you need to run the interactive setup again, go to the Assistance menu and select Setup. If you just want to check your dish pointing coordinates, or run the signal strength meter, select Dish Pointing from the Main menu.
Reference How It All Works Although the DSS® system is simple to use, there are a number of parts in the system. Don’t be overwhelmed. This section explains how these different parts work together to bring a picture to your screen. What’s It For? This section also describes the controlls located on the front and back of the receiver. What Else Can it Do? Your remote capable of controlling other devices as well.
Reference Parts of the DSS® System One way to understand the DSS® system is to look at the different parts of the system—from the studio down to the DSS® receiver and remote control in your living room. Uplink Center Satellite Dish Antenna Satellite ➣ Authorization Center World View These parts make up the DSS® system “big picture.” Uplink Center Transmits programming up to the satellite. Satellite Relays the programming signals back to your satellite dish.
Reference Home View These parts are inside of or attached to your house. Satellite Dish DSS Receiver Telephone Jack Access Card and Security Clip Remote Control DSS® Satellite Dish Picks up the satellite’s coded program information and relays it to your DSS® receiver. (Your satellite dish may be installed in different locations on or around your house. The satellite dish must, however, be pointed in a southern direction toward the satellite.
Reference Controls and Buttons This part of the Reference sections discusses the controls and buttons located on the receiver and the remote control. ON/OFF DISPLAY MENU SELECT ANTENNA The Access Card door slides open so that you can replace the card when necessary. Front Panel Controls ON/OFF Turns the DSS® receiver’s power on or off. DISPLAY Brings up the on-screen channel marker. ANTENNA Switches the source of the video signal from DSS® satellite signals to an off-air antenna or cable signal.
Reference IN FROM ANT PHONE JACK S-VIDEO VIDEO R AUDIO L WIDE BAND DATA SATELLITE IN CH 4 OUT TO TV CH 3 REMOTE IN Back Panel IN FROM ANT Use to connect an off-air antenna or cable TV signal to the DSS® system. OUT TO TV Use to connect the DSS® receiver to your TV. However, if your TV has audio/video jacks, you should use those jacks to get better picture and sound quality. CH3/CH4 SWITCH If a coaxial cable is used to connect the DSS® receiver to your TV, you must set the CH3/CH4 SWITCH.
Reference Remote Control Buttons • OFF ON OFF•ON TV TV DSS ALT Tells the remote to control the TV. VCR VCR Turns the device you are controlling on or off. • MENU SELECT Tells the remote to control the VCR. GUIDE DISPLAY CLEAR PREV CH ALT Tells the remote to control an alternative device connected to your TV. DSS® Turns on the DSS® receiver and tells the remote to control DSS® system functions. 1 2 3 DISPLAY Brings up the on-screen channel marker.
Reference ANT Lets you switch the source of the video signal from DSS® satellite signals to an off-air antenna or cable signal. TRANSPORT Buttons (REW, STOP, PLAY, FF, PAUSE, REC) Use when controlling an auxiliary device, such as a VCR or Laserdisc player. Note that the REC (record) button is used for one-button recording when using a program guide. FETCH Brings up the on-screen logos that correspond to your current channel list. Use the arrows to point to a logo and tune to that channel.
Reference Programming the Remote to Control Your VCR To determine whether your remote needs to be programmed, turn the VCR on, point the remote at the VCR, and press the VCR button. Then press ON•OFF or CHAN UP or DOWN to see if the VCR responds to the remote commands. Follow these steps to program your remote to control your VCR: 1. Turn on the VCR. This remote may not operate all models of the brands that are shown. Use the codes shown in this manual, or on the sheet packed with your remote. 2.
Reference Programming the Remote to Control a Cable Box 1. Turn on the cable box. 2. Look up your brand and its code number(s) in code list on page 55. 3. Press and hold the ALT button. 4. Press and release the DSS® button. 5. Enter the three-digit code from the code list. 6. Release the ALT button and press ON•OFF or CHAN UP or DOWN to see if the cable box responds to the remote commands. 7. Repeat these steps using the next code listed for your brand until the cable box responds to the remote commands.
Reference Remote Codes TV Codes Akai .................................................. 002 Anam National ................................ 038 AOC .......................... 011, 019, 027, 088 Candle .............................. 011, 027, 033 Citizen ...................... 011, 027, 033, 064 Colortyme ........................ 011, 027, 084 Concerto ................................... 011, 027 Contec/Cony ..... 036, 037, 040, 042, 064 Craig .................................................
Reference VCR Codes Aiwa .......................................................... 015 Akai .................. 003, 017, 022, 023, 063, 066 Audio Dynamics ................................ 014, 016 Broksonic ................................................... 010 Candle .............................. 007, 009, 013, 044, 045, 046, 052 Cannon .............................................. 008, 053 Capehart .................................................... 001 Citizen ..............................
Reference Glossary The following is a list of terms used in this manual. There is also a glossary contained within the Assistance menu of your DSS® system. Access Card Identifies you to the DSS® service providers and is required for your DSS® system to work. Do not remove the access card except when a new card has been issued to replace the original. Alternate Audio Refers to the different audio channels that may be broadcast in conjunction with a video program.
Reference Main Menu The first list of choices in the DSS® on-screen menu system. Press the MENU button on the remote or front panel to bring up the Main menu. Past Purchases Detailed list of the programs that you have already purchased and viewed. Point and Select The method of using the remote control (or front panel) buttons to navigate to and make choices among the different parts of the on-screen displays.
Reference Troubleshooting The DSS® System Test allows you to run a basic diagnostics check on your DSS® system. If you are experiencing any trouble with your system, run the system test. Make sure that • All connections—jacks, cables, etc. are correctly in place. See Connecting Your DSS® Receiver, page 46, for more information. • There are batteries in the remote, and that they are working correctly. • The access card is installed in the receiver.
Appendix A: Warranty Information Toll-Free Telephone Product Help You can reach Thomson Consumer Electronics at the following number: 1-800-679-4776 (Toll free inside U.S.A.) Our toll-free DSS® System number operates from 8:00 a.m. to 10:00 p.m. EST on weekdays and 10:00 a.m. to 10:00 p.m. EST Saturday and Sunday. Thomson provides a toll-free telephone number to help you with any problems you may encounter with your DSS® System, as many problems can be diagnosed over the phone.
Appendix A: Warranty Information What we will do: • • During the initial 90 days: Exchange the defective portion of your DSS® with a new or, at our option, refurbished unit and correct any basic installation defects at no cost to you. After the 90 days and within one year: Exchange the defective portion of your DSS® with a new or, at our option, refurbished unit. We will bill you a flat exchange charge to replace a defective receiver. This charge covers the labor cost for its repair.
Appendix A: Warranty Information To receive a replacement receiver after we have received your unit: • • • • • Write the RA number on the outside of the carton used to return the unit. Make sure you insure your shipment in case of damage or loss. Carefully pack the unit using the original box and packing material if possible. Please retain all accessories that were included with your unit such as the remote control hand unit. Include with the shipment: – Evidence of purchase date such as a bill of sale.
Appendix B: FCC Regulations FCC Registration Information Your DSS® equipment is registered with the Federal Communications Commission and is in compliance with parts 15B and 68, FCC Rules and Regulations. 1. Notification to the Local Telephone Company. On the bottom of this equipment is a label indicating among other information, the FCC Registration number and Ringer Equivalence Number (REN) for the equipment. You must, upon request, provide this information to your telephone company.
Appendix C: Accessories Accessory Order Form for RCA DSS® Models Audio/Video Cables Description RG-6 Coaxial Burial Cable with weatherproof “F” connectors Part No. Price Qty Total RG-6 Coaxial Cable 12 feet D912 $12.95 25 feet D925 $15.95 50 feet D950 $21.95 75 feet D975 $29.95 100 feet D901 $29.95 6 feet D906 $12.95 12 feet D914 $14.95 S-Video Cable D913 $12.95 “F” Connector D905 $ 5.
Appendix C: Accessories To order accessories, contact your local RCA Dealer. If a dealer is not nearby, you can also follow the instructions below to order by telephone. United States and Canadian Orders To place your order by phone, have your Visa or MasterCard ready and call the toll-free number listed below between 8 AM and 8 PM Eastern Standard Time. Use this number only to place an order for accessory items listed on this order form.
Index A G-H P Access Card 47 Grid Guide 12 Password, system new card setup 35 Access Card number 4 Help 18, 35 auto-help 35 ALT AUD button 34 menu help 36 Alternate audio programs 34 Arrow keys 8 on-line 35 Help Buttons 36 Attractions Guide 13, 29 Remote control forgetting 25 Remote Control Setup 51 Pay-Per-View Programs 28 RF jacks 38 Picture Size, changing 34 PPV (pay-per-view) 28 Program Guide 9 I-L All Button 15 Auto Help 35 Info Guide 12 Arrow button 14 Interactive setup 44 Bac
Thomson Consumer Electronics is one of the first corporations to take part in a special program to improve our environment. Thomson has committed itself to a voluntary initiative program through the U.S. Environmental Protection Agency. The program’s purpose is to reduce toxic air emissions and to promote pollution prevention. Thomson’s involvement includes a concentrated effort to phase in new water-based paints to replace solvent-based paints normally used in our manufacturing operations.