
Operation Manual

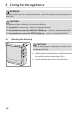

28
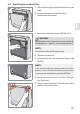
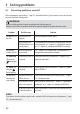
4.3 Replacing the HEPA filter
1. Make sure that the plug has been disconnected from the mains
socket.
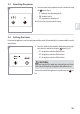
2. Push the release catches on the front panel (Fig. 11).
Carefully remove the front panel (Fig. 11).
3. Remove the carbon filter from the HEPA filter (Fig. 8).
4. Remove the used HEPA filter (Fig. 12) from its fitting.
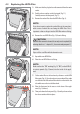
5. Unpack the new HEPA filter.
6. Place the new HEPA filter in its fitting.
7. Fit the carbon filter to the hook and eye fasteners on the HEPA
filter again (Fig. 8). If you do not insert a new carbon filter, make
sure that the side of the carbon filter which is on the inside is the
side which was on the inside beforehand.
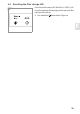
8. Place the front panel in the recesses in the bases of the appli-
ance (Fig. 13/arrows).
9. Then push down the front panel (Fig. 14) until you hear and see
the release catches click into place.
NOTE:
If you do not want to replace the carbon filter at the same time,
make a note of which side was facing the HEPA filter. This is
important so that no dirt gets into the HEPA filter when re-fitting.
CAUTION:
The HEPA filter cannot be cleaned. It can only ever be replaced (for
ordering details see Zchapter 5.3, „Accessories and spare parts“).
NOTE:
Dispose of the used filter with the domestic waste.
NOTE:
Make sure that the "TOP" marking (Fig. 13/"TOP") on the HEPA fil-
ter points upwards (Fig.13/arrow) into the inside of the appli-
ance.
11
12
13
14