
Replacement Part List


9
Assembly
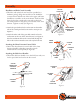
Attaching the Discharge Chute
1. Attach the discharge chute to the snow thrower by placing
it on the chute seat on the snow thrower. Position the flange
keeper beneath the chute seat lip. Align the two holes in the
chute and two holes in the flange keeper and secure with two
bolts from the top side (see Figure 5). Repeat in three locations
to attach the discharge chute to the snow thrower.
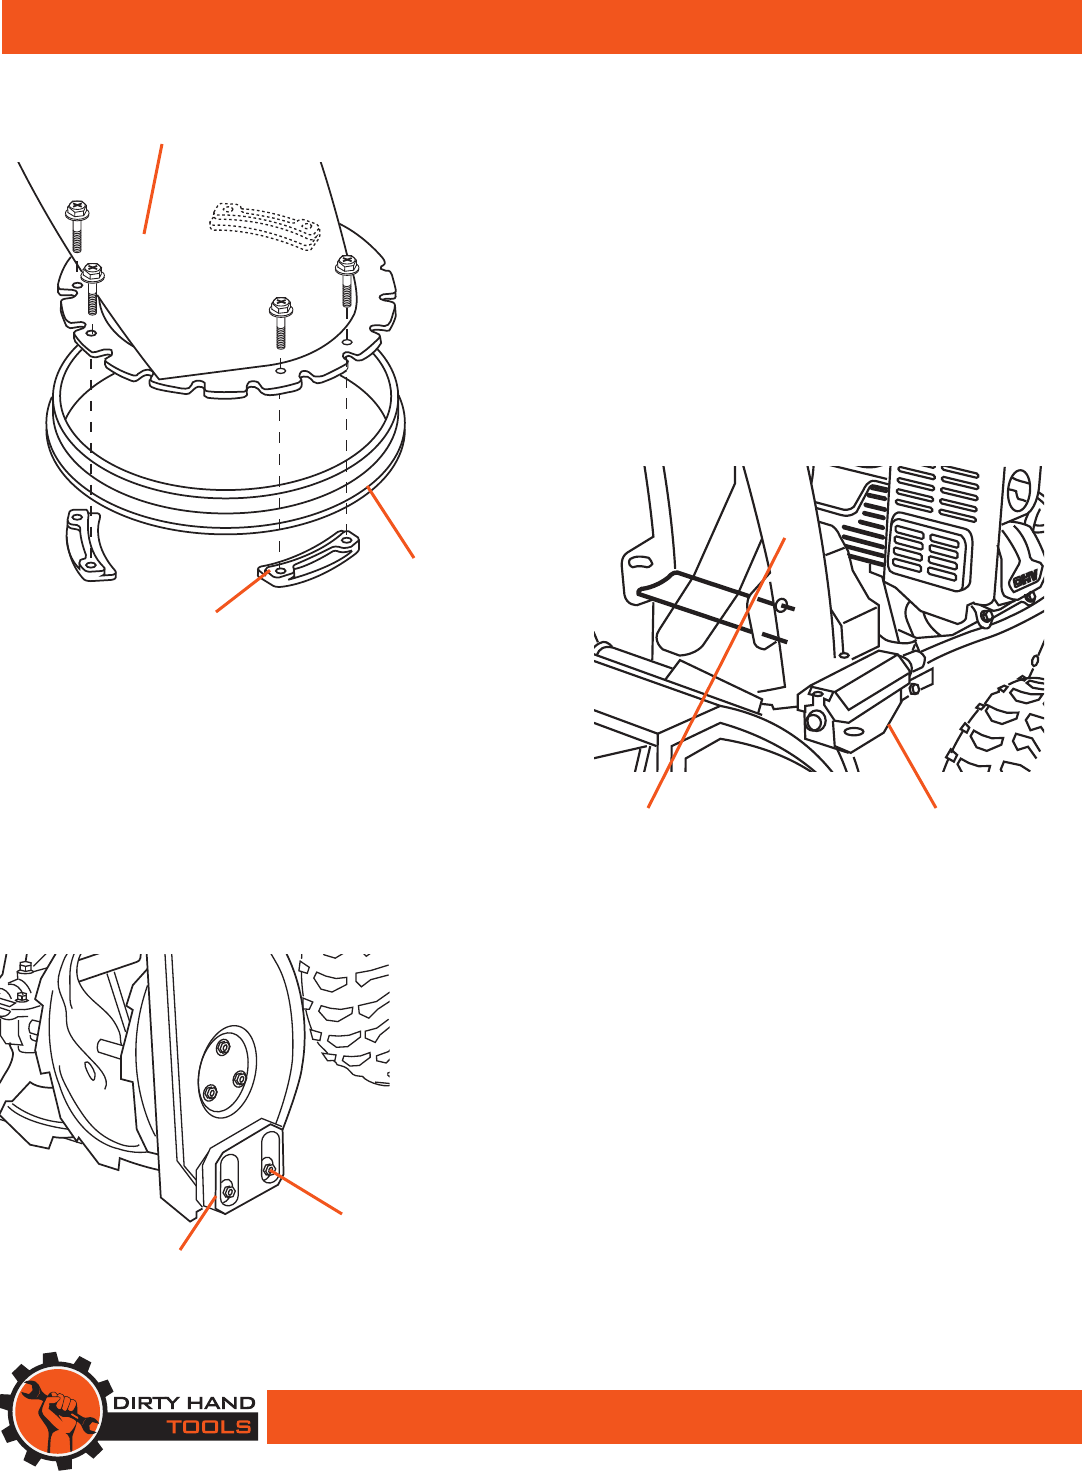
2. Attach the chute crank bracket aligning the chute notches with
the spiral end of the chute directional control assembly (see
Figure 6). Lubricate both ends of the chute directional control
crank with petroleum jelly, paraffin wax, or light machine oil.
SKID
SHOE
HEX NUT
(2 PLACES)
Adjusting the Skid Shoes
1. Position the skid shoes based on surface conditions. Adjust
upward for hard-packed snow. Adjust downward when
operating on gravel or crushed rock surfaces. Loosen the two
hex nuts that retain the skid shoe in place and move up or
down as desired, then retighten the lock nuts (see Figure 7).
Repeat for the opposite side of the snow thrower.
Figure 7
CHUTE
SEAT
DISCHARGE
CHUTE
Figure 5
FLANGE
KEEPER
CHUTE DIRECTIONAL
CONTROL
DISCHARGE
CHUTE
Figure 6