HOPPER WHOLE-HOME HD DVR SYSTEM USER GUIDE
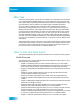
Warning and Attention Symbols You must be aware of safety when you install and use this system. This User Guide provides various procedures. If you do some of these procedures carelessly, you could injure or kill yourself or damage equipment or property. Some other procedures require special attention.
Important Safety Instructions ......................... vii Introduction ........................................................ 1 WELCOME ................................................................... 2 HOW TO USE THIS USER GUIDE ................................... 2 ABOUT YOUR DISH ACCOUNT .................................... 4 WATCHING TV NOW .................................................... 5 ADDITIONAL SERVICES ................................................ 7 ABOUT SATELLITE TV RECEPTION ...
Table of Contents Finding Programs to Watch ............................ 21 CHANGING CHANNELS ............................................... 22 USING THE PROGRAM GUIDE ..................................... 22 USING THE BROWSE BANNER .................................... 24 USING THEMES AND SEARCH ..................................... 24 USING PICTURE-IN-PICTURE (HOPPER ONLY) ............. 26 USING MULTI-CHANNEL RECALL ................................
Table of Contents USING APPS ON YOUR HOPPER ................................. 49 MY ACCOUNT CUSTOMER SUPPORT .......................... 49 Digital Video Recordings ................................. 51 WHAT IS A DVR? ...................................................... 52 PAUSING A PROGRAM ............................................... 52 REVERSE, FAST FORWARD, AND SKIP ....................... 53 SLOW MOTION AND FRAME-BY-FRAME ...................... 53 RECORDING A LIVE PROGRAM ..........................
Table of Contents USING CLOSED CAPTIONING ...................................... 88 USING AUDIO OUTPUT ............................................... 89 RESETTING TO FACTORY DEFAULTS .......................... 91 SCHEDULING RECEIVER UPDATES .............................. 91 USING TV EVERYWHERE ........................................... 91 Connections and Setup ................................... 97 CONNECTING THE HOPPER HD DVR ......................... 98 CONNECTING THE JOEY RECEIVER(S) ................
Important Safety Instructions 1 Read these instructions. 2 Keep these instructions. 3 Heed all warnings. 4 Follow all instructions. 5 Do not use this apparatus near water. 6 Clean only with a dry cloth. 7 Do not block any ventilation openings. Install in accordance with the manufacturer’s instructions. 8 Do not install near any heat sources such as radiators, heat registers, stoves, or other apparatus (including amplifiers) that produce heat.
Safety Apparatus shall not be exposed to dripping or splashing and no objects filled with liquids, such as vases, shall be placed on the apparatus. Also, no sources of flame, such as lit candles, shall be placed on the apparatus.
Introduction Introduction and Welcome to DISH! What you’ll find in this chapter: • WELCOME • HOW TO USE THIS USER GUIDE • ABOUT YOUR DISH ACCOUNT • WATCHING TV NOW • ADDITIONAL SERVICES • ABOUT SATELLITE TV RECEPTION • WHY CONNECT TO A PHONE LINE OR BROADBAND INTERNET? INTERNET • MOVING ON-SCREEN LOGO 1
Chapter 1 Welcome WELCOME Thanks for choosing DISH. You are about to experience the excitement and convenience of our Direct Broadcast Satellite (DBS) service, which delivers the very best picture and sound quality. DISH consistently provides the latest products and satellite services—with high performance, ease of operation, and a wide variety of entertainment options.
Introduction How to Use this User Guide • Chapter 12: Connections and Setup explains how to connect your Hopper HD DVR to your TV, as well as to other equipment, such as a VCR. Guide Conventions • • • • • • The labels of the remote-control buttons are all in capital letters. Example: Press SAT to control your Hopper or Joey. Select means to move the highlight to an on-screen option or choice in a menu list and then press the SELECT button on the remote control. Example: Select the Locks option.
Chapter 1 About Your DISH Account ABOUT YOUR DISH ACCOUNT This section describes how to order your packages and provides information on how to find information about your DISH account. Ordering Your Programming Packages Before you can enjoy your new Hopper HD DVR, order your programming packages. 1 Press POWER on the front panel to turn on the Hopper. 2 Press SYSTEM INFO on the front panel to display the Hopper’s System Information menu on the nearby TV screen.
Introduction Watching TV Now WATCHING TV NOW After you have ordered your programming package, you can begin enjoying the features of your new Hopper HD DVR. When you complete these simple tours, you’ll be familiar with the remote control and be able to find a program to watch, pause live TV, and record your favorite shows. Finding a Program to Watch If you want to know more about watching TV, see Chapter 3: Finding Programs to Watch starting on page 21.
Chapter 1 Watching TV Now Pausing Live TV Here’s something you can’t do with regular old TV: pause live TV because someone’s at the door or calling you on the phone, or there’s something else you have to do right now. For more about the pause feature of your Hopper, see Pausing a Program on page 52. Recording and Playing Back a Program Take this tour to learn how to make basic recordings of your favorite shows.
Introduction Additional Services ADDITIONAL SERVICES Pay-Per-View Catch all the action on Pay-Per-View. Take a break from regular TV and order the latest movies, sports, and special events. For details on ordering Pay-Per-View events, see page 30. Be sure to connect your Hopper to an active phone line or broadband Internet before you order a Pay-Per-View event (see the instructions on page 100). For more information, visit the mydish.com/ppv website.
Chapter 1 Why Connect to a Phone Line or Broadband Internet? Solar Interference Twice a year, the sun moves to a position behind the DISH satellites as they orbit the Earth. This event occurs during a few days at the beginning of spring and the beginning of autumn, and lasts only a few minutes. During these brief periods, you will not be able to see programs on DISH. When the sun move from behind the satellites, the programs will reappear.
Introduction Tips watching satellite TV programming. Make sure you are using the correct remote control for your TV-viewing location (see page 12 for details). TIPS • • Always have the latest software—Press POWER to turn off the the Hopper when you’re not using it. This way, the satellite can send updated software and guide data. Order Pay-Per-View programs and events with your remote control—Keep an active telephone line or broadband Internet connected to the Hopper.
Chapter 1 Notes Notes 10
Receiver & Remote Control About Your Hopper HD DVR What you’ll find in this chapter: • HOPPER HD DVR OVERVIEW • REMOTE CONTROL • HOPPER FRONT PANEL • HOPPER BACK PANEL • USING THE ON-SCREEN MENUS • USING TEXT FIELDS 11
Chapter 2 Hopper HD DVR Overview HOPPER HD DVR OVERVIEW This section gives you an overview of your DISH satellite TV system. Satellite Receiver This three-tuner satellite receiver with integrated digital video recorder can view/record high-definition (HD) and standard-definition (SD) DISH programming on multiple TVs. • • Nearby TV—Connect the Hopper to an HDTV to access, view and record HD and SD DISH programming.
Satellite Receiver Remote Control Remote Control Batteries Each remote control comes with four AAA batteries. When you replace old batteries, you should replace all of the batteries. Use batteries of the same type together, for example, all alkaline or carbon zinc. Don’t mix batteries of different types/chemistries. Alkaline batteries last longer than carbon zinc. 1 Press down on the dimple at the top of the battery cover on the back of the remote control and slide off the cover.
Chapter 2 Remote Control Remote Control Buttons SAT Mode Pair/Input Access receiver features and settings Menu Access receiver features and settings Volume and Mute Buttons Control TV volume Programming required Themes Search for programs using Themes Recall Return to previously viewed TV channel(s) Info Retrieve info on programs or set a timer Search Search for a program Colored Buttons Provides shortcuts to frequently used menus Press this button for SAT Mode Power & TV Power Top Button turns the rece
Satellite Receiver Remote Control Press this button for TV Mode TV Mode Power & TV Power Top Button turns the TV on/off Bottom button turns the TV on/off Pair/Input Switch between TV inputs (available only for certain makes and models of TVs) TV Menu Access menu features available on some TVs Mute Turn TV volume on or off Select Button Select a program or menu Volume Control TV volume Up/Down Arrow Buttons Channel up/down on the TV Recall Return to the last channel viewed Number Buttons Enter a chan
Chapter 2 Remote Control Power & TV Power Top Button turns the DVD/BR/VCR on/off Bottom button turns the TV on/off Press this button for Mode DVD DVD Mode Pause Pause a DVD, Blu-ray disc, or videotape Back Rewind a DVD, Blu-ray disc, or videotape Stop Stop playing or recording a videotape, or stop playing a DVD or Blu-ray disc Record Record on a videotape 16 FWD (Forward) Forward a DVD, Blu-ray disc, or videotape Play Play a DVD, Blu-ray disc, or videotape Number Buttons Use to get to specific chapters
Satellite Receiver Hopper Front Panel HOPPER FRONT PANEL Power Turns Select receiver Chooses power an item on/off or channel Sys Info Reset Displays Press to information reset the on system receiver POWER MENU SMARTCARD SYS INFO SELECT RESET JUMP LOCATE REMOTE INFO PWR WR W RE EC REC Menu Arrows Jump Locate Smart Info Remote Card Displays Displays Navigates Moves to another Locates Slot for program the Main through smart card information Menu menus or selection the remote screen channels control
Chapter 2 Using the On-screen Menus USING THE ON-SCREEN MENUS The menus make using the receiver and selecting programs quick and easy. Use the menus to control the receiver and to use its features, such as setting parental controls and locks, choosing a program, or creating a favorites list. Open and Close Menus You can open the menus in either of two ways: • • Press the MENU button on the receiver front panel or remote control to open the Main Menu, then access any of the other menus from the Main Menu.
Satellite Receiver Using Text Fields • A single choice list allows you to select only one choice at a time. If you select another choice, your previous choice is deselected. • A multiple choice list allows you to select more than one choice at one time. If you select another choice, your previous choice(s) also stays selected, as indicated by a check mark.
Chapter 2 Questions While in the Text Field When the cursor is in the text field: • Press the LEFT ARROW to delete characters. • Press FORMAT/* to backspace without deleting characters. • Press 0 to enter a blank space character, such as between words. • Use the RIGHT ARROW to move forward without deleting characters. QUESTIONS • • When can I use the Picture-In-Picture (PIP) feature on the Hopper? When the Hopper has any two tuners available, you can use the PIP functions on the nearby TV.
Finding Programs to Watch Watching TV What you’ll find in this chapter: • CHANGING CHANNELS • USING THE PROGRAM GUIDE • USING THE BROWSE BANNER • USING THEMES AND SEARCH • USING PICTURE-IN-PICTURE (HOPPER ONLY) • USING MULTI-CHANNEL RECALL • STARTING IN ONE ROOM AND FINISHING IN ANOTHER • HOMES WITH A SECOND HOPPER INSTALLED 21
Chapter 3 Changing Channels CHANGING CHANNELS There are two basic ways to change the channel on your satellite TV receiver: • • Use UP and DOWN ARROWS on your remote control Enter a channel number with the NUMBER PAD buttons Using the Up and Down Arrows While watching live TV, if you want to change the channels one at a time to see what’s on, press the UP and DOWN ARROWS on your remote control. You can also change the channels the same way using the UP and DOWN ARROWS on the receiver front panel.
Finding Programs to Watch Using the Program Guide • displays only the channels included in your current DISH package. And the My HD Channels Favorites List displays only the high-definition channels in your package. If you set up another list, then the Program Guide displays only the channels that you included on that list. See page 36 for more information on using Favorites Lists. The Program Guide displays information for programs on now and those coming on within the next nine days.
Chapter 3 Using the Browse Banner USING THE BROWSE BANNER Use the Browse Banner to see what other programs are on or coming on soon, while not missing any of the program you are watching. When the Browse Banner is open, you will see the Program Banner information about the current program displayed at the top of the screen, and on the left-hand side of the Browse Banner at the bottom of the screen.
Finding Programs to Watch Using Themes and Search Using Themes You can list programs by the theme of their contents, (for example, just movies or just sports). Use Themes and Search to quickly find programs based on: • • • • Theme. You can look for something to watch by the program’s category or theme (Movies, Sports, News/Business, etc.), which makes your search easier and your television viewing time more enjoyable. Sub-theme.
Chapter 3 Using Picture-In-Picture (Hopper only) system. Each TV’s Search History is available using that receiver’s remote. You can use Search History to re-search programming instead of typing the information again. Press the Search button, access the drop-down list on the menu bar and select the History item to see a list of your recent searches. Highlight one of the listed searches and press the Select button to repeat it. Searches done on different days will often yield new results.
Finding Programs to Watch Starting in One Room and Finishing in Another channels for you to choose from, as it does when the On option is set. • Off. If you turn off the receiver’s multi-channel recall feature, the RECALL button goes immediately to the previous channel you viewed. Older channels are not shown. 4 When you are finished changing these settings, highlight and select the Save option. If you have made changes you do not want saved, press the remote CANCEL button.
Chapter 3 Homes With a Second Hopper Installed HOMES WITH A SECOND HOPPER INSTALLED To access the DVR library on a second Hopper from any Joey Receiver in your WholeHome DVR system, do the following: 1 Press the MENU button and select the Settings tile on the Main Menu screen. 2 Select Network Setup, and then Whole-Home. 3 Using the ARROW buttons, highlight and select the other Hopper in your home to link to it. 4 Highlight and select the Save option when you have finished.
Pay-Per-Programs Available On Demand and PPV What you’ll find in this chapter: • PAY-PER-VIEW • DISH ON DEMAND • BLOCKBUSTER @HOME™ • DISHONLINE.
Chapter 4 Pay-Per-View PAY-PER-VIEW To order Pay-Per-View programming using your remote control, you must connect the receiver to an active phone line or broadband Internet connection. After you order a PayPer-View program, you can watch it on all of the receivers on your DISH account. Using the remote control, you can order the exact same program for each receiver but you pay for the program only once. However, replays of most programs are separate events. Visit www.mydish.
Pay Per Programs Blockbuster @Home™ 3 Use the UP and DOWN ARROW buttons to scroll through the choices, if available. 4 Highlight and select the movie, TV program, or on-demand event you want to watch. 5 Select Rent. Rental Considerations • You can repeatedly watch a rented program for the period of time (for example, 24 or 48 hours) listed. Rented programs cannot be saved to the My Recordings list.
Chapter 4 Ordering Considerations Use Considerations • Your receiver must be connected to a network with broadband Internet access to view the DISH Online content. Contact your Internet service provider to verify download speeds and any terms or conditions affecting your broadband Internet connection. • Most Internet service providers have a “Fair Access Policy” which sets usage limits on the amount that can be downloaded in a given time or billing period.
Pay Per Programs Questions • Keep an active phone line or broadband Internet connection attached to your receiver at all times so you can order Pay-Per-View programs with your remote control. QUESTIONS • • • • • • How can I order an event for all my whole-home receivers? – Order the event with your remote on your Hopper receiver, attached to an active phone line or broadband Internet connection. For each Joey Receiver you want to play the event, make sure that it is linked to the correct Hopper.
Chapter 4 Notes Notes 34
Favorites Lists Setting Up Your Favorite Channels What you’ll find in this chapter: • WHAT ARE FAVORITES LISTS? • CREATING OR CHANGING FAVORITES LISTS • NAMING FAVORITES LISTS • USING FAVORITES LISTS 35
Chapter 5 What are Favorites Lists? WHAT ARE FAVORITES LISTS? Favorites Lists are custom lists of your favorite channels. You can create and change the lists yourself, adding and removing channels as you wish. Your favorite channels can be grouped in as many as four lists (for each whole-home receiver). • • • • • • • When using a Favorites List, the Program Guide and Browse Banner display only the channels in that Favorites List.
Favorites Lists Naming Favorites Lists NAMING FAVORITES LISTS You can rename your Favorites Lists whatever you want, up to eight characters long. USING FAVORITES LISTS Press the GUIDE button to open the Program Guide. Press the GUIDE button again to highlight the next Favorites List; press GUIDE repeatedly to scan through all the available lists.Then press the SELECT button to choose a list.
Chapter 5 Tips TIPS • • • Two lists on the same TV cannot have the same name. For example, the nearby TV cannot have two lists named “Dad’s List.” When the receiver is connected to a WholeHome DVR system, different receiver users can have lists with the same names. While in the program guide, press the GUIDE button to switch Favorites List functions only if you have added channels to a Favorites List.
Parental Controls Setting Receiver’s Parental Controls What you’ll find in this chapter: • WHAT ARE LOCKS AND RESTRICTIONS? • COPYING LOCKS FROM YOUR HOPPER TO A JOEY • CREATING OR CHANGING A PASSWORD • CREATING OR CHANGING RATINGS RESTRICTIONS • CREATING OR CHANGING CHANNEL LOCKS • HIDING ADULT CONTENT OR LOCKED CHANNELS 39
Chapter 6 What are Locks and Restrictions? WHAT ARE LOCKS AND RESTRICTIONS? Locks and restrictions are parental controls that allow you to password-protect programming based on ratings, or on a channel-by-channel basis. When you set locks: • If you try to access a locked channel or restricted program, or open the Parental Controls menu, the receiver displays a message asking you to enter the password. • The receiver permits three attempts to enter the correct password.
Parental Controls Creating or Changing a Password CREATING OR CHANGING A PASSWORD You should set up your password before using the receiver locks. 1 Press the MENU button, select the Settings tile, and then select Parental Controls. 2 If the receiver is locked, enter the password using the remote control’s NUMBER PAD. The receiver displays stars (*) as you enter the digits of your password. Then select OK. 3 If you are changing an existing password, select Edit Password.
Chapter 6 Creating or Changing Ratings Restrictions CREATING OR CHANGING RATINGS RESTRICTIONS You can lock programs based on Motion Picture Association of America (MPAA) ratings (PG, PG-13, etc.) and expanded ratings (violence, language, etc.). 1 Press the MENU button, select the Settings tile, and then select Parental Controls. 2 If the receiver is locked, enter the password using the remote control’s NUMBER PAD. The receiver displays stars (*) as you enter the digits of the password.
Parental Controls Creating or Changing Ratings Restrictions PG-13—Parents Strongly Cautioned. Some Material May Be Inappropriate For Children Under 13. A PG-13 rating is a sterner warning by the Rating Board to parents to determine whether their children under age 13 should view the motion picture, as some material might not be suited for them.
Chapter 6 Creating or Changing Ratings Restrictions TV-Y7—Directed to Older Children. This program is designed for children age 7 and above. It may be more appropriate for children who have acquired the developmental skills needed to distinguish between make-believe and reality. Themes and elements in this program may include mild fantasy violence or comedic violence, or may frighten children under the age of 7.
Parental Controls Creating or Changing Channel Locks 7 Select Save. To ensure new parental controls take effect, you will need to set a password if you have not already. See the instructions for creating a new password on page 41. CREATING OR CHANGING CHANNEL LOCKS You can lock any channel, including Pay-Per-View channels. Locked channels can be accessed or recorded only after you enter the password created for your receiver. 1 Press the MENU button, select the Settings tile, and then Parental Controls.
Chapter 6 Tips 1 Press the MENU button, select the Settings tile, and then Parental Controls. 2 If the receiver is locked, enter the password using the remote control NUMBER PAD. The receiver displays stars (*) as you enter the digits of the password. 3 Select the option to Lock Channels. 4 Select Yes under Hide Adult Channels. 5 Select Save. TIPS • • • If the receiver displays a message prompting you to enter a password, then this confirms that there are parental controls set for this receiver.
Multimedia and Apps Using Home Media and Apps on TV What you’ll find in this chapter: • USING THE HOME MEDIA FEATURE • USING APPS ON YOUR HOPPER • MY ACCOUNT/CUSTOMER SUPPORT 47
Chapter 7 Using the Home Media Feature USING THE HOME MEDIA FEATURE To use the Home Media feature on your Hopper, press the MENU button and select the Home Media tile from the MAIN MENU. A list of compatible devices should be displayed. The Home Media application connects your compatible digital media devices together.
Interactive TV Using Apps on Your Hopper USING APPS ON YOUR HOPPER To use apps on your TV, press the MENU button and select the Apps tile from the MAIN MENU screen. You can order additional channels, check the news and weather, and even play games. Make sure you connect your Hopper to broadband Internet to access all the features of your apps. You can enjoy this feature on one TV at a time.
Chapter 7 Notes Notes 50
Digital Video Recordings Recording & Pausing Live Programs What you’ll find in this chapter: • WHAT IS A DVR? • PAUSING A PROGRAM • REVERSE, FAST FORWARD, AND SKIP • SLOW MOTION AND FRAME-BY-FRAME • RECORDING A LIVE PROGRAM • PLAYING A RECORDED PROGRAM • RECORDING WHILE WATCHING DIFFERENT PROGRAMS • OTHER RECORDING OPTIONS • GROUPING AND SORTING RECORDINGS 51
Chapter 8 What is a DVR? WHAT IS A DVR? The Hopper is a Whole-Home HD Digital Video Recorder (DVR) that lets you watch TV the way that you want. You can pause, reverse, or skip back through a program. Then you can resume watching TV. Also, you can record and play back programs with full digital audio and video quality, without a VCR.
Digital Video Recording Reverse, Fast Forward, and Skip REVERSE, FAST FORWARD, AND SKIP This section describes how to use your remote control’s DVR buttons to move forward and back quickly while you watch TV. Press BACK once to reverse the program 4 times as fast as normal play. Press BACK twice to reverse at 15 times normal speed, three times to reverse at 60 times normal speed, and four times to reverse at 300 times normal speed. The on-screen bar shows how far you’ve gone.
Chapter 8 Recording a Live Program RECORDING A LIVE PROGRAM To record the rest of the program you are watching, PRESS the record button on your remote control. You can press the RECORD button again at any time during the current recording and follow the on-screen instructions if you want to extend the end of the recording past the scheduled end time. To stop a recording you are watching, press the STOP button on your remote control.
Digital Video Recording Recording While Watching Different Programs RECORDING WHILE WATCHING DIFFERENT PROGRAMS This section describes the basic ways to record a program while watching a different program at the same time. Recording a Different Program You can set up your Hopper HD DVR to record one or two programs while you are watching another program live or playing an existing recording. 1 Make sure your Hopper HD DVR is powered on by the indicator light on the front panel.
Chapter 8 Grouping and Sorting Recordings • • • • Keep—By default, an event timer keeps the 20 newest recordings it has made before it replaces older recordings with newer ones. You can change this number here. Start Early—You can extend the start time for the recording. This option is useful for programs that might start a minute or two early, like some network reality shows. End Late—You can extend the stop time for the recording.
Recording Future Programs Setting Up and Using Event Timers What you’ll find in this chapter: • USING PRIMETIME ANYTIME™ • TIMERS AND RECORDINGS • USING THE TIMERS LIST • USING THE DAILY SCHEDULE • SETTING UP AN EVENT TIMER • SETTING UP A SEEK & RECORD™ TIMER • CHANGING OR DELETING A TIMER 57
Chapter 9 Using PrimeTime Anytime™ USING PRIMETIME ANYTIME™ The PrimeTime Anytime™ feature is exclusive to your Hopper HD DVR and once enabled, will provide instant access to your favorite shows on ABC, CBS, FOX and NBC in high definition. (Note if any of your local HD channels are not available in your market, these shows cannot be recorded.) Programs airing during prime-time hours, 8-11 p.m. ET on Monday through Saturday, and 7-11 p.m.
Record Future Programs Using PrimeTime Anytime™ recordings, you must disable the feature at least 20 minutes before the nightly prime-time interval begins (8 p.m. ET/PT, 7 p.m. CT/MT on Monday through Saturday; and 7 p.m. ET/PT, 6 p.m. CT/MT on Sunday). Note that Disabling the PrimeTime Anytime™ feature will not alter or delete the current contents of the PrimeTime Anytime™ folder.
Chapter 9 Timers and Recordings TIMERS AND RECORDINGS A timer is your instruction telling the satellite TV receiver the programs you want to watch in the future. For most Digital Video Recorder (DVR) timers, you select a specific program on a specific channel, and tell the receiver how often you want to record that program. DVR recordings are listed in the My Recordings screen, which you can find quickly by pressing the DVR button on your remote control.
Record Future Programs Timers and Recordings Timer Options The Timer Options screen lets you set the following (not used on all options screens): • • • • • • • Protect Event—to prevent your programs from being erased when the DVR fills up. Set Frequency—to record only new episodes of a program. By default, all episodes of a Seek & Record event will be recorded. Set Channel—to select a specific channel. When setting manual timers, you select a channel from a scrolling list of all channels in your guide.
Chapter 9 Timers and Recordings Reasons Why Timers are Skipped If a timer is skipped, the reason is stated on the Timers List. • • • • • • Priority—This timer had a lower priority than other events being recorded at the time. User—A user chose to skip that timer. Duplicate event—There is already another timer which is set to record that program. Event exists in DVR—The program was already recorded and can be found now in the My Recordings list. Not a new episode—Used for New Episode timers.
Record Future Programs Using the Timers List Special Considerations When Using Timers • For Locked or Restricted Programs—You must enter the receiver password before you can create an automatic event timer for a program restricted by rating or on a locked or hidden channel. If you do this, and the restrictions or locks are subsequently changed, then when the timer starts, note that the receiver may display only an error or password-entry menu screen.
Chapter 9 Setting Up an Event Timer • Press PAGE UP to see the previous days' timers. Review these timers if you want to see the result of these timers (for example, if a timer recorded successfully or why it might have been skipped). SETTING UP AN EVENT TIMER 1 Find a program or event to record that starts in the future using the Program Guide or Browse Banner. 2 Highlight and select the future program or event. The Create Timer screen displays.
Record Future Programs Changing or Deleting a Timer 4 Enter your search criteria. You can use the virtual on-screen keyboard below the text box, or you can use the letters above the NUMBER PAD buttons on the remote control (similar to texting on many mobile phones) while the on-screen cursor is in the text box. See Using Text Fields on page 19 for instructions. 5 Select any Options for the Seek & Record timers, as described on page 61, if applicable. 6 Select Create.
Chapter 9 Questions • • Seek & Record™ recordings may fill DVR storage quickly. If you have other timers you know you don't want to be recorded over, choose Protect on those important programs. DVR Timers set for sporting events automatically end late by 60 minutes to allow for overtime. If you want to change this setting, use Options when you set up the timer.
Remote Control Setup Personalizing Your Remote Controls What you’ll find in this chapter: • PAIRING YOUR REMOTE CONTROL • CONTROLLING OTHER COMPONENTS • SETTING UP BY LEARNING FROM ANOTHER REMOTE • CONTROLLING A TUNER OR AMPLIFIER • THE LOCATE REMOTE FEATURE • SENDING DISCRETE POWER ON AND OFF • TIPS • QUESTIONS 67
Chapter 10 Pairing Your Remote Control PAIRING YOUR REMOTE CONTROL These instructions help you pair your remote control to your Hopper or Joey receiver. Your Hopper adn Joey come with a Universal UHF/IR remote control that uses proprietary ZigBee® RF4CE technology. It includes two-way learning functionality and the ability to control up to three additional devices such as TVs and DVD players via IR commands.
Remote Controls Pairing Your Remote Control Adjusting the Remote Control Antenna Be sure to point the remote control antenna (back of the receiver) straight up so you can use the remote control from as far away as possible. Don't let the antenna touch anything. If your remote control isn't working well from far away or another room, you may be experiencing interference from objects near your receiver.
Chapter 10 Pairing Your Remote Control Installing a UHF Attenuator Unwanted UHF signals may interfere with signals from the remote control to the receiver. To prevent such interference, you can install a 10 dB attenuator (available from many electronics parts stores). Adding this attenuator will help keep out stray UHF signals, but it will also cut down how far away your remote control can operate the receiver.
Remote Controls Controlling Other Components CONTROLLING OTHER COMPONENTS To use the remote to control other devices (such as a TV, DVD or Blu-ray Disc™ player or VCR, an audio tuner/preamp or amplifier, or another compatible DISH receiver), you must first program the remote to control these devices.
Chapter 10 Controlling Other Components VCR (using the mode button for a DVD or AUX device) in Limited Mode, you will only be able to use the POWER and VCR-function buttons (like PLAY, PAUSE, etc.). Turning Limited Mode On and Off To turn off Limited Mode so that you can use all of the buttons on your DISH remote to control your TV or disc player, do the following: 1 Press MENU, highlight and select the Settings tile, and then Remote Manager.
Remote Controls Controlling Other Components Instructions Additional Information 5 Enter one of the three-digit device codes from the table using the NUMBER buttons. The three-digit device code is for the brand name of your device that you found in step 2. 6 If you want to program Limited Mode, press 1. If not, skip to step 7. See Limited Mode for more information. 7 Press the POUND (#) button. If you entered the code correctly, then the device mode button flashes three times.
Chapter 10 Controlling Other Components 3 For AUX mode only. Press 0 for TV, 1 for VCR, or 2 for an audio tuner or amplifier. Then press the STAR (*) button. This step is for specifying the type of device that will be programmed in AUX mode. If you’re not programming in AUX mode, please skip to step 4. 4 Press the remote’s POWER button. This puts your remote into code scanning mode. 5 Press the UP or DOWN ARROW repeatedly until the device turns off.
Remote Controls Controlling Other Components 2 Press the POUND (#) button twice. Watch the mode light to determine your code. The mode button flashes the number for each digit of the device code, with a pause between the groups of flashes. A quick flash is for zero (0). For example, if the code is 570, the mode button flashes five times, pauses briefly, flashes seven times, pauses again, and flashes once very quickly. For AUX mode: The first group of flashes indicates what the AUX mode controls.
Chapter 10 Controlling Other Components Setting Up by Learning from Another Remote After you have programmed your DISH remote to control your devices (in TV, DVD, and/or AUX modes), you may find not all of the commands used by the devices’ original remote controls function as you expect. The learning function of your new DISH remote control can support these commands.
Remote Controls Controlling Other Components 4 To start learning commands for this mode: • • If you've found a code for that device, first program the code. Now press and release RECALL, then press and hold the RECORD button for about three seconds. If you have not programmed a code for that device, press and hold RECORD for three seconds. To find and program the device code, use the instructions for Setting Up Using Device Code Tables on page 72 or Setting Up Using Device Codes Scan on page 73.
Chapter 10 Controlling Other Components Controlling a Tuner or Amplifier Use the following remote control buttons to control a tuner or amplifier. When the remote control is set up as described on pages 71 and 78, press the AUX device mode button to set the remote to AUX mode. The AUX mode button will stay lit for two seconds to show you’ve set the remote to AUX mode. Make sure to keep the remote in AUX mode to use the following buttons.
Remote Controls The Locate Remote feature To set the remote control back to adjusting the TV’s device volume by default (steps 1-5 set up the remote control and steps 6-7 verify that the remote has been set up correctly): Programming to Control a Second Satellite Receiver If you have another DISH satellite receiver installed in your home, you can use this new remote in AUX mode to control it along with your new receiver.
Chapter 10 Sending Discrete Power On and Off SENDING DISCRETE POWER ON AND OFF Installers use discrete power on and power off IR commands when programming macro commands into universal remote controls. Using an on-only or off-only command is more effective than a toggle on/off command when trying to make sure the satellite TV receiver is reliably in one state or the other.
Receiver Customization Personalizing Your Hopper HD DVR What you’ll find in this chapter: • USING MULTIMEDIA • USING CALLER ID • CUSTOMIZING THE GUIDE AND CHANNEL LISTS • CHANGING LANGUAGES • USING CLOSED CAPTIONING • USING AUDIO OUTPUT • RESETTING TO FACTORY DEFAULTS • SCHEDULING RECEIVER UPDATES • USING TV EVERYWHERE 83
Chapter 11 Using Multimedia USING MULTIMEDIA Photos You can view photos on the TV connected to your Hopper HD DVR using the Home Media feature. Now you don’t have to pass photos around or have a crowd of people hover around your digital camera. See “Using the Home Media Feature” on page 48. External Hard-Disk Drive The Hopper HD DVR has generous internal storage space for hundreds of hours of recorded programming.
Receiver Customization Using Caller ID To use the external hard-disk drive feature: 1 Purchase a USB 2.0 hard-disk drive from a consumer electronics retailer. 2 Connect the drive to one of the receiver’s three USB ports, making sure to follow any connection instructions that came with the hard-disk drive. Note: Currently, the receiver supports having one USB device connected at a time.
Chapter 11 Using Caller ID 3 Select Enable or Disable for this feature, then select the option to Save.. Caller ID Screens When you receive a call, you will see a Caller ID pop-up screen. You can select OK to eliminate the message. If you do nothing, the message will disappear after about 20 seconds. If you are using a menu screen when a call comes in, you will see a different Caller ID pop-up screen. You can select OK to eliminate the message.
Receiver Customization Customizing the Guide and Channel Lists Using Caller ID History Use the following instructions to view and delete numbers from your Caller ID History. 1 Press the MENU button on your remote control. 2 Scroll down to highlight the Caller ID History tile and then press the SELECT button. 3 From the Caller ID History screen, you can view Call History entries, highlight and delete a row for an entry, or clear the entire list of entries. 4 Press Save when you are finished.
Chapter 11 Changing Languages Changing the Guide Display The receiver comes set to display the Program Guide. However, you can change the way the Electronic Program Guide and EPG Banner display on your TV screen. CHANGING LANGUAGES You may be able to change the language of some programs. Some programs, such as movies, indicate at the beginning whether an alternate language or descriptive video is available.
Receiver Customization Using Audio Output Note: Not all programming contains any CC information. Press MENU, select the Settings tile, and then highlight and select Closed Captioning. Choose from the lists the display options matching your preferences, then select Save. • Closed Captioning: Turn the Closed Captioning (CC) service On or Off. The other options on this screen are enabled when On is selected.
Chapter 11 Using Audio Output Dolby Digital gives you the capability to enjoy program audio in surround sound. An external decoder is required to enjoy this feature. Refer to your decoder’s user’s guide. Note: Not all programs or events contain a Dolby Digital sound track. Your new receiver uses an optical port for outputting digital audio. The optical output can provide two audio data types: Dolby Digital and Linear PCM (only Dolby Digital can provide full 5.1-channel sound).
Receiver Customization Resetting to Factory Defaults RESETTING TO FACTORY DEFAULTS You can reset the receiver to discard any changes you have made to receiver settings, except for remote control addresses and locks. Resetting the receiver to factory default settings also discards all Favorite Lists except for the All Chan, All Sub, and All HD lists. You cannot reset the receiver to default settings to discard or reset a password you have forgotten.
Chapter 11 Tips TIPS • To take full advantage of Dolby Digital 5.1 surround sound, you need a digital optical audio cable and audio equipment that supports this feature. • To use the Caller ID feature on the Hopper HD DVR, be sure to have the it connected to an active telephone line and have Caller ID service from your phone company. QUESTIONS 92 • How can I see who has called me in the past? Open your Caller ID History by pressing the MENU button, selecting System Setup, and then Caller ID History.
Connections and Setup How to Connect Your Hopper HD DVR What you’ll find in this chapter: • CONNECTING THE HOPPER HD DVR • CONNECTING THE JOEY RECEIVER(S) • CONNECTING TO YOUR DISH ANTENNA • CONNECTING THE PHONE LINE • CONNECTING TO BROADBAND INTERNET • USING TROUBLESHOOTING TOOLS 93
Connections and Setup Connecting the Hopper HD DVR CONNECTING THE HOPPER HD DVR This section describes how to connect the output ports on the back of your Hopper HD DVR to a nearby TV. Select one of the following methods. Note: If you would like to put your receiver in a location, for example, inside a closet or cabinet, etc., be sure to test that the UHF-2G signals control the correct TV. If you need another remote control, contact your DISH retailer, oryou can visit www.mydish.
Chapter 12 Connecting the Hopper HD DVR YPbPr Connections (Hopper only) The YPBPR (component) connections provide high-quality video from your Hopper HD DVR to your HDTV or HD monitor. If an HDMI audio/video connection between your Hopper and nearby TV is unavailable, then you should use a component video and separate audio cables.
Connections and Setup Connecting the Hopper HD DVR Setting Up to Display in HD Once the receiver has been activated with qualifying DISH programming, you will be able to receive high-definition programs to watch. Use the following steps to select the desired HDTV format to display these programs on your TV. 1 Consult your HDTV user’s guide for the best HD-format resolution that the TV supports (typically, this is either 1080i/1080p or 720p).
Chapter 12 Connecting the Joey Receiver(s) CONNECTING THE JOEY RECEIVER(S) This section describes how to connect the receiver’s HOME VIDEO NETWORK connection to one or more cable-ready remote TV(s) located in other room(s) away from the Hopper. You can use these instructions to connect TVs in your home to see live and recorded programming from the Hopper. This installation uses your in-home coaxial cable system.
Connections and Setup Connecting to Your Dish Antenna CONNECTING TO YOUR DISH ANTENNA Professional installers perform the installation of the Hopper Whole-Home DVR and Joey Receiver(s). In general, the steps involved include the following: 1 Before you can begin connecting your Hopper HD DVR to your dish antenna, you must first complete the preceding sections for connecting your TVs to the receiver.
Chapter 12 Connecting the Phone Line CONNECTING THE PHONE LINE You must keep the receiver attached to an active phone line (or broadband Internet connection) to order Pay-Per-View programs or events, access all of the DishHOME Interactive features, or use other DISH services with your remote control. Note: You may be able to use a wireless modem jack. However, this may not support all the features of your receiver, such as Caller ID. Visit www.mydish.
Connections and Setup Connecting to Broadband Internet Phone System Setup You must set up the receiver for your telephone system (touch-tone or rotary-phone dialing), and set a telephone number prefix, if you need a prefix to dial an outside call. Note: A prefix is different than an area code, which is required for all 10-digit dialing. 1 Press MENU button, select the Settings tile, then Network Setup, and then Phone Line. 2 Select the Touch Phone or the Rotary Phone option under Phone Type.
Chapter 12 Using Troubleshooting Tools USING TROUBLESHOOTING TOOLS Your receiver and the remote control(s) have troubleshooting tools that a DISH Customer Service Representative may ask you to use if you should ever run into issues while using your equipment. Even though these tools are quite helpful, it is recommended that you only use them when directed to on the phone by a DISH Customer Service representative.
Connections and Setup Using Troubleshooting Tools Point Dish and Check Switch The Point Dish and Check Switch screens are often helpful when you call the Customer Service Center. You may be asked to display these screens when you contact DISH. Even though there are items that can be changed, only change them when specifically directed to do so when speaking to a DISH Customer Service Representative.
Reference Troubleshooting and Remote Codes What you’ll find in this chapter: • TROUBLESHOOTING TABLES • REMOTE CONTROL DEVICE CODES 103
Reference Troubleshooting Tables TROUBLESHOOTING TABLES Use these tables if you have problems using your DISH system. Look in this section for a description of the problem before calling the Customer Service Center. Some issues may be basic misunderstandings of how the system works, especially when one is just becoming familiar with it. To solve a particular problem, do the following: 1 Review the section in this Guide that relates to the problem.
Reference Troubleshooting Tables Message Numbers Message Number 001 Possible Reason There may be a problem with the multi-dish switch. What to Do Check the coaxial cables and their connections to and from the multi-dish switch. Make sure that all required cables are in place, and check that all the cable connections are tight (and dry, especially for outdoor cables). Call the Customer Service Center at 1-800-333-DISH (3474) for help and to run Check Switch as described on page 102. .
Reference Troubleshooting Tables Message Number Possible Reason What to Do • 015 You may have just plugged in the receiver and it is acquiring the satellite signal or the receiver may have temporarily lost the signal. 018 The receiver may not be connected to an active telephone line or broadband Internet connection. • • • • • Wait a few minutes to see if the message goes away.
Reference Troubleshooting Tables Changing Channels What Is Happening Possible Reason You enter a desired channel number. The channel changes, but the new channel is not exactly the channel you entered. • You may have made a mistake entering the channel number, or the channel number you entered may be invalid. If so, the channel displayed is the closest possible to the channel you entered.
Reference Troubleshooting Tables What Is Happening Possible Reason What to Do • Make sure the remote control antenna is connected to the REMOTE ANTENNA port on the receiver’s back panel. Make sure the remote control antenna is not touching any other equipment or any back panel connections on your receiver. Provide space above the receiver so the antenna can be installed straight up. Place the receiver higher than the other equipment in your entertainment center.
Reference Troubleshooting Tables What Is Happening Possible Reason What to Do • You may have applied a Favorites List other than the list named All Chan. • You can change the applied Favorites List while using the Program Guide by pressing the remote control GUIDE button. You can choose another custom Favorites List, the All Chan list, which includes all the channels, the All Sub list, which includes all subscribed channels, and the All HD list, which includes all subscribed HD channels.
Reference Troubleshooting Tables What Is Happening Possible Reason What to Do • • There may be interference from other nearby electrical devices (such as radio towers, cellular telephones, computers, microwave ovens, radios, stereos, or TVs). • • • • A “black box” fills almost all of the TV screen. You may have turned on the Closed Captioned feature on the TV, and put that feature into Text mode. The TV screen is all blue.
Reference Troubleshooting Tables What Is Happening Possible Reason What to Do You try to set up an event timer and the receiver displays a message noting that the program is a Pay-Per-View event. You must order a Pay-Per-View event before you can create an event timer for it. To create an event timer for the event, first order it. You try to set up an event timer, but the receiver displays an Error message giving you the option to delete an event timer that was set up earlier.
Reference Troubleshooting Tables Hearing a Program What Is Happening Possible Reason • The receiver’s front panel power light is on and there is a good picture on the TV set, but you do not hear any sound. You hear a foreign language with a program. • • You may have muted the sound, or set the volume so low that you cannot hear it. The audio connections may not be properly connected. You have selected Dolby Digital Only when there is no Dolby Digital soundtrack.
Reference Troubleshooting Tables What Is Happening Possible Reason What to Do Your computer or FAX machine tries to send a FAX or modem transmission, but fails. The receiver was sending PayPer-View purchase information to DISH using your phone line. When the receiver found that the telephone was busy, it automatically disconnected. The fax or modem found that there was no dial tone, and cancelled the transmission. Re-send the FAX or modem transmission.
Reference Troubleshooting Tables Menus What Is Happening You were using a menu, and it suddenly closed. 114 Possible Reason What to Do You may not have done anything with the remote control or front panel buttons for several minutes. The receiver has a time-out feature that closes any menu after several minutes of no activity. This will discard any changes you have made, but otherwise does no harm to the receiver. Start over again.
Reference REMOTE CONTROL DEVICE CODES Remote Control Device Codes The Hopper contains manufacturer codes for programming the remote to control your TV, VCR, Blu-ray Disc™ or DVD player, or audio amplifier. Every attempt has been made to include all codes. If your device brand is not listed or if the codes do not work, the remote may not control your device. In some cases, codes may operate some but not all buttons shown in this guide.
Reference Remote Control Device Codes 116
Appendix What you’ll find in this chapter: • LIMITED WARRANTY • RESIDENTIAL CUSTOMER AGREEMENT • FCC COMPLIANCE 117
Appendix LIMITED WARRANTY This Limited Warranty is a legal document. Keep it in a safe place. Remember to retain your Bill of Sale for warranty service! Any items returned without a copy of the Proof of Purchase will be considered out of warranty. What the Warranty Covers This warranty extends only to the original user of the equipment and is limited to the purchase price of each part.
Appendix 2 3 4 5 6 A Customer Service Representative will assist you. If the Representative determines you should return any equipment, you will be directed to call a Return Authorization representative. Before shipping any equipment, you must talk to a Return Authorization representative and must obtain a Return Authorization (RA) number. You will be given the appropriate address for which to return your equipment.
Appendix Residential Customer Agreement RESIDENTIAL CUSTOMER AGREEMENT Thank you for choosing DISH Network®. To view this Residential Customer Agreement in Spanish, please visit dish.com or call us at 800-333-DISH (3474) and we will send you a copy. Para ver este acuerdo en español por favor visite dish.com o llame all 1-800-333-DISH (3474) y le enviaremos una copia.
Appendix Residential Customer Agreement G. Accessing the Internet Through Your Receiver. Some of our receivers can be used to access websites and information on the Internet.
Appendix Residential Customer Agreement Service, to receive any remaining credits or promotional pricing that you would have been eligible to receive had your Services not been disconnected. Unless required by applicable law, deposits will not be held segregated from other funds and will not earn or accrue interest. Promotional pricing is valid only at the time of installation. F. Attorneys’ Fees/Collections.
Appendix Residential Customer Agreement 4. EQUIPMENT A. Equipment. In order to receive Services you must purchase or lease certain reception equipment consisting primarily of a DISH Network compatible satellite receiver(s) and applicable Smart Card(s), remote control(s), satellite antenna(s), and sometimes low noise block converter(s) with integrated feed(s) (collectively, “Equipment”). B. Additional Tuners and Receivers. We may choose to allow you to place additional receivers on your account.
Appendix Residential Customer Agreement 5. LEASED EQUIPMENT A. Lease Terms. We may choose to lease certain Equipment to subscribers.
Appendix Residential Customer Agreement F. DAMAGES LIMITATION. NEITHER WE NOR OUR THIRD-PARTY BILLING AGENTS, NOR ANY OF OUR OR THEIR AFFILIATES, SHALL HAVE ANY LIABILITY WHATSOEVER FOR ANY SPECIAL, INDIRECT, INCIDENTAL OR CONSEQUENTIAL DAMAGES ARISING OUT OF OR RELATING TO: DISH NETWORK EQUIPMENT OR ANY OTHER EQUIPMENT; OUR FURNISHING OR FAILURE TO FURNISH ANY SERVICES OR EQUIPMENT TO YOU; OR ANY FAULT, FAILURE, DEFICIENCY OR DEFECT IN SERVICES OR EQUIPMENT FURNISHED TO YOU. 8.
Appendix Residential Customer Agreement law or regulation, that provision will be considered modified to the minimum extent necessary to make such provision legal and no longer in conflict with such law or regulation, without affecting the validity of any other provisions. G. Remedies Cumulative.
Appendix Residential Customer Agreement Type of Fee Amount Description of When Fee Applies Service Access Fee $6.00 You subscribe to Racetrack TV but do not subscribe to applicable required minimum programming. International Service Access Fee $10.00 You do not subscribe to applicable required minimum programming. TV2 Receiver Connection Fee $5.00 You purchase or lease a dual tuner receiver and it is not connected to a phone line and/or a broadband network. DISH 500 Upgrade Fee $5.
Appendix FCC Compliance FCC COMPLIANCE The following text is extracted from Federal Communications Commission (FCC) regulations, as of this Guide’s publication date. Contact the FCC (see following) or a library for complete text of the regulations. Telephone Communication This equipment complies with Part 68 of the FCC rules and the requirements adopted by the ACTA. On the back panel of this equipment is a label that contains, among other information, a product identifier in the format US:AAAEQ##TXXXX.
A Account Information 4 Adult Content, Hiding 45 Antenna Adjusting 69 Remote Control 13 Apps 49 Attenuator 70 Audio Dolby Digital 90 Dolby Digital and Linear PCM audio signals 90 PCM Only 90 Troubleshooting 117 Automatic Timer 64 B Back Button 53 Back Panel 17 Batteries, Remote Control 13 Blockbuster @Home™ titles 31 Broadband Internet Connection 8, 104 Browse Banner 24 Troubleshooting 113 C Caller ID 86 Enabling/Disabling 86 History 87 Troubleshooting 118 Canceling a Procedure 19 Changing Channels 22,
DISH On Demand 30 Pay-Per-View 30 Reviewing Orders 31 R Rain and Snow Fade 7 Ratings Restrictions 42 Receiver Back Panel 17 Front Panel 17 Updates 91 Recording Grouping and Sorting 56 Live Program 54 Maximum # Recorded Events 61 Options 55 Playing Back a Recorded Program 54 Receiver is Off 62 Single Mode 54 While Watching Different Programs 54 Recover Button 79 Remote Antenna 69 Remote Battery Low 13 Remote Control 12 Antenna 13, 69 AUX Mode 78 Batteries 13 Buttons, DVD/VCR Control 16 Buttons, Receive
Receiver Information Write the following information in the spaces provided below. You may need to provide this information if you call the Service Center. To get the Conditional Access Numbers, display the System Info menu (see Ordering Your Programming Packages).
For all your customer needs, go to mydish.com/chat or call the Customer Service Center at 1-800-333-DISH (3474).