Contents Safety Instructions ................................................................................iii Chapter 1 - Introduction.........................................................................1 Welcome to DISH Network™ ............................................................... 1 Overview ............................................................................................... 1 Getting the Most of Your HD Satellite Receiver ....................................
Contents Using Locks ........................................................................................54 Using Caller ID ....................................................................................59 Advanced Features .............................................................................61 Display Options for Local Channels ....................................................63 Changing Program Languages ...........................................................
Safety Instructions 1. 2. 3. 4. 5. 6. 7. 8. 9. 10. 11. 12. 13. Read these instructions. Keep these instructions. Heed all warnings. Follow all instructions. Do not use this apparatus near water. Clean only with a dry cloth. Do not block any ventilation openings. Install in accordance with the manufacturer’s instructions. Do not install near any heat sources such as radiators, heat registers, stoves, or other apparatus (including amplifiers) that produce heat.
Safety Note to Satellite TV System Installer: This reminder is provided to call the satellite TV system installer’s attention to Article 820-40 of the National Electrical Code (NEC) that provides guidelines for proper grounding and, in particular, specifies that the cable ground shall be connected to the grounding system of the building as close to the point of cable entry as practical. Safety Tips • • • • • • • • • • • • Page iv Unplug the receiver from the AC power outlet before cleaning.
Chapter 1 Introduction Welcome to DISH NetworkTM Congratulations and welcome to the home theater experience of High Definition Television (HDTV). This high definition (HD) digital satellite receiver provides motion picture sharpness and wide screen format together with high quality digital sound. You will also experience the convenience of Direct Broadcast Satellite (DBS) service bringing high definition programming straight to your home.
Chapter 1 Introduction Conventions Used in This Guide To make it easy for you to use this guide, we use the following conventions: • The names of remote control buttons and modes are all uppercase. Example: Press the SAT button. • Menus and options that appear on the TV screen are in bold type. Example: Open the Program Guide. • Select means to move the highlight to an on-screen option or choice in a list and press the SELECT/OK button on the remote control. Example: Select the Locks option.
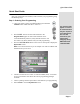
Quick Start Guide Quick Start Guide After your system has been installed, order and watch your programming using the following steps: Step 1: Ordering Your Programming 1. Using your remote control, press SAT, and then press the blank POWER button. Make sure the TV is also on. 2. Press GUIDE. You will see that some channels in the Program Guide appear in white. These channels can be viewed immediately. However, many channels will be in red. You cannot view these channels until you order programming. 3.
Chapter 1 Introduction 7. Press GUIDE. Wait a few minutes and the channels you purchased will turn from red to white, and can now be viewed. If your programming package qualifies, your should now be watching TV in high definition format. Step 2: Finding Programs To Watch First, make sure the receiver is turned on. Press the POWER button on the remote or press the POWER button on the receiver. There are two ways to find information on programs.
Quick Tour of the Menus Quick Tour of the Menus This tour guides you quickly through the basic features available through the Main Menu. See Chapter 3, Using the System for more information about these and other features. 1. Press the remote control MENU button to open the Main Menu. 2. Press the 1 button to select the Program Guide option on the Main Menu. This opens the Program Guide on the TV screen. You can use the Program Guide to find and select a program to watch.
Chapter 1 Introduction 4. Press the 2 button to select the Themes and Search option on the Main Menu. Use this menu to search for programming by Theme Categories. You can also select the Search function to find programs by name or by key words within the text of the event information in the program guide. 5. Press the MENU button to go back to the Main Menu. 6. Press the 4 button to open the Favorites menu.
Quick Tour of the Menus 8. Press the 5 button to select the Locks option on the Main Menu. This menu allow you to apply password-protected locks on programming based on rating, or even on a channel-by-channel basis. You can even lock PPV, hide adult programming channels or hide all locked channels from being visible in the program guide by selecting options within this menu. 9. Press MENU to go back to the Main Menu. 10. Press the 6 button to select the System Setup option on the Main Menu.
Chapter 1 Introduction 12. Press the 7 button to select the Timers option on the Main Menu. This screen is used for creating and changing timers used to trigger automatic channel changes, reminders, or VCR recordings. 13. Press MENU to go back to the Main Menu. 14. Press the 8 button to select Customer Service. Use this menu to review your statement, pay your bill, upgrade programming, and more. 15. Press the MENU to go back to the Main Menu.
About Satellite Television 16. Press the 9 button to select dish home Interactive TV. You can order channels, check the news, and even play games. The DISH button also opens this screen. 17. Press VIEW TV. About Satellite Television Satellite television uses satellites in a stationary orbit over the Earth to deliver television and audio programming. This type of orbit enables the satellites to stay aligned over one place on the surface of the Earth.
Chapter 1 Introduction Solar Interference Twice a year, the sun moves to a position behind the DISH Network satellite as it orbits the Earth. This event occurs during a few days at the beginning of the spring and the beginning of the autumn and lasts only a few minutes. During these brief periods, you will not be able to see programs on DISH Network. When the sun has moved from behind the satellite, the programs will reappear.
Chapter 2 Receiver Description and Installation Receiver Front Panel Smart Card Door Behind this door is a slot for a future smart card. No smart card is included with this receiver. Info Button Press INFO to display information about a program you are watching, or when you have the Program Guide, Browse Banner, or Themes list open. Menu Button Press the MENU button to open the Main Menu. Arrow Buttons Use ARROWS to navigate and select menu items and to change satellite channels.
Chapter 2 Receiver Description and Installation System Info Button Press the SYSTEM INFO button to open the System Info screen. Cancel Button Press this button to cancel and return to the previous menu or to watch a program if there are no previous menus. Power Button Press the POWER button to turn the receiver on or off. Be sure to turn off the satellite receiver so that your Program Guide and other system information remains current.
Receiver Back Panel Connections Receiver Back Panel Connections Tighten the connections by hand only. If you use a wrench you might over-tighten the connections and cause damage that would not be covered by the Limited Warranty. The receiver back panel has ports you can use to connect the receiver to other devices (you may not need to use some of these ports). The back panel also has the power cord and phone jack.
Chapter 2 Receiver Description and Installation Tip: For the best viewing experience, you should use the off-air tuner provided in your DISH DVI-equipped DISH HD satellite receiver. The satellite receiver’s off-air tuner can receive both analog and digital off-air broadcasts, integrate off-air programming into its Program Guide, and allow all of the satellite and off-air programming to be viewed over a single high-quality digital connection. Tip: Tighten the coaxial cable connections by hand only.
The Remote Control Telephone Jack Connect a telephone cable with a standard RJ-11 telephone connector to the receiver here, and then connect the cable to an active telephone line. Note: The receiver must be connected at all times to an active telephone line. The Remote Control The remote control gives you easy access to all of the features of your satellite receiver.
Chapter 2 Receiver Description and Installation Remote Control Batteries The remote control comes with AAA batteries, which need to be installed when you first receive your system. When you replace old batteries, you should replace all of the batteries. Use batteries of the same kind, for example, alkaline or carbon zinc. Don’t mix batteries of different kinds. Alkaline batteries last longer than carbon zinc. 1. Press down on the top of the battery cover and slide the cover off. 2.
Remote Control Settings Remote Control Settings Change the Address When you receive your system, your remote control and receiver have been set to communicate on address 1. However, because UHF signals travel long distances and go through walls, a neighbor's UHF Pro remote could control your receiver by mistake if they are on the same address. Once all connections have been made, to handle this problem, you can change the address on your remote control and the receiver as follows: 1.
Chapter 2 Receiver Description and Installation UHF Remote Control Antenna Attach a UHF Remote Control Antenna Attach the UHF remote control antenna to the receiver's back panel REMOTE ANTENNA input so you can use your UHF Pro remote control. Note: Be sure to set the antenna straight up so you can use the remote control from as far away as possible. Don't let the antenna touch anything.
UHF Remote Control Antenna Add a UHF Attenuator Stray UHF signals can block signals from the remote control to the receiver. To prevent blocks, you can install a 10 dB attenuator. This will help keep out stray UHF signals, but also reduces how far away you can use the remote control. The attenuator is not supplied with this receiver. 1. Remove the UHF antenna from the UHF Remote Antenna input on the receiver back panel. 2. Attach a 10 dB attenuator to the UHF Remote Antenna input. 3.
Chapter 2 Receiver Description and Installation Installing the Receiver This section guides you through the installation of your new satellite receiver, which includes the following: • Connecting to your HDTV set or monitor. • Connecting to your dish antenna and upgrading the software. • Ordering your programming. • Setting up to display in HD.
Installing the Receiver 5. Complete installation of the receiver with the dish antenna. See Installing a Receiver in an Existing Dish Antenna System in the next section of this chapter. 6. Order your programming using the instructions in Chapter 1. Connection Diagram Example The diagram below provides one example how the back panel ports can be used to connect to an HDTV as well as connections for a VCR, and DVD Player. Your installation may be different.
Chapter 2 Receiver Description and Installation Note: If you are installing your receiver into a system with DISH Pro LNBFs (and/or switches), you can have as much as 200 feet of cable between the LNBF and the receiver. However, you must use only RG-6 coaxial cables rated for 950 to 2150 MHz. Some cables may say “Swept tested for 2150 MHz.” If you have any doubt about this, examine the cable’s outer jacket, ask your DISH Network retailer, or look on the container the cable came in.
Installing the Receiver When the software upgrade is complete, you will see a second message that the receiver's memory is now being programmed. This message may disappear and your screen may go blank for a few minutes. This is normal and does not indicate a problem with the receiver. 8. When the software upgrade is complete and the receiver resets itself, you should now be able to order your programming by calling 1-800-333-DISH (3474). See Chapter 1, Introduction.
Chapter 2 Receiver Description and Installation 6. Connect the AUDIO DIGITAL OUTPUT or the PHONO (RCA) AUDIO OUTPUTS on the receiver, as needed, to the corresponding HDTV audio inputs to hear sound. Note: The default resolution on both HDTV outputs is 480p until the receiver is authorized and subscribed to a qualifying programming package and the desired HDTV resolution has been selected. Connecting Your Receiver to a Phone Line You must keep the receiver connected to an active telephone line.
Initial Set Up for Off-Air Broadcasts or Cable 6. Select the Prefix Code option. The receiver displays the same number of boxes (highlighting the first box) where you must enter the digits. Use the NUMBER PAD to enter the prefix code. As you enter each number, the highlight moves to the next box. 7. Select the Save option to save the settings.
Chapter 2 Receiver Description and Installation How to Add Local Off-Air Digital Channels To add a local digital channel: 1. Press MENU 6-1-5 to open the Local Channel Setup menu. 2. Use the Scan Digital selection to add the local channels to the Program Guide automatically or select the Add DTV option on the Local Channel Setup menu. This opens the Add Local Digital Channel menu. 3. Enter the Transmit Channel number for the channel you want to add. You must enter two digits.
Initial Set Up for Off-Air Broadcasts or Cable 4. Select the Save option to add the channel. This opens the Edit Local Channel Name menu: Highlight a letter and press the SELECT/OK button. Do this again to spell out the channel name. You can enter up to five characters. If you need to, use the SPACE option to insert a space or the
Chapter 2 Receiver Description and Installation 2. Use the Scan Analog selection to add the local channels to the Program Guide automatically or select the Add Analog option on the Local Channel Setup menu. This opens the Add Local Analog Channel menu. 3. Enter the channel number in the Ch. Num field. Note: Be sure to enter two digits. For single digit numbers, place a zero in front of it. 4. To assign the channel to one of the major broadcast networks, select an Affiliation option.
Initial Set Up for Off-Air Broadcasts or Cable 10. Select the Save option to leave the Local Channel Setup menu. 11. Select Display Options and choose one of the following: • DISH Network Locals - Select this option to display local channels (if in your DISH Network subscription) at their broadcast channel number. • Off-Air Antenna Locals - Select this option to display local analog channels at their broadcast channel number.
Chapter 2 Receiver Description and Installation • Poor analog reception usually causes the TV picture to be "snowy" or to include "ghosts," that is, multiple images caused by receiving reflected signals along with the direct signal from a station. • Poor digital reception may cause the TV picture to be "pixelized," that is, broken up into small squares of various colors, or to be lost completely (the TV screen is all black or all blue).
Chapter 3 Using the System Using the Remote Control This section describes how to use the remote control in the SAT mode to control your satellite receiver. To use the remote to control your VCR and other devices, see Control Other Devices with the Remote on page 64. SAT Mode Button Press this button to set the remote to SAT mode to control the receiver. The SAT mode button's back light turns ON briefly to show that the remote is set to SAT mode.
Chapter 3 Using the System Page Up And Page Down Buttons Press the PAGE UP button or the PAGE DOWN button to scan, page by page, through the Program Guide, a Themes list, a Favorites List, an Event Timers list, or a list of channels. Guide Button Tip: The arrow buttons can be used to quickly navigate through menus and the program guide. When you find a program or menu option you would like to access, just press SELECT/OK. Tip: To open some of the menus, use the matching buttons on the remote control.
Using the Remote Control Info Button Press this button for more information when the Program Guide or the Browse Banner is open, or when watching a program. • When a menu is open that includes a Help option, press this button to see help information for that menu. • Highlight a program in a Themes list and then press this button for more information on that program. • When the receiver is OFF, press this button to open the System Info menu. View TV Button Press this button to return to watching a program.
Chapter 3 Using the System dish home Button Press the DISH button on your remote control to use dish home Interactive TV. Format/Star Button Press the FORMAT/STAR button to toggle through the available display modes (Normal, Zoom) on widescreen displays. Recover Button Press the RECOVER button if you accidentally change the channel or video input on your TV and cannot get the picture back from your satellite receiver.
Changing Channels Changing Channels There are three basic ways to change channels while watching a program: • Press the remote control UP or DOWN ARROW buttons to get to the desired channel. • Use the remote control NUMBER PAD buttons to enter the desired channel number. • Press the GUIDE button and select a program from the Program Guide. See page 38 for more information. Using the Menus Tip: The channel you select may display one of several program information symbols.
Chapter 3 Using the System Selecting a Menu Option Tip: To quickly go to any menu option with a number next to it, just press the number on the remote that matches that option number. When you select a menu option, that option takes effect right away. You can select a menu option in either of two ways: • If the option has a number next to it, press the number on the remote control NUMBER PAD that matches this number. If you do this, you do not need to highlight the option first.
Using Text Fields When you select a choice in a list, it looks like this: or Canceling a Procedure To cancel a procedure, you must press the remote control CANCEL or VIEW TV button before you do the last step of the procedure. If this does not work, you must finish the procedure. Using Text Fields There are several screens that require you to enter information into areas known as fields.
Chapter 3 Using the System Using the Program Guide The on-screen Program Guide provides a complete listing of the available channels and programs. You can use the Program Guide to change channels, to see what programs are scheduled, and to buy Pay-Per-View programs. The Program Guide shows which Favorites List is active. Page 38 • The Program Guide displays only the channels in the active Favorites List (see page 44). • All Chan - Displays all of the channels in the Program Guide.
Using the Program Guide Opening the Program Guide There are two ways to open the Program Guide: • Press the GUIDE button. • Press the MENU button and then select the Program Guide option. Selecting a Program in the Program Guide 1. Use the NUMBER PAD buttons to enter the desired channel number. The Program Guide displays a block of channels including the one that you just entered. 2. Use the ARROW buttons to move the highlight to the desired program.
Chapter 3 Using the System Using the Program Banner The Program Banner provides information about the program you are watching. The receiver displays the Program Banner for a few seconds at the top of the TV screen every time you change the channel or press the remote control VIEW button. Using the Browse Banner You can use the Browse Banner to change channels, or to see what other programs are available without changing the program that you are watching.
Using the Browse Banner 2. Change the channel: • Enter the channel number for the program that you want, using the NUMBER PAD buttons • Press the UP or DOWN ARROW button to display the channel that you want. 3. Press the RIGHT ARROW button to display the next program. Press the LEFT ARROW button to return to the current program. Note: The Browse Banner displays programs that are on now. If you press the RIGHT ARROW, it will display information on the program that is on next on the same channel.
Chapter 3 Using the System Ordering Pay-Per-View Programs 1. Highlight the desired Pay-Per-View program in the Program Guide. The Pay-Per-View programs are listed with the channel number as PPV in the Program Guide. Tip: If any lock is in effect that covers the PayPer-View program, you must enter the password using the NUMBER PAD buttons. As soon as you enter the fourth digit of the password, the receiver highlights OK. 2. Press the SELECT/OK button. 3.
Using Themes and Search 2. Move through the Themes menu by using the ARROW buttons. Choose your category then press the SELECT/ OK button. 3. You can then scroll through a page at a time using PAGE UP or PAGE DOWN until you see the program you want in the listing. 4. Use the ARROW buttons to move to your selection and highlight the desired program in the program list. 5. Press the SELECT/OK button to watch the program.
Chapter 3 Using the System 5. Use the UP and DOWN ARROW buttons to scroll through the results. 6. Select one of the programs to watch, or select Cancel to close the Search Results screen. Note: If you select a program that is on now, the receiver tunes to that program. If you select a program that is on in the future, you will have to set a timer. See page 46 for more information on event timers.
Using Favorites Lists Creating or Changing a Favorites List You can create, add channels to, and remove channels from a Favorites List. 1. Press the MENU button. 2. Select the Favorites option. 3. Select the Favorites List that you want to create or change. 4. Select the Modify List option. Note: At any time you can select the Clear List option to remove all channels from the current list. This does not apply to the All Chan and All Sub. 5.
Chapter 3 Using the System Changing the Name of a Favorites List 1. Press the MENU button. 2. Select the Favorites option. 3. Select the Favorites List that you want to change. 4. Select the Edit List Name option to open the virtual keyboard. Note You cannot change the name of the All Chan or All Sub list. 5. Name the Favorites List using one of the entry methods described on page 37. Note A list must have at least one character. Two lists cannot have the same name.
Using Timers Event Timer Frequencies Once - Applies to a one-time program. If the program time changes, this timer operates at the new time. The receiver deletes this timer after the timer operates. Weekly - Applies to a program that is scheduled for once a week on the same channel at the same time on the same day. Daily - Applies to a program that is scheduled for Monday through Sunday on the same channel at the same time each day. Mon.-Fri.
Chapter 3 Using the System Setting Up an Automatic Event Timer 1. Select a future program using the Browse Banner, Themes menu or the Program Guide. Tip: You may start any timer one minute early. But if you set back-toback event timers and the second one starts early, the first one will end early. An event timer cannot start early for a Pay-Per-View program. If you try to set a timer for overlapping events, you will get an error message. 2. Select a Timer Type option. 3. Select a Timer Frequency option.
Using Timers 7. Select the Date/Time option. The receiver displays the Set Date/Time for Manual Timer menu. 8. Use the NUMBER PAD buttons to enter the Start Time (this includes selecting AM or PM) and the End Time (this includes selecting AM or PM). 9. Use the NUMBER PAD buttons to enter the Date. 10. Select the Create Timer option. 11. To create another event timer select the Create option again. Note: You cannot set a manual event timer for a Pay-Per-View event.
Chapter 3 Using the System Overlapping Event Timers If you try to create event timers for overlapping programs, the receiver displays a menu with the dates and times of both programs. The receiver also displays this menu if a program time has changed, causing one timer to overlap another. You must delete or edit one of the timers. Tip: The receiver deletes the Frequency: Once event timers when they operate. You must delete all other types of event timers yourself.
Using Timers 6. If you want to change the Start Time, the End Time, or the Date, select the Date/Time option to display the Set Date/Time. Otherwise, skip to step 9, below. 7. Use the NUMBER PAD buttons to enter the Start Time (this includes selecting AM or PM) and the End Time (this includes selecting AM or PM). 8. Use the NUMBER PAD buttons to enter the Date. 9. Select the Create Timer option. 10.
Chapter 3 Using the System Special Consideration When Using Event Timers For Locked Programs - You must enter the receiver password before you can create an automatic event timer. You can create a manual event timer for a locked program without entering the password. However, if you do this, when the event timer operates the receiver may display only an error or password entry menu. If you have set a VCR Event Timer, the VCR will record only that menu.
Setting Up the Receiver to Control a VCR The receiver starts the VCR recording, but does not turn on the VCR. Make sure you leave the VCR turned on. You must also have a videotape in the VCR. 1. Make sure the VCR is connected to one of the receiver outputs and is set to display on your TV. Consult your VCR user’s guide. 2. Get the VCR device code from the table in Chapter 5. 3. Press the MENU button. 4. Select the System Setup option, then the Installation option, then the VCR Setup option. 5.
Chapter 3 Using the System Using Locks First you set the locks; then you lock the receiver. You must lock the receiver in order to put any locks into effect. If you unlock the receiver, leave the locks unchanged, and then lock the receiver again, the same locks will be in effect as before. How to Set Locks: A Two Step Process 1. Create the locks that you want. 2. Lock the receiver. Once the receiver is locked, anyone who wants to access locked items must enter the password.
Using Locks 4. Enter and verify a password, using the NUMBER PAD buttons. The receiver displays stars as you enter the digits of the password. 5. Memorize your password! From now on, you must enter this password to lock or unlock the receiver. 6. Highlight and select the OK option. Re-enter the password. All the locks you have set are now in effect. Creating or Changing Ratings Locks Be aware of the following: The locks use the ratings that the original program providers assigned to the programs.
Chapter 3 Using the System 4. Select the rating that corresponds to the lowest acceptable audience age. Note: All ratings that are more restrictive than the selected rating are also selected. For example, if you lock PG-13 rated programs, then all programs with the R, NC-17, and NR/AO ratings are also locked. 5. Select the expanded rating code(s), if you want to also lock these ratings. 6. To unlock a rating code, highlight the code and press SELECT/OK. 7. Select the Save option to save the changes. 8.
Using Locks 5. Highlight the channel that you want to lock. If necessary, press the UP or DOWN ARROW button to see the desired channel. You can also enter each channel number using the NUMBER PAD buttons. 6. Press the SELECT/OK button to lock or unlock the highlighted channel. If the checkbox next to the channel has a checkmark, the channel is locked. 7. Select the Save option to save the changes. 8. If the receiver is not already locked, you must lock it to put the locks you just created into effect.
Chapter 3 Using the System Unlocking or Locking Pay-Per-View Programs This feature locks or unlocks all Pay-Per-View channels. Tip: If this option appears as Unlock PPV instead, Pay-PerView programs are already locked. Tip: If the receiver displays a message prompting you to enter a password, it already has been locked. You also can lock one or more Pay-Per-View channels by using channel locks or rating locks. 1. Press the MENU button. 2. Select the Locks option.
Using Caller ID 6. Press the SELECT/OK button. 7. Enter the new password using the NUMBER PAD buttons. As soon as you enter the fourth digit of the password, the receiver highlights the OK option. 8. Select the OK option to change the password. 9. Enter the new password again, using the NUMBER PAD buttons. The receiver displays stars (*) as you enter the digits of the password. As soon as you enter the fourth digit of the password, the receiver highlights the OK option. Press the SELECT/OK button.
Chapter 3 Using the System If you are in a menu when a call comes in, you will see a different Caller ID popup screen. To Turn the Caller ID On and Off 1. Press MENU. 2. Select the System Setup option. 3. Select the Installation option. 4. Select the Caller ID option. The following screen will display. 5. Select Enable Caller ID or Disable Caller ID. 6. Select Save.
Advanced Features Advanced Features Setting Up Digital Audio You must have a capable amplifier/decoder to use Dolby®Digital sound. The receiver has a built in Dolby Digital adapter and also supports Linear PCMA (regular mono or stereo sound). • Press MENU 6-8 for the Dolby Digital Setup menu. • Select the mode to support your home theater system digital audio input. • Select the Save option. The TV audio will continue to run normally even if the program broadcast does not use Dolby Digital sound.
Chapter 3 Using the System To enable closed captioning on HD displays: 1. Select MENU 6-9 to open the Closed Captioning Settings menu. 2. Choose the option to turn captioning on. 3. Select Save before exiting the menu to store your selection. Screen Adjustments You can customize the way the receiver video displays on your monitor. HD Display You can easily change the format of the HD display output (called the aspect ratio).
Display Options for Local Channels Display Options for Local Channels If you have not yet connected an off-air antenna or cable source to the receiver, first see Initial Set Up for Off-Air Broadcasts or Cable on page 25 for details. You can set up your local channels in the Program Guide for viewing either with your local channel numbers or the DISH Network four digit numbers. Digital off-air channels will always be displayed in the 2-99 channel range.
Chapter 3 Using the System 3. Select the Alternate Audio option. 4. Select the language you want in the Languages list. Note: Alternate provides visually-impaired customers with a visual description of the program, if available. 5. Select Save to save your language choice. The receiver displays the System Setup menu. 6. Press VIEW TV to exit the System Setup menu.
Control Other Devices with the Remote Set Up the Remote Control You can set up the remote to control other devices using the device codes listed on page 86. In the following instructions, the column on the left contains the instructions and the column on the right provides additional information. Instructions Additional Information 1. Turn the device on. Use the device’s front panel buttons or its remote control. 2. Find the brand name of the device in the tables starting on page 86.
Chapter 3 Using the System Instructions 11 Additional Information If you can’t find a code that works try, Setting Up Using Device Codes Scan that follows. Scan for Device Codes If the code for your device is not listed in the device codes on page 86, use this procedure to scan the remote control’s memory for the device code. In the following instructions, the column on the left contains the instructions and the column on the right provides additional information. Instructions Additional Information 1.
Control Other Devices with the Remote Instructions Additional Information 7. Turn the device back on and try some other appropriate buttons to make sure they work. Press the POWER button to turn the device back on. Try some other buttons to make sure they work. Sometimes, the POWER button works when other buttons don’t. 8. Repeat this procedure until you’ve tried all the codes. You may need to repeat the scan to find the best code for your device.
Chapter 3 Using the System Control a TV (or a Second TV) TV Mode Button To use the remote to operate a television, you must press the TV mode button to set the remote to TV mode. The TV mode button’s back light turns ON to show that the remote is set to TV mode. Make sure to keep the remote in TV mode to use the buttons as described in this section. Input Button If the TV has video input options, use this button to switch the TV among those options.
Control Other Devices with the Remote Number Buttons Use the NUMBER buttons to enter numbers in a menu, or to go directly to a new channel. Control a VCR or a DVD Player Some of the features described below may not apply to the device. See your device owner’s manual for details about its features. If a remote control button is not described in this section, it does not work in VCR mode.
Chapter 3 Using the System • Press the RECORD button to start recording on a VCR. • Press the PAUSE button to pause a videotape or DVD. Press this button or the PLAY button to restart the videotape or DVD. Note: On some TVs, the presence of fixed images for extended periods of time may cause them to be permanently imprinted on the screen.
Control Other Devices with the Remote SELECT/OK Button This SELECT/OK button works as the Input Select button for a tuner or amplifier. Up/Down (Arrow) Buttons Use UP/DOWN ARROW buttons to change channels on the tuner or amplifier. Mute Button Press the MUTE button to turn off the sound. Press it again to restore the sound. Volume Button Press the minus (-) side of this button to lower the sound volume. Press the plus (+) side of this button to raise the sound volume.
Chapter 3 Using the System Set the Remote Back to Control the TV Volume 1. Press and hold the TV mode button until all the other mode buttons light, then release. 2. Press the POUND (#) button. 3. Press the plus (+) side of the VOLUME button. 4. Press the 0 number button. 5. Press the POUND (#) button. The TV mode button flashes three times. 6. Press the SAT mode button. 7. Press the plus (+) and minus (-) sides of the VOLUME button.
Resetting the Receiver to Factory Defaults 5. If you want to continue, select the Yes option. The receiver now displays the System Diagnostic Tests screen containing further instructions. 6. Aim both remotes at the receiver. Press one button at a time on your DISH Network remote, while pressing the button to be taught on the universal learning remote at the same time. Repeat this process for each button you want to be taught to the learning remote.
Chapter 3 Using the System 2. Select the System Setup option. 3. Select the Installation option. 4. Select the Factory Defaults option.The receiver displays a Warning message, prompting you to confirm that you want to reset the receiver. 5. Select the Yes option to confirm the reset. The receiver resets, and then displays the Installation and Setup menu.
Troubleshooting Tools Note: If you have the receiver connected to a DSL (Digital Subscriber Line) phone line, it may cause this test to fail. If so, you will need to install a DSL filter between the receiver and the phone jack on the wall. You can get a DSL filter from your Internet Service Provider or a local electronics parts store. 1. Press the MENU button. 2. Select the System Setup option. 3. Select the Diagnostics option.
Chapter 3 Using the System QAM Installations If you live in an apartment, condominium or other clustered housing, your television signal is transmitted to you through master multiplexing distribution equipment located in a central area in your dwelling complex. This distribution equipment is owned and maintained by the dwelling complex owners or managers. Note: Do not change the setting on this screen unless otherwise directed.
Chapter 4 Reference Troubleshooting Tables Use these tables if you have problems using the system before calling the Customer Service Center. Many problems arise from misunderstandings of how the system works, especially when you are just becoming familiar with it. These tables cover many problems, usually with a simple solution for each one. To solve a particular problem, do the following: 1. Review the section in this Guide that relates to the problem. 2.
Chapter 5 Reference On-Screen Messages This table describes some on-screen messages in the order of their message numbers. Find the message number in the upper right corner of the message displayed on your TV screen, and then find the matching number in this table. Message Number Possible Reason What to Do There may be a problem with the multi-dish switch. Check the coaxial cables and their connections to and from the multi-dish switch.
Troubleshooting Tables You may have just plugged in the receiver, and it is acquiring the satellite signal. Or, the receiver may have temporarily lost the signal. Wait a few minutes to see if the message is removed. Make sure that all required cables are in place, and check that all cable connections are tight and dry (for outdoor cables). Make sure that the satellite dish has a clear line of sight to the satellite. Check whether branches or leaves have grown into the line of sight.
Chapter 5 Reference You may not have connected the receiver to an active telephone line. Or, the telephone line may be defective. Connect the receiver to an active telephone line. Make sure that the telephone line to which you connect the receiver is working properly. Note: To be able to order Pay-Per-View programs, you must keep the receiver connected to an active telephone line at all times. If your setup includes more than one receiver, this applies to each receiver.
Troubleshooting Tables When you run Check Switch, you see "Twin" identified as the Device/LNB but you only have signal confirmed from one satellite. • The DISH Pro Twin LNBF is connected but the dish may not be pointed to receive signal from both 110 and 119 satellites. • If the check switch summary screen shows “119 W” on Dish Input 2, you need to point your dish 9 degrees to the east and re-peak your dish. Rerun check switch.
Chapter 5 Reference Watching A Program What Is Happening A “black box” fills almost all of the TV screen. The TV screen is all blue. Possible Reason What to Do You may have turned on the Closed Captioned feature on the TV, and put that feature into Text mode. Using the TV remote control and/or menus displayed by the TV (not the receiver remote control or the menus displayed by the receiver), turn off the closed captioned feature. Receiver may have captions on and not set to Service1.
Troubleshooting Tables Using Locks What Is Happening Possible Reason What to Do You set a lock (for example, a lock on programs by ratings), but the lock does not take effect. You may not have locked the receiver. You must lock the receiver to apply any lock that you have set. You forgot the password, so that you are unable to unlock the receiver. You may not have written down the password, to keep it in a safe place. Call the Customer Service Center.
Chapter 5 Reference You try to apply an empty Favorite List. The receiver displays an ERROR message. The receiver will not allow you to apply an empty list. Choose another list to apply, or add at least one channel to the empty list. A Favorite List does not show channels that you know you have added to it. If you have set up the Program Guide to hide adult channels and the receiver is locked, the Favorite List will not show such channels. Unlock the receiver for the list to show adult channels.
Troubleshooting Tables Your computer or FAX machine was receiving a FAX or modem transmission, but an error occurred. The receiver may have tried to call the Have the sender resend the FAX or modem transmission. Customer Service Center to send PayPer-View purchase information during the FAX or mode call. When the receiver found that the telephone was busy, it automatically disconnected. This generated “clicks” that caused an error in the FAX or modem transmission.
Chapter 4 Reference Device Codes These tables contain the manufacturer codes for programming the remote to control your TV, VCR, DVD player, or audio amplifier. Every attempt has been made to include all codes. If your device brand is not listed or if the codes do not work, the remote may not control your device. In some cases, codes may operate some but not all buttons shown in this guide.
Device Codes TV TV Codes 627, 654 Quasar Memorex 590, 627, 653, 654, 659, 675, 678, 720 508, 509, 651, 663, 673, 676, 698, 700, 747 Radio Shack/Realistic 526, 541, 590, 607, 612, 645, 650, 652, 654, 655, 657, 658, 661, 662, 663, 668, 670, 683, 698, 730 MGA 504, 505, 506, 542, 571, 573, 627, 652, 653, 654, 656, 660, 728 Mitsubishi 504, 505, 542, 570, 571, 572, 573, 597, 623, 627, 652, 653, 654, 656, 659, 660, 664, 665, 670, 671, 705, 728 Montgomery Ward 675 Motorola 521, 605, 651 MTC 505, 5
Chapter 4 Reference VCR Codes VCR If programming in AUX mode: Press 1 before entering the VCR code.
Device Codes VCR CODES Tatung 594, 682, Teac 588, 594, 682 Technics DVD Players Codes DVD Players Codes Daewoo 657 Technics 733 554, 633, 678, Denon 697, 698, 699, 700 Techwood 664 Teknika 554, 588, 676, 678, 687 Emerson 658, 701 Toshiba Toshiba 534, 535, 567, 584, 590, 680, 684, 688 616, 646, 647, 672, 735, 736, 750, Fisher 659 Totevision 591, 675, 676, 687 Yamaha 737, 738, 739 Funai 658 Unitech 675, Zenith 648, 673 Vector Research 534, 592, 600, 674, 677, 683 GE
Chapter 4 Reference Tuner/Amplifier Codes Proton 654, 705 Quasar 652, 742, 746 Radio Shack 744 RCA 635, 638, 704, 727 Sansui 753 Sanyo 741 Sharp 712, 713, 714, 715, 749 Sherwood 646, 670, 736, 738, 744 Sony 639, 645, 650, 687, 728, 729, 730 Teac 684, 737 Technics 643, 644, 652, 742, 746 Toshiba 710 Yamaha 663, 730, 731, 732, 733, 745, 747 Programming for combination devices: Program the remote control in VCR mode and then in AUX mode (press 1 before entering the DVD code).
Appendix Limited Warranty This Limited Warranty is a legal document. Keep it in a safe place. Remember to retain your Bill of Sale for warranty service! Any items returned without a copy of the Proof of Purchase will be considered out of warranty. What the Warranty Covers This warranty extends only to the original user of the equipment and is limited to the purchase price of each part.
Appendix Legal Limitations REPLACEMENT AS PROVIDED UNDER THIS WARRANTY IS YOUR EXCLUSIVE REMEDY. ECHOSTAR SHALL NOT BE HELD LIABLE FOR ANY INCIDENTAL OR CONSEQUENTIAL DAMAGES FOR BREACH OF ANY EXPRESSED OR IMPLIED WARRANTY ON THIS SYSTEM, NOR FOR ANY INCIDENTAL OR CONSEQUENTIAL DAMAGES RESULTING FROM THE USE OF, OR INABILITY TO USE, THIS SYSTEM. UNDER NO CIRCUMSTANCES SHALL ECHOSTAR’S LIABILITY, IF ANY, EXCEED THE PURCHASE PRICE PAID FOR THIS SYSTEM.
Limited Warranty Advance Exchange Program The Advance Exchange Program allows you to have replacement equipment shipped immediately to you (depending upon where you live, it could take three to five business days). Along with replacement equipment, you will receive a prepaid shipping label and instructions on how to return the defective equipment.
Appendix Residential Customer Agreement Effective as of September 1, 2001 until replaced. THIS DOCUMENT DESCRIBES THE TERMS AND CONDITIONS UNDER WHICH DISH NETWORK WILL PROVIDE ITS SERVICE TO YOU. IF YOU DO NOT ACCEPT THESE TERMS AND CONDITIONS, PLEASE NOTIFY US IMMEDIATELY AND WE WILL CANCEL YOUR SERVICE.
Residential Customer Agreement D. Ordering Pay Per View. You may order DISH Network pay-per-view Services by using your on-screen Program Guide and remote control unit to select the movies and other events we offer. To order DISH Network pay-per-view Services, your DISH Network DBS digital receiver must be connected to a telephone outlet.
Appendix I. Fees for Receivers that Independently Support Multiple Televisions. Additional fees may apply for a receiver which supports independent viewing of programming on multiple televisions. 2. BILLING POLICIES AND PAYMENTS FOR SERVICES A. You agree to pay all amounts billed for Services and to pay all taxes, fees and other charges, if any, which are now or may in the future be assessed on the Services you receive from us.
Residential Customer Agreement F. In addition to the amounts due for Services, you agree to pay the fees referenced below ("Fees") when applicable. DISH Network reserves the right to increase these Fees or add additional Fees in the future, in our sole discretion Smart Card Replacement Fee $50.00 Additional Receiver Authorization Fee (monthly, per receiver) $4.99 Late Payment Fee $5.00 Change of Service Fee $5.00 Duplicate Billing Statement Fee $2.00 Overnight Delivery Fee $18.00 Restart Fee $25.
Appendix Corporation, the corporate parent of DISH Network and any tampering or other unauthorized modification to the Smart Card is strictly prohibited and may result in, and subject you to, legal action. You agree to return the Smart Card to us upon request. B. Smart Cards are nontransferable. Your Smart Card will only work in the DISH Network receiver to which it was assigned by DISH Network.
Residential Customer Agreement 7. LIMITATION OF OUR LIABILITY A.
Appendix Staying Legal Title 47, Section 605(e)4, United States Code (U.S.C.) makes it a federal crime to modify this receiver to enable it to receive encrypted (scrambled) television programming without payment of required subscriptions. Conviction can result in a fine of up to $500,000 and imprisonment for five years, or both. Any owner of this receiver who procures or willfully causes its modification is an accessory to that offense and may be punishable in the same manner.
FCC Compliance company will notify you in advance that temporary discontinuance of service may be required. If advance notice is not practical, the telephone company will notify the customer as soon as possible. Also, you will be advised of your right to file a complaint with the FCC if you believe it is necessary. The telephone company may make changes in its facilities, equipment, operations, or procedures that could affect the operation of the equipment.
Appendix Notes Page 118
Index A E Add Local Off-Air Channels Analog 27 Digital 26 Advanced Features 61 Automatic Event Timer 46 Event Timers Automatic Event Timer 46 Before an Event Timer Operates 47 Editing an Event Timer 50 Event Timer Frequencies 47 Event Timer Types 46 Manual Event Timer 46 Maximum Number of Event Timers 50 Setting Up the Receiver and VCR to Use a VCR Event Timer 52 B Back Panel, Receiver 13 Banner, Browse 40 Browse Banner Displaying Information on Other Programs 40 Using the Browse Banner 40 H Highlightin
Q Starting a Test 74 Telephone Connection 75 Themes (Theme Categories) Using Themes 42 Timers, Event Setting Up the Receiver and VCR to Use a VCR Event Timer 52 Troubleshooting Tables Buying a Pay Per View Program 84 Changing Channels 83 On-Screen Messages 78 Using Event Timers 85 Using Favorite Lists 83 Using Locks 83 Using the Menus 82 Using the Program Guide or the Browse Banner 82 Using the Telephone for Voice/Data/FAX 84 Troubleshooting Tables 77 TV - Controlling with the Remote 68 TV/DVD Combo Codes
Write the following information in the spaces provided below. You may need to provide this information if you call the Service Center. To get the Conditional Access Numbers, display the Important System Information menu (see Ordering Your Program Packages ).