
Brochure
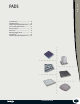
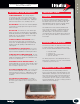
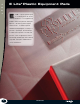
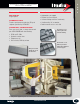

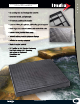

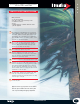
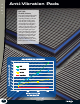
Table Of Contents
- US Full Line Catalog 3
- US Full Line Catalog 4
- US Full Line Catalog 5
- US Full Line Catalog 6
- US Full Line Catalog 7
- US Full Line Catalog 8
- US Full Line Catalog 9
- US Full Line Catalog 10
- US Full Line Catalog 11
- US Full Line Catalog 12
- US Full Line Catalog 13
- US Full Line Catalog 14
- US Full Line Catalog 15
- US Full Line Catalog 16
- US Full Line Catalog 17
- US Full Line Catalog 18
- US Full Line Catalog 19
- US Full Line Catalog 20

800.995.2222
800.995.2222
www.diversitech.com
www.diversitech.com
P
A
D
S
This information is available as a contractor handout.
Order item number LIT-FLY-CLAD4.
CladLite
®
Hurricane Pads
Check with your local building inspector to determine
in which wind-borne debris region your equipment will
be installed. CladLite
®
Hurricane pads can be used for
allapplicationsupto130MPHandmostapplications
up to 150 MPH. Please see CladLite
®
T-Class section
for details on 150 MPH exceptions.
Choose a pad size that is larger than the outside
dimensions of the equipment AND leaves room for
fasteners, which must be located on the top of the
pad at least 1/2” away from the edges.
Place and level the pad on the ground.
Placetheequipmentonthepad.Refertothe
equipment manufacturer’s instructions to determine
where the fasteners should be placed through the
equipment for anchoring to a pad.
Do NOT use a nail gun to attach equipment to the pad.
Readtheinstructionsprovidedwithyourpreferred
brand of 1/4” diameter x 1-1/4” long masonry screws.
If the flange/metal through which you are attaching
the unit to the pad is thicker than 1/4”, then a longer
fastener will be required. Screw penetration must be
a minimum of 1” into the pad.
Pre-drilla3/16”diameterholeatleast1-1/4”deep
in the top of the pad at each fastener location.
Rememberthattheholesmustbeatleast1/2”away
from the edges of the pad.
Use a wrench or screwdriver to drive the masonry
screws into place.
Equipment must be properly attached to the CladLite
®
Hurricane pad or CladLite
®
Hurricane T-Class pad in
order to prevent sliding and tipping in high winds.
What you will need:
• 3/16” masonry drill bit
• Four (4) 1/4” dia. x 1-1/4” masonry screws
• Screwdriver or wrench
• A level
• CladLite
®
Hurricane or CladLite
®
Hurricane T-Class
pad and equipment
1
2
4
5
6
7
8
3
INSTALLATION INSTRUCTIONS
9