
Instructions / Assembly
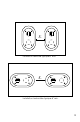

f) Apply a heavy coat of cement to outside end of the
pipe and a light coat to the inside of the tting and
then another coat to the outside of the pipe.
g) Immediately insert pipe into tting with a slight twisting
motion until it bottoms in the socket.
h) Hold joint together momentarily until it has set in order
to prevent the tapered socket from pushing the pipe
out of the tting.
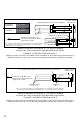
i) Wipe all excess cement from joint.
j) Use care when handling freshly made joints, and be
sure not to disturb joints during the cure period. Joints
may be pressure tested aer the cure times in
following section and in Table 3. Note that longer
cure times are required when installing under cold
ambient temperatures.
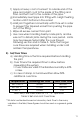
5) Set/Cure Times
a) Handling Time is the time required before handling
the joint.
b) Cure Time is the required time to allow before
pressurizing the system
i. Cure Times are valid if the Relative Humidity is 60%
or less.
c) In case of damp or humid weather allow 50%
additional cure time.
Temperature Handling/Set Time Joint Cure Time
60°-100° F 5 min 30 min
40°-60° F 10 min 45 min
0°-40° F 15 min 1 hr
Note: Set/Cure Times valid for 1 ½” – 3” Pipe Sizes
Table 3. Set and Joint Cure Times
**All data is estimated based on laboratory tests. Due to the many
variables in the eld, these gures should be used as a general guide
only.
11