Cendence User Manual 2017.08 V1.
Searching for Keywords Search for keywords such as “battery” and “install” to find a topic. If you are using Adobe Acrobat Reader to read this document, press Ctrl+F on Windows or Command+F on Mac to begin a search. Navigating to a Topic View a complete list of topics in the table of contents. Click on a topic to navigate to that section. Printing this Document This document supports high resolution printing.
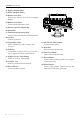
Contents Using this manual 2 Legends 2 Watch the video tutorials 2 Download the DJI GO 4 app 2 Download the DJI Assistant 2 2 Product Profile 5 Introduction 5 In the Box 5 Remote Controller Diagram 6 Preparing the Remote Controller 8 Mounting/Removing the Intelligent Battery 8 Charging the Battery 8 Mounting the Monitor to the Remote Controller 9 Linking the Remote Controller 10 Remote Controller Operations 10 Button Types 10 Turning the Remote Controller On and Off 10 Oper
Product Profile Introduction The CendenceTM remote controller features DJI’s LIGHTBRIDGETM technology for a maximum transmission distance of up to 4.3 mi (7km).* Dual transmission frequency support makes HD video downlink stable and reliable. In Dual Remote Controller mode, two remote controllers can control the aircraft and camera separately and simultaneously. Dual Remote Controller mode even works when users are up to 328 ft (100 m) apart.
Cendence User Guide Remote Controller Diagram 1. Antennas Relay aircraft control and video signal. 2. Monitor Mounting Bracket Used to mount the DJI CrystalSky monitor. 2 1 3. Control Sticks Control the orientation and movement of the aircraft. 17 6 4 3 17 5 12 4. Strap Hood 8 5. Focus Adjustment Knob Rotate to set the focal length. 7 9 15 14 16 13 10 11 6. Return-to-Home (RTH) Button Press and hold to initiate Return to Home (RTH). 7.
Cendence User Guide 21. Battery Release Button 22. WB37 Intelligent Battery 23. Battery Level LEDs Display the battery level of the Intelligent Battery. 18 18 19 20 24. Battery Level Button Press to show the battery level. 25. Remote Controller Support Rig 26 27 30 31 32 33 34 30 28 35 38 29 36 37 26. Handle Bar 21 23 Mounting Holes 27. Patch Antenna 22 24 Used to mount the Cendence Patch Antenna. 28. Left Dial 25 Controls gimbal tilt. 29.
Preparing the Remote Controller Mounting/Removing the Intelligent Battery Put the battery into the Battery Slot, then slide it to the end until you hear a click. OK Press the Battery Release Button before removing the battery. Press the Battery Level Button once to check the battery level. Charging the Battery The remote controller is powered by a WB37 intelligent battery, which can be charged via the charging port or by the WCH2 Intelligent Battery Charging Hub.
Cendence User Guide The charging hub blinks green while charging and turns solid green when charging is finished. Power Qutlet 100~240 V (50Hz/60Hz) B A B Using the WCH2 Charging Hub, charging time is approximately 1 hour and 11 minutes (for one battery). USB power supply port can be used to charge the mobile device of 5V/2A. Refer to the WCH2 Charging Hub User Guide for more details. Mounting the Monitor to the Remote Controller Mounting the DJI CrystalSky Monitor DJI CrystalSky7.
Remote Controller Operations Button Types Users can use the preconfigured buttons to control the aircraft and the camera and can also assign functions to the customizable buttons through the DJI GO 4 app. There are three types of button: 1. Preconfigured buttons for aircraft control, e.g. the Pause Button, RTH Button, etc. 2. Preconfigured buttons for camera control, e.g. the Shutter Button, Recording Button, Focus Adjustment Knob, etc. 3.
Cendence User Guide 5. Locate the Linking button on the aircraft and press the Linking button to start linking. The remote controller display shows the current status information. The master remote controller shows the aircraft status, and the slave remote controller shows the camera settings. If No Connection is shown after linking, repeat the above steps to try linking again. 10 © 2017 DJI All Rights Reserved.
Cendence User Guide Operating the Aircraft Control the Aircraft This section explains how to control the orientation of the aircraft through the remote controller. Control can be set to Mode 1, Mode 2 or Mode 3, or to a custom mode.
Cendence User Guide Remote Controller (Mode 2) Aircraft Left Stick Remarks Moving the left stick up and down changes the aircraft’s elevation. Push the stick up to ascend and down to descend. When both sticks are centered, the aircraft will hover in place. The more the stick is pushed away from the center position, the faster the aircraft will change elevation. Always push the stick gently to prevent sudden and unexpected elevation changes.
Cendence User Guide P-mode (Positioning): P-mode works best when the GPS signal is strong. The aircraft utilizes GPS, stereo Vision Systems, and an Infrared Sensing System to stabilize, avoid obstacles or track moving subjects. Advanced features such as TapFly and ActiveTrack are enabled in this mode. S-mode (Sport): The handling gain values of the aircraft are adjusted to enhance aircraft maneuverability. Note that Obstacle Sensing systems are disabled in this mode.
Cendence User Guide -320° +320° The right dial controls the gimbal pan. Turn the dial to the right, and the gimbal will shift clockwise. Turn the dial to the left, and the gimbal will shift counter clockwise. The camera will remain in its current position when the dial is static. Operating the Camera Shoot videos/photos with the Shutter Button and Video Recording Button on the remote controller. 1. Shutter Button Press to take a photo.
Cendence User Guide Customizable Buttons Go to the Customizable Button Settings Menu in DJI GO 4. Here you can set functions for the left lever, right lever, C1-C4 buttons, and BA-BH buttons. Dual Remote Controller Mode More than one remote controller can connect to the same aircraft in Dual Remote Controller mode. The Master remote controller operator controls the orientation of the aircraft, while the Slave remote controller controls the movement of the gimbal and camera operation.
Cendence User Guide “Slave” Remote Controller: 1. Select Slave to set the remote controller to Slave. Remote Controller Settings Master and Slave Set Remote Controller Status Master ID: 28172d OFF Master Slave Slave ID: 14f93f Connection Status:OFF Search Master When in Slave mode, the remote controller cannot link to the aircraft nor control aircraft orientation. Select Master in DJI GO 4 if you wish to connect and control the aircraft with the remote controller. 2.
Using Accessories Using the Patch Antenna Mounting the Patch Antenna Follow the steps below to mount the patch antenna. 1. Rotate the original antenna screws to remove the antennas. Only pull the antennas from the screws, not the antenna bodies, to avoid damage. 2. Connect the patch antenna with two screws, connect two antenna cables, and connect the CAN bus cable to the remote controller. Make sure to power off the remote controller before removing and attaching the antennas.
Cendence User Guide Mounting the Control Stick Covers Follow the steps below to mount the Control Stick Covers. 1. Remove the rings around sticks with the Control Stick Cover Mounting Key, and the screws on the top of the sticks. 2. Mount the Control Stick Covers to the remote controller and secure them with the Control Stick Cover Mounting Key. 3. Reattach the screws to the sticks. 18 © 2017 DJI All Rights Reserved.
Appendix Upgrading the Remote Controller Firmware Using the DJI GO 4 App Power on the remote controller and connect it with the DJI GO 4 app. A prompt will appear if a new firmware upgrade is available. To start upgrading, connect a mobile device to the Internet and follow the on-screen instructions. Ensure the DJI GO 4 app has access to the Internet. Ensure the battery level is adequate for the remote controller. Do not disconnect the aircraft from the computer during a firmware upgrade.
DJI incorporates HDMITM technology. The terms HDMI and HDMI High-Definition Multimedia Interface, and the HDMI Logo are trademarks or registered trademarks of HDMI Licensing LLC in the United States and other countries. This content is subject to change. Download the latest version from http://www.dji.com/cendence If you have any questions about this document, please contact DJI by sending a message to DocSupport@dji.com. © 2017 DJI All Rights Reserved.