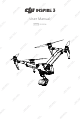
User Manual v1.0 2023.
This document is copyrighted by DJI with all rights reserved. Unless otherwise authorized by DJI, you are not eligible to use or allow others to use the document or any part of the document by reproducing, transferring or selling the document. Users should only refer to this document and the content thereof as instructions to operate DJI UAV. The document should not be used for other purposes. Searching for Keywords Search for keywords such as “battery” and “install” to find a topic.
DJI Inspire 3 User Manual Using This Manual Legends Important Hints and Tips Read Before Use DJITM provides users with tutorial videos and the following documents. 1. Safety Guidelines 2. Quick Start Guide 3. User Manual It is recommended to watch all the tutorial videos and read the Safety Guidelines before using for the first time. Prepare for your first flight by reviewing the quick start guide and refer to this manual for more information.
Contents Legends 3 Read Before Use 3 Tutorial Videos 3 Downloading DJI Assistant 2 3 Product Profile 8 Introduction Using for the First Time Activating and Charging the Batteries 10 Preparing the Aircraft 10 Preparing the Remote Controller 14 Activating the Aircraft 14 Firmware Update 14 Overview 15 Aircraft 15 Remote Controller 16 Accessory Options (Sold Separately) 20 Aircraft 21 Aircraft Profile 22 Flight Modes 22 Aircraft Power Button/Indicators 24 Aircraft Indicators
DJI Inspire 3 User Manual Propellers 42 Expansion Ports 44 Intelligent Battery Charging Hub 45 Charging Hub Overview 46 Paired Charging of Batteries 47 Charging Modes 48 Using the Charging Hub 48 Charging Hub LED Indicators 49 Intelligent Battery 50 Introduction 51 Battery Features 51 Using the Battery 53 Using the Paired Batteries 53 Mounting/Removing the Battery 53 Hot Battery Replacement 54 Powering On/Off and Checking the Battery Level 54 Warming the Battery 55 Battery
DJI Inspire 3 User Manual User Interface Home Screen 70 Screen Gestures 70 Shortcut Settings 71 Video Transmission 72 Remote Controller LEDs and Alert 73 Charging the Remote Controller and Checking the Battery Level 74 Linking the Remote Controller and Control Stick Modes 76 Buttons Overview 79 RTH Button 79 L1/L2/L3/R1/R2/R3 Buttons 79 Button Customization and Combinations 79 Aircraft Control Button 80 Flight Mode Switch (N/S/F) 81 Calibrating the Compass 81 HDMI Settings 81
DJI Inspire 3 User Manual FPV Camera View 111 Full Screen Mode 112 Map View 112 Health Management System (HMS) 113 Flight 115 Flight Environment Requirements 116 Operating the Aircraft Responsibly 117 Flight Limits and GEO Zones 118 GEO (Geospatial Environment Online) System 118 Flight Limits 118 Flight Altitude and Distance Limits 118 GEO Zones 119 Calibrating the Compass 120 Pre-Flight Checklist 121 Auto Takeoff/Auto Return to Home 122 Starting/Stopping the Motors 122 Flig
Product Profile This chapter introduces the major features of the product. 8 © 2023 DJI All Rights Reserved.
DJI Inspire 3 User Manual Product Profile Introduction DJI INSPIRETM 3 is a cinematic-grade aerial shooting system equipped with the DJI ZENMUSETM X9-8K Air gimbal camera, which consists of the aircraft, the gimbal camera, and the remote controller using the DJI Pilot 2 app.
DJI Inspire 3 User Manual Using for the First Time Activating and Charging the Batteries The Intelligent Batteries and remote controller internal battery require activation before first use. The remote controller cannot be powered on before activating the internal battery. Insert the Intelligent Batteries into the charging hub, connect the charging hub to the remote controller using the USB-C to USB-C high-speed data cable, and then connect the charging hub to a power outlet.
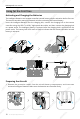
DJI Inspire 3 User Manual 2 Press the power button a minimum of five times to transform the aircraft to Landing mode, and power on. At this time, the indicators of the power button light up sequentially. 5× • Press, and then press and hold the power button to power on the aircraft. 3. Remove the protective covers of the lens and gimbal camera lens mount. Install the lens (sold separately) to the gimbal camera and remove the gimbal connector cover.
1 2 DJI Inspire 3 User Manual 2 2 • DO NOT expose the camera lens to a strong energy source such as the sun, lava, or 1 3 laser beams. Otherwise, it will cause damage to camera. 4. Remove the protective cover on the aircraft and install the gimbal camera to the aircraft. 1 2 3 • Make sure to hold the gimbal firmly when removing or mounting it. • Make sure that the gimbal connector on the aircraft is correctly positioned when mounting, otherwise the gimbal camera will not mount.
DJI Inspire 3 User Manual 6. After aligning the propeller and the motor installation mark, respectively insert the four propellers into the motors, and then press and rotate to lock. 1 2 • Make sure the quick-release propeller adapter is rotated to install in place, and the propeller adapter springs back with the top of the motor shaft. • Before removing the propeller, first press down the propeller adapter.
DJI Inspire 3 User Manual Preparing the Remote Controller The remote controller is already linked to the aircraft when it is purchased together as part of a combo. The remote controller requires activation before first use, and an internet connection is required for activation. Press, and then press and hold the power button to power on the remote controller. Follow the on-screen prompts to activate the remote controller. When powered off, press the power button to check the battery level.
DJI Inspire 3 User Manual Overview Aircraft 5 6 4 7 3 2 2 1 1 8 1. Front LED Indicators 5. FPV Camera 2. Horizontal Omnidirectional Vision System 6. Gimbal Release Button 7. Gimbal Camera Quick-Release Port 3. Motors 8. Gimbal Camera 4. Propellers 13 12 13 11 14 15 16 10 9 9. Rear LED Indicators 10 9 13. Upward Vision System 10. Horizontal Omnidirectional Vision System 14. Y-Shape LED Indicator 11. Aircraft Power Button/Indicator 16. Battery Release 15.
DJI Inspire 3 User Manual 24 21 19 20 22 18 17 23 17. USB-C Assistant Port 21. Timecode Input Port 18. Downward Infrared Sensing System 22. Auxiliary Light 19. Downward Vision System 23. Expansion Port 20. USB-C Port 24. Transformation Mechanism Remote Controller 1 3 15 2 4 4 5 6 10 11 7 5 7 8 13 9 12 14 9 1. External RC Antennas Transmit control and video wireless signals between the remote controller and the aircraft. 2.
DJI Inspire 3 User Manual 4. Control Sticks Control stick mode can be set in DJI Pilot 2. 5. Internal Wi-Fi Antennas DO NOT block the Wi-Fi antennas during usage. Otherwise, the signal may be affected. 6. Back/Function Button Press once to return to the previous screen. Press twice to return to the home screen. Use the back button and another button to activate combination buttons. Refer to Guide on the home screen for more information. 7.
DJI Inspire 3 User Manual 30 29 28 16 27 26 17 18 19 20 20 21 22 23 24 31 25 31 16. C3 Button Customize functions in DJI Pilot 2. 17. Left Dial Controls the tilt of the gimbal. 18. Record Button Press once to start or stop recording. 19. Flight Mode Switch Switch between different flight modes. Users can switch between the Normal, Sport, and Function modes. The Function mode can be configured in the app. 20. Internal RC Antennas Transmit aircraft control and video wireless signals.
DJI Inspire 3 User Manual 28. Handle 29. Speaker 30. Air Vent For heat dissipation. DO NOT block the air vent during usage. 31 34 36 33 40 32 35 38 41 39 37 41 31. Reserved Mounting Holes For mounting external devices. 32. C1 Button Customize functions in DJI Pilot 2. 33. C2 Button Customize functions in DJI Pilot 2. 34. Rear Cover 35. Battery Release Button 36. Battery Compartment For installing WB37 Intelligent Battery (excluded). 37. Rear Cover Release Button 38. Alarm 39.
DJI Inspire 3 User Manual Accessory Options (Sold Separately) DJI DL Lens DJI Zenmuse X9-8K Air gimbal camera is equipped with a DL mount supporting to install with a DJI DL lens. Read the Gimbal Camera chapter for installation and more information. DJI Professional Ecosystem DJI Inspire 3 can be used with other DJI products, such as DJI Video Transmitter, DJI High-Bright Remote Monitor, DJI Three-Channel Follow Focus, and DJI Master Wheels, to form a professional film ecosystem.
Aircraft This chapter introduces the major features of the aircraft. © 2023 DJI All Rights Reserved.
DJI Inspire 3 User Manual Aircraft Aircraft Profile The Inspire 3 aircraft mainly consists of the flight control system, communication system, vision system, image processing system, propulsion system, transformation mechanism, and power and battery system. This chapter provides a detailed introduction to the aircraft components and functions. Flight Modes Flight modes can be switched via the Flight Mode switch on the remote controller.
DJI Inspire 3 User Manual A-mode (Attitude mode) In Attitude mode, the vision systems and some intelligent features are disabled. The aircraft cannot position itself or brake automatically in this mode and is easily affected by its surroundings, which may result in horizontal shifting. Use the remote controller to control and position the aircraft. Fly with caution. • DO NOT switch from N-mode to either S-mode or F-mode unless you are sufficiently familiar with the aircraft behavior under each flight mode.
DJI Inspire 3 User Manual Aircraft Power Button/Indicators 2 1 1. Power Button (after mounting the intelligent batteries): a. Press the power button once to check the current aircraft battery level. b. Press, and then press and hold for two seconds to power the aircraft on or off. c. Press the power button a minimum of five times to unlock or enter the travel mode. 2. Indicators: display the current aircraft battery level or the aircraft status.
DJI Inspire 3 User Manual Aircraft Indicators The aircraft has front LED, rear LED, and Y-shape LED indicators. 3 1 2 1. Front LED Indicators 2. Rear LED Indicators 3. Y-shape LED Indicator When the aircraft is powered on but the motors are not running, the front LEDs glow solid red to display the orientation of the aircraft. When the aircraft is powered on but the motors are not running, the rear LEDs display the status of the flight control system.
DJI Inspire 3 User Manual After the motor starts, the front LEDs blink red and green alternately and the rear LEDs blink green. The green lights indicate the aircraft is a UAV and the red lights indicate the heading and position of the aircraft. The Y-shaped LED is used to assist in indicating the direction of the aircraft rear. After the aircraft is powered on, the Y-shaped LED will display solid green. • Lighting requirements vary depending on the region. Observe local laws and regulations.
DJI Inspire 3 User Manual Intelligent Landing Gear Go to the DJI Pilot 2 camera view and tap to display the intelligent landing gear switch. 1 2 1. Intelligent Landing Gear Switch: when enabled, the aircraft will automatically raise or lower the landing gear during takeoff or landing. When disabled, it is recommended to go to the camera view and tap > > Land Gear Settings to enable Precision Landing so that downward obstacle avoidance is turned on.
DJI Inspire 3 User Manual Return to Home Return to Home (RTH) brings the aircraft back to the last recorded Home Point when the positioning system is functioning normally. There are three types of RTH: Smart RTH, Low Battery RTH, and Failsafe RTH. The aircraft automatically flies back to the Home Point and lands when Smart RTH is initiated, the aircraft enters Low Battery RTH, or the signal between the remote controller and the aircraft is lost during flight.
DJI Inspire 3 User Manual Preset Optimal Advanced RTH Procedure 1. The Home Point is recorded. 2. Advanced RTH is triggered. 3. The aircraft brakes and hovers in place. a. The aircraft lands immediately if it is less than 20 m from the Home Point when RTH begins. b. If the aircraft is farther than 20 m from the Home Point when RTH begins, the aircraft will plan the best path according to the RTH settings and fly to the Home Point while avoiding obstacles and GEO zones.
DJI Inspire 3 User Manual • During Advanced RTH, the aircraft will adjust the flight speed automatically to suit environmental factors such as wind speed and obstacles. • The aircraft cannot avoid small or fine objects such as tree branches or power lines. Fly the aircraft to an open area before using Smart RTH. • Set Advanced RTH as Preset if there are power lines or towers that the aircraft cannot avoid on the RTH path and make sure the RTH Altitude is set higher than all obstacles.
DJI Inspire 3 User Manual Low Battery RTH When the Intelligent Battery level is too low and there is not enough power to return home, land the aircraft as soon as possible. To avoid unnecessary danger caused by insufficient power, the aircraft will automatically calculate if it has enough power to fly to the Home Point from its current location. A warning prompt will appear in DJI Pilot 2 when the battery level is low and only has enough power to complete an RTH flight.
DJI Inspire 3 User Manual Auto Landing The remaining battery level is only enough for the aircraft to descend from its current altitude. The aircraft will land automatically and landing protection will be enabled. Estimated Remaining Flight Time The estimated remaining flight time of the aircraft is based on its current battery level. / Low Battery Level Warning > in camera Tap view to set the low battery level threshold value.* Long beeps will sound from the remote controller.
DJI Inspire 3 User Manual 3. The aircraft lands and the motors stop after reaching the Home Point. The aircraft will enter or remain in Straight Line RTH if the remote controller signal is restored during RTH. • The aircraft may not be able to return to the Home Point normally if the GNSS signal is weak or unavailable. The aircraft may enter Attitude mode if the GNSS signal becomes weak or unavailable after entering Failsafe RTH. The aircraft will hover in place for a while before landing.
DJI Inspire 3 User Manual Precision Landing The aircraft automatically scans and attempts to match the terrain features below during RTH. The aircraft will land when the current terrain matches the Home Point. A prompt will appear in DJI Pilot 2 if the terrain match fails. • Landing Protection is activated during Precision Landing. • The performance of Precision Landing is subject to the following conditions: a. The Home Point must be recorded upon takeoff and must not be changed during flight.
DJI Inspire 3 User Manual Vision Systems and Infrared Sensing System The aircraft is equipped with both an infrared sensing system and forward, backward, lateral, upward, and downward vision systems. The upward and downward vision systems consist of two cameras, and the forward, backward, and lateral vision systems consist of four cameras in total. The infrared sensing system consists of two infrared modules.
DJI Inspire 3 User Manual Lateral Vision System Precision Measurement Range: 1.5-42 m Effective Sensing Speed: ≤15 m/s FOV: 90° (horizontal), 85° (vertical) Upward Vision System Precision Measurement Range: 0.2-13 m Effective Sensing Speed: ≤6 m/s FOV: 100° (front and back), 90° (left and right) Downward Vision System Precision Measurement Range: 0.3-18 m Precision Measurement Range: 0.
DJI Inspire 3 User Manual • Omnidirectional obstacle sensing is available in the horizontal direction when the landing gear is raised. When the landing gear is lowered, there are two 20° sensor blind spots at the front left and right of the aircraft that may affect obstacle sensing. See the diagram above. Fly with caution. • The gray area is the blind spot of the vision system, where the aircraft cannot detect objects. Fly with caution.
DJI Inspire 3 User Manual • The vision system cannot work properly over surfaces without clear pattern variations or where the light is too weak or too strong. The vision system cannot work properly in the following situations: a. Flying near monochrome surfaces (e.g., pure black, white, red, or green) or those without clear texture or those with highly repetitive textures (e.g., small bricks of the same color). b. Flying near surfaces with strong reflected light or images (e.g.
DJI Inspire 3 User Manual Flight Recorder Flight data including flight telemetry, aircraft status information, and other parameters are automatically saved to the internal data storage of the aircraft. The data can be accessed using DJI Assistant 2 (Inspire Series). Follow the instructions in the DJI Assistant 2 to export the flight record. Aircraft FPV Camera DJI Inspire 3 aircraft is equipped with an FPV camera using a 1/1.8" sensor, which can optimize images in poor lighting conditions at night.
DJI Inspire 3 User Manual Aircraft Antennas DO NOT cover or block any antenna during usage to avoid affecting communication or positioning performance. 1. Internal O3 Pro Video Transmission Antennas 2. Internal DJI AirSense Antennas 3.
DJI Inspire 3 User Manual • RTK positioning can be enabled and disabled during flight. Remember to select an RTK service type first. • Switching the RTK service type is not supported during flight. • If the RTK positioning function is enabled when using Waypoint Pro, the same RTK service type must be used for the same flight route type to avoid positioning deviation.
DJI Inspire 3 User Manual Propellers Read the Using for the First Time section for propeller installation information. DJI Inspire 3 aircraft supports both the 1671 Foldable Quick-Release Propellers and the 1676 Foldable Quick-Release Propellers for High Altitude (sold separately). * Refer to the diagram below to choose the appropriate propellers according to the aircraft weight (includes gimbal camera, two batteries, lens, PROSSD, and propellers) and the expected maximum flight altitude.
DJI Inspire 3 User Manual • Compared with the ordinary propellers, if high altitude propellers are used to fly at altitudes lower than 3,000 m (9,842.5 ft) above sea level, the motor temperature rises higher, which may reduce motor life or even damage it. Therefore, use high altitude propellers only at the recommended altitude or under suitable working conditions. • Only use official DJI propellers. DO NOT mix propeller types. • Purchase additional propellers if necessary.
DJI Inspire 3 User Manual Expansion Ports 2 1 1. Timecode Input Port 2. USB-C Assistant Port Timecode Input Port Use a time code synchronizer with a 3.5mm audio jack (sold separately). Follow the steps below to synchronize the time code of the camera. 1. Power on the remote controller and the aircraft. 2. Go to the DJI Pilot 2 camera view, tap > > Camera Advanced Settings panel, set the timecode running mode to Free and the mode to Jam Sync. 3.
Intelligent Battery Charging Hub This chapter introduces the features of Intelligent Battery Charging Hub. © 2023 DJI All Rights Reserved.
DJI Inspire 3 User Manual Intelligent Battery Charging Hub Charging Hub Overview The DJI TB51 Intelligent Battery Charging Hub features eight TB51 battery ports and one USB-C charging port. It can charge two TB51 batteries and one DJI RC Plus simultaneously. 1 2 3 4 6 5 1. System Status LED 4. USB-C Charging Port 2. Charging Port Status LEDs 5. TB51 Battery Port 3. Charging Mode Switch 6. Power Port Warnings • Keep liquids away from the inside of the charging hub.
DJI Inspire 3 User Manual Paired Charging of Batteries The charging hub will prioritize paired battery ports and charge the batteries according to the diagram. There are four pairs in the sequence of A, B, C, and D. a. Where there are multiple battery pairs, the pair with the highest power will be charged first. (Figure a) b. Between paired and singular batteries, paired batteries will be charged first. (Figure b) c.
DJI Inspire 3 User Manual Charging Modes Toggle the charging mode switch to select from three types of charging modes. 1 2 3 1. Fast Mode: each battery pair is charged to 90% in sequence, then to 100% together. It takes approximate 35 minutes to charge one battery pair to 90%, and approximate 160 minutes to charge four battery pairs to 100%. 2. Standard Mode: each battery pair is charged to 100% in sequence. It takes approximate 55 minutes to charge one battery pair to 100%. 3.
DJI Inspire 3 User Manual Charging Hub LED Indicators LED Indicator Description Charging Status — — — Solid green Charging complete (in Fast Mode, batteries are charged to 90%, and fully charged after all the LEDs are solid green) Blinks green Charging, while the flashing speed indicates the charging speed Solid yellow Waiting to charge Blinks yellow Battery warming up/cooling down Solid red Charging port error * Blinks red Re-insert the battery after cleaning the battery charging port Sys
Intelligent Battery This chapter introduces the features of Intelligent Battery. 50 © 2023 DJI All Rights Reserved.
DJI Inspire 3 User Manual Intelligent Battery Introduction The TB51 Intelligent Battery is equipped with high-energy battery cells and uses an advanced battery management system to power the aircraft. Only use a DJI-approved charging device to charge the Intelligent Battery. The firmware for the Intelligent Battery is included in the aircraft firmware. Make sure the firmware of all intelligent batteries is updated to the latest version.
DJI Inspire 3 User Manual • Refer to the user manual, safety guidelines, and battery labels before use. Users shall take full responsibility for all operations and usage. • If only one battery is usable after takeoff, land the aircraft promptly and replace the battery. • Use batteries provided by DJI. DO NOT use other batteries. • DO NOT drop or damage the battery. DO NOT place heavy objects on the battery or the charging hub. 52 © 2023 DJI All Rights Reserved.
DJI Inspire 3 User Manual Using the Battery Using the Paired Batteries Charge and discharge the two batteries together to optimize flight performance and maximize battery life. After the batteries are inserted and the aircraft is powered on and there is a huge difference between their battery life, the app will display a prompt alerting the user. In this case, it is recommended to replace the batteries with similar performance before use.
DJI Inspire 3 User Manual Powering On/Off and Checking the Battery Level Install the batteries in the aircraft before powering on or off. Power on/off: press the power button, then press and hold for two seconds. The indicator can show current battery level after the aircraft is powered on. The indicator turns off after the aircraft is powered off. Battery Level Button LED4 LED3 LED2 LED1 Press the battery level button to check the current battery level when the power supply is off.
DJI Inspire 3 User Manual Warming the Battery The battery has a built-in self-heating feature for when operating in low-temperature conditions: 1. When the battery temperature is lower than 18° C (64.4° F), self-heating starts once the battery is inserted into the aircraft and powered on. 2. If the battery is not inserted into the aircraft, press and hold the battery level button for five seconds to initiate self-heating. The battery will continue to keep warm with a temperature between 18° and 20° C (64.
DJI Inspire 3 User Manual Battery Storage 1. It is recommended to store the battery separately in a dry environment at room temperature of approximately 25° C (77° F). DO NOT insert the battery into the aircraft or the charging hub for storage. 2. Battery self-discharge will be triggered if the battery level is higher than 60%. Discharging the battery level to 60% can extend battery life. The battery self-discharge strategy is shown below. Battery 100% 96% 60% 0 1 2 7 12 Day 3.
Gimbal Camera This chapter introduces the features of gimbal camera. © 2023 DJI All Rights Reserved.
DJI Inspire 3 User Manual Gimbal Camera Overview Read the Using for the First Time section for the lens and gimbal installation information. 1 2 3 8 4 7 5 6 1. Gimbal Camera Quick-Release Port Remove the protective cap before mounting onto the aircraft. 2. Pan Motor For controlling the pan axis. 3. Roll Motor For controlling the roll axis. 5. Lens Locking Lever 6. Lens Mount Attach the lens after removing the lens cap. 7. Tilt Motor For controlling the tilt axis. 8. Lens Release Button 4.
DJI Inspire 3 User Manual X9-8K Air Gimbal Camera The X9-8K Air camera supports recording at up to 8K 75fps ProRes RAW video and capturing 44MP photos. The camera has 12+ stops of dynamic range when recording at above 30fps video and dual native ISO of 320/1600, and 14+ stops of dynamic range when recording at 30fps video or below and dual native ISO of 800/4000. Camera Specifications Recording Specifications Refer to Recording Specifications in the Specifications section for more information.
DJI Inspire 3 User Manual Image Sensor Resolution CinemaDNG Full Frame 8.1K 17:9 - 8192x4320 CinemaDNG Full Frame 8K 16:9 - 7680×4320 CinemaDNG Full Frame 4.1K 17:9 - 4096×2160 CinemaDNG Full Frame 4K 16:9 - 3840×2160 CinemaDNG Super 35 5.5K 17:9 - 5568×2952 CinemaDNG Super 35 5.2K 16:9 - 5248×2952 Apple ProRes RAW Full Frame 8.1K 17:9 - 8192×4320 Apple ProRes RAW Full Frame 8K 16:9 - 7680×4320 Apple ProRes RAW Full Frame 8K 2.39:1 - 8192×3424 Apple ProRes RAW Full Frame 4.
DJI Inspire 3 User Manual Apple ProRes RAW Super 35 5.5K 17:9 - 24.5×12.98 mm Apple ProRes RAW Super 35 5.2K 16:9 - 23.1×12.98 mm Apple ProRes 422HQ Full Frame 8.1K 17:9 - 36×19 mm Apple ProRes 422HQ Full Frame 8K 16:9 - 33.8×19 mm Apple ProRes 422HQ Full Frame 4.1K 17:9 - 36×19 mm Apple ProRes 422HQ Full Frame 4K 16:9 - 33.8×19 mm Apple ProRes 422HQ Super 35 4K 17:9 - 24.5×12.98 mm Apple ProRes 422HQ Super 35 4K 16:9 - 23.1×12.98 mm H.264 Full Frame 4.1K 17:9 - 36×19 mm H.264 Full Frame 4K 16:9 - 33.
DJI Inspire 3 User Manual Metal surface Camera Operation Controlling the Camera with the Remote Controller The following buttons and scroll wheel on the remote controller can be used to control the camera remotely. 3 2 1 4 4 4 1. Focus/Shutter Button Press halfway down to auto-focus and press all the way down to take a photo. The photo mode can be set in DJI Pilot 2. 2. Record Button Press once to start or stop recording. 3.
DJI Inspire 3 User Manual Controlling the Camera with DJI Pilot 2 For information about how to control the camera in DJI Pilot 2, refer to the Gimbal Camera View section in the DJI Pilot 2 App chapter. Gimbal Controllable Rotation Range The 3-axis gimbal stabilizes the camera, allowing the user to capture clear and steady images and videos when in flight. Refer to the figure below for the tilt, pan, and roll range of the gimbal.
DJI Inspire 3 User Manual Gimbal Operation Controlling the Gimbal with the Remote Controller 1 2 1. Left Dial The left dial controls the gimbal tilt. Dial left, the gimbal will tilt downward. Dial right, the gimbal will tilt upward. 2. Right Dial The right dial controls the gimbal pan. Dial left, the gimbal pan will rotate to the left. Dial right, the gimbal pan will rotate to the right. Gimbal Mode The gimbal can work in two modes for different shooting needs.
Remote Controller This chapter introduces the features of Remote Controller. © 2023 DJI All Rights Reserved.
DJI Inspire 3 User Manual Remote Controller Preparing the Remote Controller Mounting the WB37 Intelligent Battery A WB37 Intelligent Battery (excluded) can be mounted onto the remote controller in the following steps. 3 2 1 Battery Release Button 1. Push the rear cover release button to the end to open the rear cover. 2. Insert the WB37 battery into the battery compartment and push it to the top. There will be a clicking sound to indicate the battery is installed firmly. 3. Close the rear cover.
DJI Inspire 3 User Manual Mounting the Dongle A Dongle (excluded) can be mounted onto the remote controller in the following steps. 1. Push the rear cover release button to the end to open the rear cover. Remove the screws to open the dongle compartment. 2. Insert the dongle into the USB-C connector. Close the dongle compartment. 3. Attach the dongle compartment with the screws. Close the rear cover.
DJI Inspire 3 User Manual Adjusting the Antennas Lift and adjust the antennas. The strength of the remote controller signal is affected by the position of the antennas. Adjust the direction of the external RC antennas and make sure their flat side is facing the aircraft, so that the controller and aircraft are within the optimal transmission zone. • DO NOT overstretch the antennas to avoid damage. Contact DJI Support to repair the remote controller if the antennas are damaged.
DJI Inspire 3 User Manual Starting and Activating the Remote Controller Powering On/Off Press once and then press and hold for two seconds to power the remote controller on or off. Activating the Remote Controller Internet The remote controller needs to be activated before first use. Make sure the remote controller has access to the internet during activation. Follow the steps below to activate the remote controller: 1. Power on the remote controller. Select a language option and tap Next.
DJI Inspire 3 User Manual User Interface Home Screen 4:53 5 DJI Pilot 2 Gallery Files Firefox Setting Guide After powering on the remote controller, Time, Wi-Fi Signal, Battery Level, and applications will be display on the home screen. Screen Gestures Return to the previous screen: Slide from the left or right to the center of the screen. 70 © 2023 DJI All Rights Reserved. Return to the home screen: slide up from the bottom. Access recently opened apps: slide up from the bottom and hold.
DJI Inspire 3 User Manual Shortcut Settings 2 Notifications 3:05 PM 3 4 Apr 18, 2022 Mondy 1 Wi-Fi Bluetooth Record Screen Screenshot Do Not Dis Enhanced Di Mobile dat Airplane mo 5 6 7 1. Notifications View system or app notifications. 2. Recent Tap to view and switch to recently opened apps. 3. Home Tap to return to the home screen. 4. System Settings Tap to access system settings. 5. Shortcuts Tap to enable or disable Wi-Fi.
DJI Inspire 3 User Manual 6. Adjust Brightness Slide the bar to adjust brightness. Tap to adjust to auto brightness mode. Tap the bar to switch to manual brightness mode. or slide 7. Adjust Volume Slide the bar to adjust volume and tap to mute. Note that after muting, all sounds of the remote controller will be completely disabled, including related alarms sounds. Please turn on mute with caution.
DJI Inspire 3 User Manual Remote Controller LEDs and Alert Remote Controller LEDs 2 1 1. Status LEDs The status LED indicates the status of the remote controller, the aircraft, and the link between them.
DJI Inspire 3 User Manual Charging the Remote Controller and Checking the Battery Level Charging the Remote Controller Read the Using the Charging Hub section for more information. It takes approximately 2 hours to fully charge the remote controller internal battery. • It is recommended to use the charging hub for charging. Otherwise, use a certified USB-C charger with a maximum rated power of 65 W and maximum voltage of 20 V such as the DJI 65W Portable Charger.
DJI Inspire 3 User Manual Low High Checking the External Battery Level Press the button on the external battery, and the LEDs will indicate the current battery level of the external battery. Low High The battery level LEDs indicate the battery level of the WB37 battery.
DJI Inspire 3 User Manual Linking the Remote Controller and Control Stick Modes Linking the Remote Controller The remote controller is already linked to the aircraft when it is purchased together as part of a combo. Otherwise, follow the steps below to link the remote controller and the aircraft after activation. Prohibited areas Fire Rescue Limit fly Traffic Police Brigade Air Line Academy Remote Controller Linking Album New database for safty available Prepare To Fly 1.
DJI Inspire 3 User Manual Control Stick Modes The control sticks can be operated in Mode 1, Mode 2, or Mode 3, as shown below. The default control stick mode is Mode 2. In this manual, Mode 2 is used as an example to illustrate how to use the control sticks.
DJI Inspire 3 User Manual Center position: control sticks are centered. Moving the control stick: control sticks are pushed away from the center. Remote Controller (Mode 2) Aircraft Remarks Moving the left stick up or down (throttle stick) changes the aircraft’s altitude. Push the stick up to ascend and down to descend. The more the stick is pushed away from the center position, the faster the aircraft will change altitude. Push the stick gently to prevent sudden and unexpected changes in altitude.
DJI Inspire 3 User Manual Buttons Overview RTH Button Press and hold the RTH button until the remote controller beeps twice to start RTH. The aircraft will fly to the last updated Home Point. Press the button again to cancel RTH and regain control of the aircraft. • In Dual Control mode, the users cannot start or cancel RTH using the RTH button on the remote controller that does not have aircraft control.
DJI Inspire 3 User Manual Combination Buttons Some frequently-used features can be activated by using combination buttons. To use combination buttons, hold the back button and operate the other button in the combination. In actual use, enter the home screen of the remote controller, and tap Guide to quickly check all available combination buttons.
DJI Inspire 3 User Manual Flight Mode Switch (N/S/F) Toggle the switch to select a flight mode. Read the Flight Modes section for more information. Icon Flight Mode F F-mode (Function) S S-mode (Sport) N N-mode (Normal) Calibrating the Compass The compass may need to be calibrated after the remote controller is used in areas with electromagnetic interference. A warning prompt will appear if the compass of the remote controller requires calibration. Tap the warning prompt to start calibration.
DJI Inspire 3 User Manual • In Dual Control mode, the aircraft can be connected with a DJI RC Plus remote controller and a DJI High-Bright Remote Monitor. Read the DJI Professional Ecosystem section for more information on the DJI High-Bright Remote Monitor. Setting Dual Control Mode Before using Dual Control mode, the pilot needs to link the aircraft with both remote controllers A and B. Follow the steps below to link the remote controllers. 1. Launch DJI Pilot 2. 2.
DJI Inspire 3 User Manual connected remote controller does not choose either option within a specified time period, the aircraft will also activate the failsafe action. 5. When the disconnected remote controller reconnects to the aircraft during the flight, if the aircraft control is not taken over by the connected remote controller, the aircraft control will be resumed to the remote controller before disconnection by default. 6.
DJI Professional Ecosystem This chapter introduces on how to form DJI Professional Ecosystem with the other DJI products. 84 © 2023 DJI All Rights Reserved.
DJI Inspire 3 User Manual DJI Professional Ecosystem DJI Inspire 3 can be used with other DJI products (sold separately), such as DJI Video Transmitter, DJI High-Bright Remote Monitor (abbreviated as remote monitor), DJI Three-Channel Follow Focus, and DJI Master Wheels to form a professional film ecosystem. DJI Video Transmitter Connection: connect the remote controller with the DJI Video Transmitter using an HDMI cable.
DJI Inspire 3 User Manual • Even if the remote monitor is selected as Control Monitor A, the remote monitor will also work as Control Monitor B after being linked to the aircraft. • Make sure the remote monitor is within 50 cm of the aircraft during linking. Remote Monitor Liveview 1 2 3 4 5 6 7 12 11 10 9 8 1. Remote Monitor Battery Level 6. Recording Parameters 2. Aircraft Battery Level 7. MF Readings 3.
DJI Inspire 3 User Manual DJI Three-Channel Follow Focus Mounting and Checking: mount the remote monitor with DJI Three-Channel Follow Focus, and then power on the remote monitor. Usage: use the focus knob on the DJI Three-Channel Follow Focus to control the focus of the X98K Air camera lens. • Read the DJI Three-Channel Follow Focus User Guide for more information. DJI Master Wheels Connection: mount the DJI Remote Monitor Expansion Plate to the remote monitor.
DJI Inspire 3 User Manual Typical Application Scenarios DJI Inspire 3 and the above DJI products can perform in various application scenarios. It allows two or three persons to operate the aircraft and gimbal while others view the liveview using third-party wireless monitors. Scenario 1: using dual remote controllers to control the aircraft and the gimbal. It is applied to 2-person shooting, while the focus is adjusted using the remote controller dial by the aerial gimbal operator.
DJI Inspire 3 User Manual Scenario 2: using dual remote controllers to control the aircraft and the gimbal. It is applied to 3-person shooting, while the focus is adjusted using the three-channel follow focus connected to the remote monitor by the focus puller. This allows others to view the liveview from the third-party monitors wirelessly. USB-A USB-c O3 Pro Broadcast Mode HDMI USB-A to USB-C HDMI/SDI • Make sure to use the USB-A port when connecting the remote controller to the remote monitor.
DJI Inspire 3 User Manual Scenario 3: using a remote controller, a video transmitter, a three-channel follow focus, and multiple remote monitors. It is applied to 2-person or 3-person shooting, while the focus is adjusted by the focus puller. It allows others to view the liveview from the third-party monitors wirelessly or via wired connection.
DJI Pilot 2 App This chapter introduces the features of DJI Pilot 2. © 2023 DJI All Rights Reserved.
DJI Inspire 3 User Manual DJI Pilot 2 App The DJI Pilot 2 app integrates various professional functions for simple and efficient operations. The camera parameters can be set using the camera setting panel. • The use of the app is subject to DJI Pilot 2 Terms of Use and DJI Privacy Policy. Read them carefully in the DJI Pilot 2 app. • Read all the DJI Pilot 2 app safety prompts, warning messages, and disclaimers carefully. Familiarize yourself with relevant regulations in your area.
DJI Inspire 3 User Manual 1. Profile Tap to view flight records, download offline maps, manage GEO Zone unlocking, read help documentation, select a language, and view app information. 2. Data and Privacy Tap to manage network security modes, manage app cache, and clear DJI device logs. 3. GEO Zone Map Tap to view the GEO Zone map and check if the location is a restricted or authorization zone. Users can also check the maximum flight altitude by selecting the altitude zone. a b c a.
DJI Inspire 3 User Manual the aircraft. 7. Academy Tap to view Inspire 3 Tutorials, Flight Tips, and Case Studies, and download User Manuals to the remote controller. 8. Health Management System Displays the health status of the aircraft, remote controller, and payload. e d a b c a. If the current remote controller is not connected to the aircraft, a picture of the remote controller will be displayed.
DJI Inspire 3 User Manual • A consistent firmware update is required when the firmware versions of some modules of the aircraft are inconsistent with the compatible version of the system. In a typical consistent firmware update situation, the aircraft, remote controller, and the batteries that are installed will be updated to the latest version. Any other batteries need to be updated separately.
DJI Inspire 3 User Manual Gimbal Camera View Introduction After tapping Enter Camera View on the homepage of the DJI Pilot 2 app, the X9-8K Air gimbal camera view will display as the main view for the first time of use. 2 3 1 4 22 5 21 19 6 7 8 9 18 10 17 11 16 12 20 15 14 13 1. Live view from X9-8K Air gimbal camera. 2. Top Bar: displays product information such as aircraft status, flight mode, and signal quality. Refer to the Top Bar section for more details. 3.
DJI Inspire 3 User Manual frame rate (project frame rate/sensor frame rate in S&Q mode). d. Displays the file name of the photo or video currently being shot or about to be shot, the remaining photo number/recording time, and the remaining capacity. e. Displays the current lens focal length. f. Displays the current timecode. The timecode display format is “hour: minute: second: non-drop frame” or “hour: minute: second; drop frame”. g. Displays the current focus mode. Tap to switch to AFS or MF. h.
DJI Inspire 3 User Manual 20. Waypoint Pro: tap to enter the flight rout library, users can view and edit the flight route or create new flight routes. Read the Waypoint Pro section for more information. 21. Gimbal Mode: displays that the current state of the gimbal is Follow mode. Tap to switch to the Free mode. Refer to the Gimbal Camera section for a detailed description of each mode. 22. Auto Takeoff/Auto RTH: tap the / icon then long press to enable Auto Takeoff/Auto RTH.
DJI Inspire 3 User Manual 8. Signal Strength: displays the O3 Pro signal quality. Three white bars indicate strong signal strength, two yellow bars for medium signal strength, and a red bar for poor signal quality. If the signal is lost, it displays a disconnected red icon. 9. Intelligent Battery Level: displays the battery level of the aircraft. Tap to view battery level, voltage, and temperature. 10. Settings: tap to open the Settings menu to set the parameters of each module.
DJI Inspire 3 User Manual 1. Tap to switch to the map view. 2. Gimbal Pan: displays the orientation of the gimbal relative to the aircraft in real time. The icon rotates with the gimbal. 3. Displays north direction. 4. Remote Controller Orientations: a. Displays the position of the Home Point relative to the aircraft location. When the Home Point horizontal distance exceeds 16 m, the Home Point icon will stay on the edge of the Navigation Display. b.
DJI Inspire 3 User Manual Camera Quick Settings Panel Tap to enter the Camera Quick Settings panel and set the exposure for photos and videos and the image parameters. 1. Tap to set the photo or video exposure parameters. Tap angle and shutter speed. to switch between shutter 2. Tap to set the image parameters such as white balance, sharpen, and noise reduction. Recording LUT, and monitoring LUT can also be set in video mode. 3. Tap to set the photo and video parameters.
DJI Inspire 3 User Manual Advanced Camera Settings Panel Enter the DJI Pilot 2 camera view, tap monitoring, storage, and other settings. > and then Advanced Camera Settings panel to set Monitoring Settings Tap to set exposure assistant, display assistant, and focus assistant. 1 2 2 3 1. Exposure Assistant: tap to enable the Histogram, Waveform, and Zebra Stripes (Histogram and Waveform cannot be enabled at the same time). a. Histogram: displays a histogram in the camera view after enabled. b.
DJI Inspire 3 User Manual Storage Settings Tap to set the reel information and DJI PROSSD. 1. Reel Information Settings: a. Camera No.: tap to set the camera number, which can be set from A to Z. The camera number will be included in the footage name. b. Next Reel Count: tap to set the next reel count of the next storage device. The setting range is 1 to 999 and the next reel count will be included in the name of the recorded footage.
DJI Inspire 3 User Manual 2. Storage Information: a. DJI PROSSD: displays remaining capacity and total capacity. b. Tap to format the DJI PROSSD. Other Settings Tap to set timecode, lens, LUT, metering mode, and anti-flicker. 1 2 3 4 5 6 1. Timecode a b c d e f g a. Timecode: displays the current aircraft timecode. EXT icon indicates that there is an external timecode synchronizer connected to the aircraft. b. Run Mode The Run mode can be set to Free Run or Recording Run.
DJI Inspire 3 User Manual time code will be continuous throughout all recorded footage. c. Mode Mode can be set to Preset or Jam Synced. Preset can be selected in both run modes. In Preset mode, tap TC settings or Reset TC to customize the initial value. Jam Synced can only be selected in Free Run mode and requires connecting an external timecode synchronizer to the aircraft. d. Count Mode Count mode can be set to Drop Frame or Non-Drop Frame.
DJI Inspire 3 User Manual 4. Metering Mode Tap to set to average metering or spot metering. 5. Anti-flicker Anti-flicker is only available in Photo mode, which can be set to Off, Auto, 50Hz, or 60Hz. 6. Reset Camera Settings Tap to reset the camera settings. 106 © 2023 DJI All Rights Reserved.
DJI Inspire 3 User Manual Waypoint Pro Instruction Waypoint Pro can be used to plan the flight route for the aircraft in advance. By manually adding waypoints or enabling Auto Add Waypoint on to create a flight route, and editing the waypoints, the aircraft can fly to all waypoints and complete preset actions to realize automatic flight. Waypoint Pro provides two modes, including Repeatable Routes and 3D Dolly.
DJI Inspire 3 User Manual settings panel, select the Repeatable Routes mode or 3D Dolly mode, and set the parameters accordingly. • When using 3D Dolly, Control Mode can be set as Auto or Manual. In Auto mode, the aircraft will automatically maintain the preset aircraft orientation and the gimbal pan and tilt according to the route position. In Manual mode, users can control the aircraft orientation and the gimbal pan and tilt using the control sticks and dials. 4.
DJI Inspire 3 User Manual 3. Clear Waypoints: tap to clear all the added waypoints. 4. Delete Selected Waypoints: tap to delete the selected waypoints. 5. Flight Route Settings: flight route settings are applied to the entire route. 6. Individual Waypoint Settings: select a waypoint and set the parameters applied to the waypoint. 7. General Settings: set other parameters such as the flight route name and altitude mode. 8. Save: tap to save the flight route. 9.
DJI Inspire 3 User Manual Spotlight Pro Usage 1 4 2 1. Enabling Spotlight Pro: tap 3 to enable or disable Spotlight Pro. 2. Selecting the Target: a. Drag-Select Target: after enabling Spotlight Pro, tap and drag on the screen to select a target. If the target is too small or not identified, drag-select target may fail. b. Tap-Select Target: after enabling the Target Scanning in the Flight Control Settings, the target will be identified and displayed in the app, tap to track the target. 3.
DJI Inspire 3 User Manual • Gimbal mode can be switched during tracking: Free Mode: the movements of the aircraft in Free Mode are as shown below: Roll Stick: move to change the aircraft’s rotation around the target. Pitch Stick: move to change the aircraft’s distance from the target. Throttle Stick: move to change the aircraft’s altitude. Yaw Stick: move to adjust the horizontal view. Gimbal Pitch Dial: move to adjust the vertical view.
DJI Inspire 3 User Manual Full Screen Mode In the gimbal camera view or the FPV camera view, slide two fingers down on the screen to enter or exit the Full Screen mode. Map View 1 2 3 4 5 1. GEO Zone Map Layers: tap to view all GEO Zone layers and enable or disable the GEO Zones layer display on the map. 2. Recenter View: tap to center the remote controller location in the view. 3. Map Lock: when enabled, the map cannot be rotated. When disabled, the map can be rotated freely. 4.
DJI Inspire 3 User Manual Health Management System (HMS) The HMS system includes Error Diagnosis, DJI Care Pro, Basic Service, Firmware Update, and Manage Logs. 1 2 3 4 5 1. Error Diagnosis: for checking the current status of each aircraft module. Users can solve issues by following the corresponding prompted instructions. Color Status Green Normal Orange Caution Red Warning 2. DJI Care Pro: relevant information can be viewed if the device is bound to DJI Care Pro. 3.
DJI Inspire 3 User Manual Battery Hub Status and Log Management To check the battery hub status in HMS in DJI Pilot 2, connect the battery hub to the remote controller via a USB-C to USB-A data cable. The user can also update the battery hub and battery firmware and export the battery hub and battery logs in batches. Checking the Battery Hub Status Run DJI Pilot 2, tap HMS to check the status of the battery hub and batteries.
Flight This chapter introduces the safe flight practices and flight restrictions. © 2023 DJI All Rights Reserved.
DJI Inspire 3 User Manual Flight Make sure to have training and practice before operating any actual flight. Practice with the simulator in DJI Assistant 2 or fly under the guidance of experienced professionals. Pick a suitable area to fly in according to the following flight requirements and restrictions. Fly the aircraft below 120 m (400 ft). Any flight altitude higher than that may violate local laws and regulations. Make sure you understand and comply with the local laws and regulations before flying.
DJI Inspire 3 User Manual Operating the Aircraft Responsibly Observe the following rules to avoid non-compliant behaviour, serious injury, and property damage: • • • • • • • • • DO NOT operate in the vicinity of manned aircraft. DO NOT interfere with the operations of manned aircraft. Be alert and avoid other aircraft at all times. Land immediately if necessary. DO NOT fly the aircraft in venues of major events, including but not limited to sporting events and concerts.
DJI Inspire 3 User Manual Flight Limits and GEO Zones GEO (Geospatial Environment Online) System DJI’s Geospatial Environment Online (GEO) System is a global information system that provides real-time information on flight safety and restriction updates and prevents UAVs from flying in restricted airspace. Under exceptional circumstances, restricted areas can be unlocked to allow flights in.
DJI Inspire 3 User Manual Weak GNSS Signal Restriction Prompt in DJI Pilot 2 Max Altitude When the GNSS signal is weak, namely when the GNSS icon is yellow or red, and the ambient light is too dark, the max altitude is 3 m (9.84 ft). The max altitude Aircraft approaching max flight is the relative altitude measured by the altitude. Fly with caution. infrared sensor. When the GNSS signal is weak but the ambient light is sufficient, the max altitude is 30 m (98.43 ft).
DJI Inspire 3 User Manual Calibrating the Compass Only calibrate the compass when prompted to do so by the DJI Pilot 2 app or the aircraft rear indicators. Observe the following rules when calibrating the compass: • It is recommended to calibrate the compass to ensure the quality of the images and videos when features require high aircraft orientation accuracy, such as long-time exposure during hovering.
DJI Inspire 3 User Manual Pre-Flight Checklist 1. Only use genuine parts that are in good condition. DO NOT modify or alter the aircraft, its components, or parts. Make sure that when installing any external devices that the total weight of the aircraft does not exceed the maximum takeoff weight.
DJI Inspire 3 User Manual Auto Takeoff/Auto Return to Home Auto Takeoff Use the Auto Takeoff function: 1. Launch DJI Pilot 2 and enter the gimbal camera view. 2. Complete all steps in the pre-flight checklist. 3. Tap . If conditions are safe for takeoff, press and hold the button to confirm. 4. The aircraft will takeoff and hover approx. 1.2 m (3.9 ft) above the ground. Auto Return to Home Use the Auto RTH function: 1. Tap . If conditions are safe to land, press and hold the button to confirm. 2.
DJI Inspire 3 User Manual Flight Test Takeoff/Landing Procedures 1. Place the aircraft in an open, flat area with the aircraft rear facing towards the user. 2. Power on the remote controller and the aircraft. 3. Launch DJI Pilot 2 and enter the camera view. 4. Wait for the aircraft self-diagnostics to complete. If DJI Pilot 2 does not prompt any irregular warning, the user can start the motors. 5. Push the throttle stick up slowly to takeoff. 6.
Appendix 124 © 2023 DJI All Rights Reserved.
DJI Inspire 3 User Manual Appendix Specifications Aircraft Model T740 Aircraft Weight Approx. 3,995 g (includes gimbal camera, two batteries, lens, PROSSD, and propellers) Max Takeoff Weight 4,310 g Hovering Accuracy Range Vertical: ±0.1 m (with vision positioning) ±0.5 m (with GNSS positioning) ±0.1 m (with RTK positioning) Horizontal: ±0.3 m (with vision positioning) ±0.5 m (with GNSS positioning) ±0.1 m (with RTK positioning) RTK Positioning Accuracy (RTK fix) 1 cm + 1 PPM (horizontal) 1.
DJI Inspire 3 User Manual Propeller Model Standard Propellers: DJI 1671 High-Altitude Propellers: DJI 1676 Operating Temperature -20° to 40° C (-4° to 104° F) Diagonal Distance Landing Gear Raised: 695 mm Landing Gear Lowered: 685 mm Travel Mode Dimensions Height: 176 mm Width: 709.8 mm Length: 500.5 mm Gimbal Camera Sensor 35mm full-frame CMOS Max Resolution Photo: 8192×5456 Video: 8192×4320 Video Resolution Refer to Recording Specifications Supported Lens DL 18mm F2.8 ASPH Lens DL 24mm F2.
DJI Inspire 3 User Manual Controllable Range Tilt (landing gear lowered): Before gimbal pitch limit extension: -90° to +30° After gimbal pitch limit extension: -115° to +100° Tilt (landing gear raised): Before gimbal limit extension: -90° to +30° After gimbal limit extension: -140° to +75° Roll: ±20° Pan: ±300° Max Control Speed With DJI RC Plus: Tilt: 120°/s Roll: 180°/s Pan: 270°/s With DJI Master Wheels: Tilt: 432°/s Roll: 432°/s Pan: 432°/s Weight Approx.
DJI Inspire 3 User Manual Capacity 4280 mAh Nominal Voltage 23.1 V Type Li-ion Chemical System LiCoO2 Energy 98.8 Wh Weight Approx. 470 g Operating Temperature -20° to 40° C (-4° to 104° F) Charging Temperature [9] -20° to 40° C (-4° to 104° F) Max Charging Power 411 W Charge via Aircraft Not supported Battery Charging Hub Input 100-240 V AC, max 8 A Output 26.4 V, 7.8 A Total Rated Output 476 W, including 65W PD fast charging of USB-C port Charging Time [10] Fast Mode: Approx.
DJI Inspire 3 User Manual Operating Environment [11] Forward, Backward, Left, Right and Upward: surfaces with discernible patterns and adequate lighting (lux >15) Downward: surfaces with discernible patterns and diffuse reflectivity >20% (e.g., walls, trees, people); adequate lighting (lux >15) ToF Infrared Sensor Measurement 0-10 m Range Remote Controller Model RM700B Operating Time Built-in Batteries: approx. 3.3 hours Built-in Batteries Plus External Battery: approx.
DJI Inspire 3 User Manual [1] Measured when flying in a windless environment at sea level, with gimbal camera and lens attached to the aircraft and without other accessories. This data is for reference only. [2] Measured in an environment with light wind with the gimbal camera and lens attached to the aircraft and without other accessories. This data is for reference only. [3] Measured when flying at sea level, with gimbal camera and lens attached to the aircraft and without other accessories.
Recording Specifications Sensor FPS/Rate Codec Cinema DNG ProRes RAW Fov FF 25 29.97 30 48 50 59.94 60 * Choose after enabling S&Q mode 72 75 96 100 119.
DJI Inspire 3 User Manual Firmware Update Use DJI Pilot 2 or DJI Assistant 2 (Inspire Series) to update the remote controller, aircraft, and other connected DJI devices. Using DJI Pilot 2 Aircraft and Remote Controller 1. Power on the aircraft and remote controller. Ensure the aircraft is linked to the remote controller, the battery level is higher than 25%, and the remote controller is connected to the internet. 2. Run DJI Pilot 2. A prompt will appear on the homepage if new firmware is available.
DJI Inspire 3 User Manual 5. Tap Update All to begin the update, which takes approximately 10 minutes. The update is completed when the update success prompt appears. • During a firmware update, DO NOT insert or remove the batteries to avoid battery update failure. • During a firmware update, DO NOT unplug the USB-C to USB-A data cable to avoid firmware update failure.
DJI Inspire 3 User Manual Storage and Transportation and Maintenance • DO NOT store the product in a humid or dusty area. Ideally, the aircraft shall be stored in a cool and dry place at room temperature of 25° C (77° F), and direct sunlight shall be avoided. • DO NOT store the gimbal camera in humid or dusty areas. The recommended environmental humidity range is 20-90% RH. • The storage temperature of the product (excluding TB51 Intelligent Batteries) is from -35° to 40° C (-31° to 104° F).
DJI Inspire 3 User Manual Trolley Case Using the Trolley Case for Storage Regular Storage: the status of the product out of box is as below. 3 4 5 6 6 2 1 7 11 8 9 10 1. Screwdriver 7. Gimbal Camera Box (included gimbal camera) 2. Changing Hub (bind belts when placed) 3. Intelligent Batteries 8. Cables/Gimbal Dampers 4. Remote Controller Strap/Documents 9. Remote Controller 5. Aircraft Body 10. DJI PROSSD 6. Foldable Quick-Release Propellers 11.
DJI Inspire 3 User Manual Trolley Case Lock 2 1 3 1. Resettable Switch 2. Dials 3. Button Setting the Combination Code The combination code is original 000. Follow the steps below to reset the combination code: 1. Toggle the resettable switch on the rear of the lock to SET. 2. Adjust the dials to the set a personal combination code. 3. Toggle the resettable switch to OFF to finish setting. 4. Make sure to memorize the new combination code well. Using the Combination Code 1.
DJI Inspire 3 User Manual Troubleshooting Procedures 1. Why can the battery not be used before the first flight? The battery must be activated by charging before using it for the first time. 2. How to solve the gimbal drift issue during flight? Calibrate IMU and compass in DJI Pilot 2. If the problem persists, contact DJI Support. 3. No function Check if the Intelligent Batteries and the remote controller are activated by charging. If the problems persist, contact DJI Support. 4.
DJI Inspire 3 User Manual Battery Disposal Dispose of the batteries in specific recycling containers only after a complete discharge. DO NOT dispose of the batteries in regular trash containers. Strictly follow the local regulations regarding the disposal and recycling of batteries. Dispose of a battery immediately if it cannot be powered on after over-discharging.
DJI Inspire 3 User Manual List of Items, Including Qualified Accessories Part Weight Dimension Zenmuse X9-8K Air Gimbal Camera Approx.516 g 127.5×120.6×156.0 mm DL 18mm F2.8 ASPH Lens Approx. 182 g Φ64.5×62.8 mm DL 24mm F2.8 LS ASPH Lens Approx. 178 g Φ55.0×71.2 mm DL 35mm F2.8 LS ASPH Lens Approx. 179 g Φ55.0×71.2 mm DL 50mm F2.8 LS ASPH Lens Approx. 182 g Φ55.0×71.2 mm DL Lens ND4 Filter (Φ46mm) Approx. 9 g Φ46 mm DL Lens ND8 Filter (Φ46mm) Approx.
DJI Inspire 3 User Manual Firmware Version Information Aircraft Firmware v01.00.00.10 Remote Controller Firmware v01.04.03.00 TB51 Intelligent Battery v04.01.00.51 DJI Pilot 2 v5.0.1.10 Refer to the Inspire 3 Release Notes for more firmware update information for traceability. www.dji.com/inspire-3/downloads GEO Awareness Drone Geo-Zones and DJI Geo Zones DJI is committed to maintaining a safe flying environment.
DJI Inspire 3 User Manual DJI Geo Zones with Geo Fencing Function DJI Geo zones are divided into seven categories with only five of them taking effect. If more than one restriction is set at the same position, the alert generated is in the following order: Restricted Zones > Authorization Zones > Altitude Zones > Enhanced Warning Zones > Warning Zones Restricted Zones Appear red in the DJI app. Users will be prompted with a warning message, and flight is prevented.
DJI Inspire 3 User Manual Altitude Zones Altitude zones are zones with a limited altitude and appear in gray on the map. When approaching, users will receive a warning message in the app. 20 m Altitude Zone Warning message appears 100 m Limited altitude Limit maximum speed 10 m Limit maximum speed 1. UA can take off and fly into these zones in specific height with a warning message 2.
DJI Inspire 3 User Manual Regulatory Restricted Zones Due to local regulations and policies, flights are prohibited within the scope of some special areas. (Example: Prisons) Approved Zones for Light UAVs (China): For Approved Zones, pilots of light UAVs flying at an altitude of 120 m or less are not required to obtain permission to fly.
DJI Inspire 3 User Manual Remote ID system malfunctions or has a failure, an alarm information will be displayed in a DJI flight control app such as DJI Pilot 2. • The user shall keep the DJI flight control app running in the foreground and always allow it to obtain the location information of the remote controller. [1] The pass criterion for PFST is that the hardware and software of the Remote ID required-data source and transmitter radio in the Remote ID system are functioning properly.
WE ARE HERE FOR YOU Contact DJI SUPPORT This content is subject to change. https://www.dji.com/inspire-3/downloads If you have any questions about this document, please contact DJI by sending a message to DocSupport@dji.com. DJI and INSPIRE are trademarks of DJI. Copyright © 2023 DJI All Rights Reserved.