
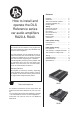
Operation Manual
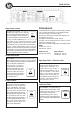


All models include
RCA inputs
High Level input
Continuos variable low pass and/or high-
pass crossovers
Grand bass feature 0 - +18 dB
Phase shift continously variabel 0-180 degr.
Remote turn on / off
Automatic remote turn on/ off on high level
input without connecting any remote wire
Electronic protection circuitry against
short-circuit, DC offset and thermal overload.
Bridgeable design to direct full power to
one or two speakers.
Installation
Before you begin installation
Before you begin you need to read the manual, to have
some tools, cables and other material available. There
is one such list of material on the following page.
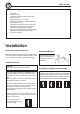
Amplifier location
Important
Allow air circulation around the amplifier.
2
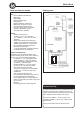
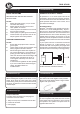
Disconnect Battery
Before starting the instal-
lation, always disconnect
the negative terminal of
the battery.
The DLS Reference series of amplifiers have a
compact design that allows great flexibility in
mounting. You can mount it under a seat or in the
trunk.
When you select a location, do remember that the
amplifier generates a lot of heat.
Choose a location where air can circulate freely
around the amplifier. Do not cover the amplifier
with carpets or hide behind trim panels.
Do not mount the amplifier in an inverted or upside
down position.
Check all locations and placements carefully
before making any cuts, drilling any holes or ma-
king any connections.
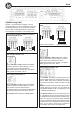
This is the best way to
mount the amplifier to get
the best cooling.
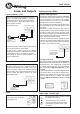
RA20 & RA40
DLS logo on amplifier cooling flange
The DLS logo on top of the amplifier is attached
with two hex. screws. The logo can be removed
and twisted 90 or 180 degrees, and then screwed
back in wanted position. The logo can be mounted
in four different ways to match your installation.