eBox-2300SX-LS User’s Manual DM&P Group eBox-2300SX-LS User’s Manual DMP Electronics Inc.
eBox-2300SX-LS User’s Manual COPYRIGHT The information in this manual is subject to change without notice for continuous improvement in the product. All rights are reserved. The manufacturer assumes no responsibility for any inaccuracies that may contain in this document, and makes no commitment to update or to keep current information contain in this manual.
eBox-2300SX-LS User’s Manual TRADEMARKS ACKNOWLEDGMENT eBox-2300SX-LS is the registered trademarks of DMP Electronics Inc. The brand names, product names or trade names appearing in this document are the properties and registered trademarks of their respective owners. All names mentioned herewith are served for identification purpose only. OWNER’S RECORD The serial number of this product is located at the rear panel of your eBox-2300SX series.
eBox-2300SX-LS User’s Manual SAFETY INFORMATION WARNING Do not expose eBox-2300SX to rain or moisture, in order to prevent shock and fire hazard. Never install eBox-2300SX in wet locations. Do not open the cabinet to avoid electrical shock. Refer to your nearest dealer for qualified personnel servicing. Never touch un-insulated terminals or wire unless your power adaptor and display monitor are disconnected.
eBox-2300SX-LS User’s Manual REGULATORY FCC CLASS A NOTE This equipment has been tested and found to comply with the limits for a Class A digital device, pursuant to Part 15 of the FCC Rules. These limits are designed to provide reasonable protection against harmful interference when the equipment is operated in a commercial environment.
eBox-2300SX-LS User’s Manual PURCHASE AGREEMENT PURPOSE: In accordance to the general commercial conduct of Trust and Fair Trade, herewith below is the agreement for the protection for both parties, DMP and Users in pursuant of trading. PRODUCT DESCRIPTION: With this product, herewith also known as eBox-2300SX, which is a simplified & an economical design of an embedded eBox-2300SX for Special Purpose Personal Computing.
eBox-2300SX-LS User’s Manual Table Chapter 1 Product Package ………………………………………………………… 1 Chapter 2 The Setup Mode Setting ………………………………………………….2 First Section: Booting ………………………………………………………………….2 Second Section: The Introduction of Control Panel Setting ……………………….6 Third Section: Nets Tool……………………………………………………………... 11 Forth Section: About ………………………………………………………………….13 Fifth Section: Network Setting ……………………………………………………….14 Sixth Section: Desktop……………………………………………………………….
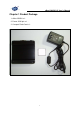
eBox-2300SX-LS User’s Manual Chapter 1 Product Package 1. eBox-2300SX x 1。 2. Power-15W-3pin x 1。 3.
eBox-2300SX-LS User’s Manual Chapter 2 The Setup Mode Setting First section: Booting 1.1 When you start the system and the screen will shows as below: (1-1) 1.2 Input administrator’s username and password as picture 1-2. The default username is administrator and the default password is 123. Administrator can click in “My Computer”/ “Control Panel”/ “Password” to alter system password.
_______________________________eBox-2300SX-LS User’s Manual (1-2) 3
_______________________________eBox-2300SX-LS User’s Manual 1.3 When you enter to Setup Mode in the first time as (1-3). There are function icons, including “My Computer”, “Change Language”, and “Test Stateless” on the desktop. The administrator have to click into “My Computer”/ “Control Panel” and to install peripheral devices, to set loop circumstance and system function; you can check whether your eBox-2300SX is registered or not; Test Stateless can test whether the Statelss Server is normal or not.
_______________________________eBox-2300SX-LS User’s Manual (1-4) 5
_______________________________eBox-2300SX-LS User’s Manual Second section: The Introduction of Control Panel Setting Under “My Computer”/ “Control Panel”, it includes Network, User Desktop, Resource, VNC, Display, Package Info, Boot Menu, Stateless, Window Manager, Adjust Time, Admin, XFS IP, Connection Manager, Environment, OS Upgrade, Device Manager. There are 15 System Administration Interface items of setting capability. Each capability of tool setting under Control Panel is below: 2.
_______________________________eBox-2300SX-LS User’s Manual 2.4 Resource:Set “Enable” or “ Disable” in eBox Local access Peripheral resource. The Default is “Enable”. The system cooperates with Driver CD and Device Managercan to auto-scratch hardware devices on the resources list and installs the driver. 2.5 Package Info:Start Package Browser to browse all of module information of the system. 2.
_______________________________eBox-2300SX-LS User’s Manual 2.7 Boot Menu:You can set “Enable” or “Disable” on eBox graphic or literal boot mode. Suggest user use default of the system and do not change it. 2.8 Stateless:The implement can make administrator to centralize the setting methods. It is not necessaryto set eBox Client access usingfunction one by one. It just connectsto Stateless Sever and completes allof related settings. 2.9 Window Manager:The implement is for setting tool bar location.
_______________________________eBox-2300SX-LS User’s Manual 2.10 Adjust Time:It can set the time and date of the system. 2.11 Admin:It supply administrator to alter system password, and to set “Enable” or “Disable” system setting function inf Control Panel and Samba Server password revise setting tool 2.12 XFS IP:The tool is for setting net connection to XFS Server access in order to get character support from Serve. For example, 192.168.1.
_______________________________eBox-2300SX-LS User’s Manual 2.13 Connection Manager:The tool is for integrateing RDP, ICA, XDMCP, VNC connection. User can set related connection setting of RDP, ICA, XDMCP, and VNC by Connection Manager. 2.14 Environment:The tool is for setting keyboard language, mouse speed, mouse wheel. Suggest using system default or “Enable” mouse wheel. 2.15 OS Upgrade:The tool is supply user to upgrade eBox by CD-ROM or Internet.
Xhost. _______________________________eBox-2300SX-LS User’s Manual These are showed as (3-1). 3.1 Detect:Net- detect tool. 3.1.1 Ping:It can input IP Address to test whether the Internet is normal or not. 3.1.2 Traceroute : The tool can detect the condition of Nets Package Transmission of IP address. 3.2 Terminal:Net Terminal Tool。 3.2.1 SSH: By security remote terminal connection, user can connect another mainframe to operate its Remote Host System.
_______________________________eBox-2300SX-LS User’s Manual 3.2.2 Telnet:The tool is for Remote Terminal Connection. After Connecting to another host, if its IP address have been added in Xhost (see 3.1),and input Command order: export DISPLAY=local IP:0.0. It means the x windows of the Remote Host will transmit to and operate by local access. If you wanted to use mp3 player of Remote Host, you just input xmms command, then you can play mp3 from Remote Host by mp3 Player.
_______________________________eBox-2300SX-LS User’s Manual Forth Section: About It shows related system information in “My Computer”/ “About”, including eBox version, CPU, and RAM as (4-1).
_______________________________eBox-2300SX-LS User’s Manual Fifth Section: Network Setting 1 Click “My Computer”/ “Control Panel”/ “Network” and it will show Network Configuration as(5-1). User can press Edit to proceed to network setting, and then click Enable DHCP to start DHCP and press OK. The system will catch DHCP setting in normal situation. If not, you can catch IP by manual work.( means Enable, means Disable)。 (5-1) 2 Press Enable DHCP will show as (5-1) and the DHCP will be started.
_______________________________eBox-2300SX-LS User’s Manual Sixth Section: Desktop 1. Click “My Computer”/ “Control Panel”/ “User Desktop”, it will show as (6-1), and you can choose which tools can be used for user. ( means Enable, means Disable)After select, administrator press Accept and Preview, and then the system will request you to select Screen Resolution. Choose 800*600.
_______________________________eBox-2300SX-LS User’s Manual Seventh Section: Connecting Manager 1. Administrator can enter “My Computer”/ “Control Panel”/ “Connection Manager” in Setup Mode which showed as(7-1). Then press “New” and it will show “New Add”, including ICA、RDP、XDMCP、VNC. Administrator select connection type which you want , press OK, and proceed to next related connection setting step. (7-1) 2.(7-2)is each function of Conncetion Edit Area.
_______________________________eBox-2300SX-LS User’s Manual Edit: Delet/ Modify Conncetion Delete: Desktop: Delete Connection Definition Select ICA and RDP which be set, then press ”Desktop”, and the connection will showed as ICON and be put on desktop in the User Mode. Autorun: Press “Autorun” and the connection as ICA or RDP which be set will in auto- run and in connection when user enter User Mode. PRINT: Press “PRINT” will start Printer Setting screen which can set sharing local access printer.
_______________________________eBox-2300SX-LS User’s Manual (7-4) Setting Item Illustration Title Input Connection title Browse Option Network Protocol:Choose one network protocol. Server Location:input IP or DNS of ICA Server which you want to connect. Browse Server Select Citrix Server or Published Application in the Server, you can also press Find to search Published Application from Net Server.
_______________________________eBox-2300SX-LS User’s Manual 7.1.2 ICA-Service Setting When you click Sevice in ICA Server Connection list, it will show a picture as(7-5). (7-5) Setting Item Illustration Command Line Input complete application route, including the name of application which be executed when you connect to ICA Server. Working Input complete name of application route. Directory 7.1.3 ICA-Account Setting When you click Account in ICA Server Connection list, it will show a picture as(7-6).
_______________________________eBox-2300SX-LS User’s Manual Setting Item Illustration Username Input ICA Server user’s username. Password Input ICA Server user’s password. Domain Any information about using Internet can be inputted in the frame. 7.1.4 ICA-Desktop Setting When you click Desktop in ICA Server Connection list, it will show a picture as(7-7). (7-7) Setting Item Color Palette Desktop Resolution Illustration Select Color Pallete of the connection.
_______________________________eBox-2300SX-LS User’s Manual Setting Item Connect via SOCKS Proxy Proxy Illustration If the firewall is used on ICA Server, you can click the item. Input IP address and Port number. 7.1.6 ICA–Misc Setting When you click Misc in ICA Server Connection list, it will show a picture as(7-9). (7-9) Setting Item Compress Data Stream Sound Enable Quality Encryption Level Illustration Reducing information stream between ICA by compressing data stream.
_______________________________eBox-2300SX-LS User’s Manual (7-10) 7.1.7.2 ICA-Settings-Hotkeys Setting Press “Hotkeys” and it will show as(7-11). You can choose “Hotkeys” when you start ICA Server connection. (7-11) 7.1.7.3 ICA-Settings-Preference Setting After pressing “Setting” in ICA Server Connection Setting, Press “Preference” and it will show as(7-12). You can choose ICA Keyboard items which you need. (7-12) 7.1.7.
_______________________________eBox-2300SX-LS User’s Manual (7-13) 7.1.7.4 ICA-Settings-Drive Mapping Setting After pressing “Setting” in ICA Server Connection Setting, Press “Drive Mapping” and it will show as(7-14). You can set each storage and “Enable” its Read or Write. (7-14) 7.1.7.5 ICA-Settings-COM Ports Setting After pressing “Setting” in ICA Server Connection Setting, Press “COM Port” and it will show as(7-15). You can set each COM Port in accordance with need. (7-15) 7.1.7.
_______________________________eBox-2300SX-LS User’s Manual (7-16) 7.1.7.7 ICA-Settings-Printer Setting After pressing “Setting” in ICA Server Connection Setting, Press “Printer” and it will show as(7-17). Select a printer which you want to use in the system and inform Server that the priting data should be transmitted to the printer which be selected.
_______________________________eBox-2300SX-LS User’s Manual 7.2 Set RDP Client Connection: After pressing “New”, click a “New Add” RDP Connection. It shows as (7-18). (7-18) 7.2.1 Set RDP Client Connection:After clicking a “New Add” RDP Connection, it shows as (7-19), you have to input Title in the “Name”. Also, you need to input RDP Server Connection IP Address and Port (It can be omitted if you do not have it) in Server Name, and press OK to complete RDP Connection.
_______________________________eBox-2300SX-LS User’s Manual 7.2.2 Set RDP user’s Login information. It shows as (7-20). (7-20) 7.2.3 This part is set Network Drive, including Disk Redirection, Com Ports and LPT Ports. It shows as below.
_______________________________eBox-2300SX-LS User’s Manual 7.2.4 Set Color Pallete and Screen Resolution of Desktop. It shows as (7-22). (7-22) 7.2.5 Set the type of printer. It shows as (7-23).
_______________________________eBox-2300SX-LS User’s Manual 7.2.6 The(7-24) shows that user select a connection setting, press”Connect”, and it will connect to RDP Server.
_______________________________eBox-2300SX-LS User’s Manual 7.3 Set VNC Connection:Add new VNC Connection and it will shows a VNC viewer as(7-25). After setting VNC Server Name、Server IP、Password、Port, press OK and save VNC configuration; click connection type what you want and press “Connect” will connect to VNC Server.
_______________________________eBox-2300SX-LS User’s Manual 7.4 XDMCP Connection Setting:Add new XDMCP Connection and it will shows a XDMCP viewer as(7-26). Input Connection Title in “Name”, IP Address in “IP”and press “OK” to complete XDMCP Connection Setting.
_______________________________eBox-2300SX-LS User’s Manual Eighth Section: Stateless 8.1 If administrator has to set more 2300SX-LS in different computer, you can uniform their using function and set different using limits by Stateless.(8-1) shows how to set the Stateless, including User ID(Default ID:stateless), Password(Default Password is: 123), Server IP(Server:your.company.com). Then click “Enable”and press “Accept”, and it will show “Stateless mode enable” viewer when you complete Stateless setting.
_______________________________eBox-2300SX-LS User’s Manual 8.2 After executing the step of 8.1 go back to Desktop, press Test Stateless, and it will shows that Check User name, Password, Server Address. Then the system will show whether the Stateless Server is in success or not. If it in success and there will show “OK” viewer as(8-2). Also, if it in fail and there will show “error”. (8-2) 8.3 After executing the step of 8.2, and it show an information viewer.
_______________________________eBox-2300SX-LS User’s Manual (8-3) 8.4 (8-4) is show that Stateless be in “Enable” and it only reveal Stateless after rebooting Control Panel.
_______________________________eBox-2300SX-LS User’s Manual 8.5 Start Statelesss and reboot, the system will request you to input login ID and password in booting process. Administrator can take the Stateless Demo / williamh.ini be reference in Driver CD. After user input williamh in login and input williamh in Password, the system will enter User Mode as (8-5). (Login ID is the name of *.ini, it means that the connection is to williamh.
_______________________________eBox-2300SX-LS User’s Manual CDPLAYER=1 CD Player: 1 means “Enable”, 0 means “Disable” MAIN=1 Control Panel: 1 means “Enable”, 0 means “Disable” TOOLBAR=1 Tool Bar: 1 means “Enable”, 0 means “Disable” OFF=1 Turn Off: 1 means “Enable”, 0 means “Disable” [userdesktop_autorun] Auto- run user’s desktop setting Exemple 2: global.
_______________________________eBox-2300SX-LS User’s Manual 8.6 Stateless The illustration of further argument: [extra_app] Put other Volutary- making applied programs on user’s desktop Programe Name Program Name has to accord with Language Setting For example: my_lang=en The name pf program can not use Chinese my_lang=tw The name pf program can use Chinese Volutary setting in Desktop Connection You can set the RDP setting which you want to connect by yourself. It allow user to set much definition.
_______________________________eBox-2300SX-LS User’s Manual 2. Set EXCELArgument [rdp_excel] TYPE="rdp" NAME="test" DEFAULT_DOMAIN="tcide" DEFAULT_PASSWORD="tcide" DEFAULT_USER="tcide" APPLICATION="c:\progra~1/micros~2/office/excel.exe" FULLSCREEN="True" SERVER="192.168.1.7" 3. Set powerpoint Argument [rdp_powerpoint] TYPE="rdp" NAME="test" DEFAULT_DOMAIN="tcide" DEFAULT_PASSWORD="tcide" DEFAULT_USER="tcide" APPLICATION="c:\progra~1/micros~2/office/powerpnt.exe" FULLSCREEN="True" SERVER="192.168.1.
_______________________________eBox-2300SX-LS User’s Manual 8.6 Set eBox-2300SX-LS argument in Stateless: Global.ini [lang] my_lang=en [icaserver] ip=211.72.201.
_______________________________eBox-2300SX-LS User’s Manual Ninth Section: Alter System Password 9.1 User can alter system password in Admin. Administrator enters Control Panel/ Admin, and it will show a login screen. The default password is “123”, and press”login”.
_______________________________eBox-2300SX-LS User’s Manual 9.2 After login, the screen will show three icons as(9-2), including Password, Authentication, and SAMBA. Password is for altering system booting password; Authentication is for setting “Enable”or ”Disable” system function, for example, if you pressed “Disable” in Network and reboot, administrator could not alter any information in Network; SAMBA is for administrator to change password for SAMBA Share.
_______________________________eBox-2300SX-LS User’s Manual Chapter 3 The User Mode 1. The User can “Double Click “thses icons on the Desktop, or press “Start” to click the applied program which you want to use. (3-1) 2. Click “Opera” on the Desktop, input the Address, and it will connect to Internet Browser as(3-2). The browser support Java Script and Flash.
_______________________________eBox-2300SX-LS User’s Manual (3-2) 42
_______________________________eBox-2300SX-LS User’s Manual Chapter 4 Q&A First Section about Win2000 Server Q:I can not input login information when I login Windows 2000 Terminal Server, why? A:Make sure if the item of user offer has been selected in login information of RDP-Tcp Connection Setting. Also, make sure the Terminal Server Setting (Sever Setting (Internet Connector authority should be suspended.
_______________________________eBox-2300SX-LS User’s Manual click “Next”. After pressing “Finish”, you will get a mail of PIN. (Personal ID Number). Then, go back to “Terminal Service License”, click right mouse key on Computer Name, and select “Start Server.” Select first item on “License Wizard” then press “Next”. Input the PIN and compelte the step.
_______________________________eBox-2300SX-LS User’s Manual starting “Terminal Service”, you need use “Add/ Remove” to re-install program. Next, select Windows 2000 User compatible authority. In the “Terminal Service License Install Program”, you should assign to authorize if the Server offers service to all enterprise or network. Also, you need offer tha location where the data base is. Then, press “Next” and “Finish”.
_______________________________eBox-2300SX-LS User’s Manual http://support.microsoft.com/support/kb/articles/Q248/4/30.ASP Q:How to set the Proxy in order to make the “Terminal Service” go through the Firewall? A:Terminal Server client use the TCP 3389. hence, you have to set the Proxy Server be TCP- 3389. The method is below: Start “Internet Service Manager”. Click right mouse key and select “Web Proxy”, then select “Properties”. Click “Security”. Click “Packet Filters” and press”Add”.
_______________________________eBox-2300SX-LS User’s Manual Duplicate Drmapclt.dll File to Winnt\System32 Folder Press “Start”/ “Execute” and input Regedt32 Input Drmapclt : HKEY_CURRENT_USER\Software\Microsoft\Terminal Server Client\Default\Addins4 Input Drmapclt : HKEY_LOCAL_MACHINE\SOFTWARE\Microsoft\Terminal Server Client\Default\AddIns Add Drmapclt: Value: NAME Type: REG_SZ Data value: Drmapclt.dll ※The detail as below: Q244725 - Using Drive Share with Terminal Services http://support.microsoft.
_______________________________eBox-2300SX-LS User’s Manual Duplicate the 32-bit Fxfr.dll to "Program Files\Terminal Services Client" Change the name of Rdpdr.dll which in the "Program Files\Terminal Services Client" to Rdpdr.pss Duplicate 32-bit Rdpdr.dll to "Program Files\Terminal Services Client" The detail is below: Q244732 - How to Install the File Copy Tool Included with the Windows 2000 Resource Kit http://support.microsoft.com/support/kb/articles/Q244/7/32.
_______________________________eBox-2300SX-LS User’s Manual Client computer can not remote control System Controller and Sy stem Controller can not control Client computer. The Resolution of your computer and Client computer should be in consistency. Otherwise, the connection would be failed. Press CTRL+ * and the Remote control will be finished. Q: How to start, set and use Terminal client Remote Control? A: (I) Start Remote Control a.
_______________________________eBox-2300SX-LS User’s Manual reset session: reset default. shadow: monitor other user’s computer. tscon: Connet to other existing “Terminal” Server. tsdiscon: Terminate the connection of “Termianl” Server and Client. tskill: Terminate the procesure of processing. tsprof: duplicating the user setting and change the setting file route. tsshutdn: shut down “Terminal” Server.
_______________________________eBox-2300SX-LS User’s Manual Select an item from “Name” and press “Add”. Press “OK”. The item which yo u select will show on the “Name”. Q: How can I call Microsoft Consumer Service Center to re-issue “Ter minal License”? A: You can call 00-800-2468-1668 (Free) and press 3, it will has an assistant to help you to finish Terminal License re-issuance.
_______________________________eBox-2300SX-LS User’s Manual caused by improper using “Regedit”. The way of editing system register information, please open “Changing Keys a nd Values” in the Regedt32.exe of “Discription” or open “Add and Delete Infor mation in the Registry” and “Edit Registry Data” in the Regedt32.exe of “Discri ption”. Please be notice, doing backup before editing registry. If you use Windo ws NT or Windows 2000, you have to upgrade ERD (Emergent Revise Disk).
_______________________________eBox-2300SX-LS User’s Manual Chapter 5 Technique Supporting Thank you for your supporting. If you have any installing problems, please call: Customer Service: (02)22980770 DMP Electronics Inc. Monday to Friday: AM 08:30-PM 17:30 Or E-mail to: info@compactpc.com.tw The website:http://www.compactpc.com.tw © The content and logo of the manual are possessed of DMP. DMP Company has the right of revising withous notifying.