User Guide Dobot Magician User Guide Issue: V1.7.0 Date: 2019-01-09 Shenzhen Yuejiang Technology Co.
Dobot Magician User Guide Copyright © ShenZhen Yuejiang Technology Co., Ltd 2018. All rights reserved. No part of this document may be reproduced or transmitted in any form or by any means without prior written consent of Yuejiang Technology Co., Ltd Disclaimer To the maximum extent permitted by applicable law, the products described (including its hardware, software and firmware, etc.) in this document are provided AS IS, which may have flaws, errors or faults.
Dobot Magician User Guide Preface Preface Purpose This Document describes the functions, technical specifications, installation guide and system commissioning of Dobot Magician, making it easy for users to fully understand and use it.
Dobot Magician User Guide Contents Contents Security Precautions ................................................................................................ 1 1.1 General Security................................................................................................................ 1 Precautions ........................................................................................................................ 2 Quick Start ...............................................................
Dobot Magician User Guide Contents Importing Image Files and Setting Writing Parameters..................................... 60 Adjust the Position of the Pen Nib .................................................................... 66 Performing Laser Engraving Tasks ................................................................................. 68 Installing a Laser Kit ......................................................................................... 68 Connecting the DobotStudio ..............
Dobot Magician User Guide 1 Security Precautions Security Precautions This topic describes the security precautions that should be noticed when using this product. Please read this document carefully before using the robotic arm for the first time. This product need to be carried out in an environment meeting design specifications, you cannot remold the product without authorization, otherwise it could lead to product failure, and even personal injury, electric shock, fire, etc.
Dobot Magician User Guide 1 Security Precautions bruising or pinching. Be careful during the robotic arm carrying or installing. Please follow the instructions on the packing box to put down the robotic arm gently and place it correctly in direction of arrow. Commissioning of the incomplete machine is prohibited until it has been installed in a machine and the whole machine complies with the provisions of the Machinery Directive (2006/42/EC).
Dobot Magician User Guide 1 Security Precautions Please turn off the Dobot Magician completely first before connecting or disconnecting external equipment, such as Bluetooth, WIFI, stick controller, infrared sensor, color sensor, etc. Or, it causes damage to your device. Please wear the lasing protective eyeglass when using the laser module. Please protect your eyes and skin from the laser. The heating rod will produce high temperature up to 250℃ when using the 3D printing module, please be careful.
Dobot Magician User Guide 2 Quick Start Quick Start This topic briefly describes how to operate the Dobot Magician with the software DobotStudio, allowing you to quickly know and use the robotic arm. Figure 2.1 shows the process of getting started with the Dobot Magician. Figure 2.1 The process of getting started with the Dobot Magician Connecting Cables to the Dobot Magician Issue V1.7.0 (2019-01-09) User Guide 4 Copyright © Yuejiang Technology Co., Ltd.
Dobot Magician User Guide Figure 2.2 Figure 2.3 2 Quick Start Connect the Dobot Magician to your computer Connect the Dobot Magician to the electrical outlet Installing the DobotStudio You can control Dobot Magician by DobotStudio to implement functions such as Teaching & Playback, fully programmable applications, and 3D printing. This topic introduces Teaching & Playback. System Requirements The DobotStudio supports the following Windows and macOS versions.
Dobot Magician User Guide 2 Quick Start macOS 10.10, macOS 10.11, and macOS 10.12 Obtaining the DobotStudio Package Before using Dobot Magician, download the Windows DobotStudio package from https://www.dobot.cc/downloadcenter.html. The macOS version is also downloadable in this URL. Installing the DobotStudio Prerequisites The DobotStudio package has been obtained. Procedure Unpack the DobotStudio package to a destination directory. For example, this directory is Installation Directory\DobotStudio.
Dobot Magician User Guide Figure 2.6 2 Quick Start The Device Driver Installation Wizard dialog box When the drivers are installed successfully, the Completing the Device Driver Installation Wizard dialog box is displayed. Click Finish ,as shown in Figure 2.7. Figure 2.7 The Completing the Device Driver Installation Wizard dialog box When the installation is complete, the Completing the DobotStudio Setup Wizard dialog box is displayed. Click Finish, as shown in Figure 2.8. Issue V1.7.
Dobot Magician User Guide Figure 2.8 2 Quick Start The Completing the DobotStudio Setup Wizard dialog box Click Finish. Verifying the Installation 2.2.4.1 Verifying the DobotStudio If the DobotStudio is launched and runs properly by double-clicking the desktop shortcut to this program, it means that it is installed successfully. 2.2.4.
2 Quick Start Dobot Magician User Guide Figure 2.10 The V2 robotic arm driver in Device Manager window Figure 2.11 The V1 robotic arm driver in Device Manager window NOTE To reinstall the Dobot Magician driver after uninstalling it, install the driver corresponding to the Windows version in the directory Installation Directory\DobotStudio\attachment\Drive\HardwareV1.0.0. For example, install the 64-bit driver on a 64-bit Windows 10, as shown in Figure 2.12. Issue V1.7.
Dobot Magician User Guide Figure 2.12 2 Quick Start Install the 64-bit driver on a 64-bit Windows 10 If the DobotStudio hardware version is 0.0.0, install the driver matching the Windows version in the directory: Installation Directory\DobotStudio\attachment\Drive\HardwareV0.0.0. Please connect the DobotStudio to the robotic arm and then click to check the hardware version.
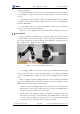
Dobot Magician User Guide Figure 2.13 2 Quick Start The gesture of Dobot Magician before power-on Power off: When the LED indicator is green, press down the power button to turn off the robotic arm. In this case, the Forearm moves slowly to the Rear Arm while the angle between them becomes small. Finally, the two arms reach a specific position. WARNING During the shutdown process, watch your hand.
2 Quick Start Dobot Magician User Guide Figure 2.14 The DobotStudio page with a beginner guide NOTE After reading the beginner guide of the DobotStudio, click to close it. The Question dialog box is displayed, as shown in Figure 2.16. Figure 2.15 Issue V1.7.0 (2019-01-09) Click Connect User Guide 12 Copyright © Yuejiang Technology Co., Ltd.
Dobot Magician User Guide Figure 2.16 2 Quick Start The Question dialog box Because this section is for quick access to the Dobot Magician only and no high accuracy is required. When Connect changes to Disconnect, it means that the DobotStudio is connected to the Dobot Magician, as shown in Figure 2.17. NOTE To achieve a high accuracy of the robotic arm, click Wait Link. Figure 2.17 1. The DobotStudio is connected to the Dobot Magician Click Teaching & Playback, as shown in Figure 2.18. Issue V1.
Dobot Magician User Guide Figure 2.18 2 Quick Start Click Teaching & Playback NOTE After reading a beginner guide on the Teaching & Playback page, as shown in Figure 2.19, click to close it. Figure 2.19 2. Teaching & Playback page Select PTP Point > MOVJ mode in the Save Point area, as shown in Figure 2.20. Issue V1.7.0 (2019-01-09) User Guide 14 Copyright © Yuejiang Technology Co., Ltd.
Dobot Magician User Guide Figure 2.20 3. 2 Quick Start Select MOVJ motion mode Press and hold the unlock button on the Forearm to move the robotic arm to a position such as point A, and then release the button. In this case, the DobotStudio will save the Cartesian coordinate of point A, as shown in Figure 2.21. Figure 2.
Dobot Magician User Guide Figure 2.22 4. Jog the Dobot Magician in the Cartesian or Joint coordinate system Move the robotic arm to other two locations such as points B and C by referring to the method of creating point A above, as shown in Figure 2.23. The robotic arm will save the Cartesian coordinates corresponding to these two points. Figure 2.23 5. 2 Quick Start The Cartesian coordinates of points B and C Enter 3 in Loop text box.
Dobot Magician User Guide Figure 2.24 6. 2 Quick Start Enter 3 in the Loop text box Click Start to perform the motions taught above, as shown in Figure 2.25. The robotic arm will stop after playing back the steps for three times. Figure 2.25 7. Click Issue V1.7.0 (2019-01-09) Click Start to exit the Teaching & Playback page, as shown in Figure 2.26. User Guide 17 Copyright © Yuejiang Technology Co., Ltd.
Dobot Magician User Guide Figure 2.26 Issue V1.7.0 (2019-01-09) 2 Quick Start Click Exit User Guide 18 Copyright © Yuejiang Technology Co., Ltd.
Dobot Magician User Guide 3 Introduction Introduction Overview Dobot Magician is a multifunctional desktop robotic arm for practical training education, supporting teaching and playback, blockly graphic programming, script, etc. Installed with different end-effectors, Dobot Magician can realize interesting functions such as 3D printing, laser engraving, writing and drawing.
Dobot Magician User Guide 3 Introduction Figure 3.2 Workspace of Dobot Magician (1) Figure 3.3 Workspace of Dobot Magician (2) Issue V1.7.0 (2019-01-09) User Guide 20 Copyright © Yuejiang Technology Co., Ltd.
Dobot Magician User Guide 3 Introduction Coordinate System Dobot Magician has two types of coordinate system, the joint one and the Cartesian one, as shown in Figure 3.4 and Figure 3.5 respectively. Figure 3.4 Joint coordinate system Figure 3.5 Cartesian coordinate system Joint coordinate system: The coordinates are determined by the motion joints. If the end-effector is not installed, Dobot Magician contains three joints: J1, J2, and J3, which are all the rotating joints.
Dobot Magician User Guide 3 Introduction The direction of Y-axis is perpendicular to the base leftward. The direction of Z-axis is vertical upward, which is based on the right hand rule. The R-axis is the attitude of the servo center relative to the origin of the robotic arm, of which the positive direction is counter-clockwise. The R-axis only exists once the end-effector with servo is installed. Motion Function The motion modes of Dobot Magician include Jogging, Point to Point (PTP), ARC. 3.
Dobot Magician User Guide 3 Introduction MOVJ: Joint movement. From point A to point B, each joint will run from initial angle to its target angle, regardless of the trajectory, as shown in Figure 3.6. Figure 3.6 MOVL/MOVJ mode MOVL: Rectilinear movement. The joints will perform a straight line trajectory from point A to point B, as shown in Figure 3.6. JUMP: From point A to point B, the joints will move in MOVJ mode, of which the trajectory looks like a door, as shown in Figure 3.7.
Dobot Magician User Guide Figure 3.8 3 Introduction ARC mode 3.3.3.4 Application Scenarios The application scenario depends on the trajectory in motion mode, as shown in Table 3.1. Table 3.
Dobot Magician User Guide Maximum speed (with 250g payload) Rotational speed of Rear arm, Forearm and base 320°/s Rotational speed of servo 480°/s Repeated positioning accuracy 0.2mm Power supply 100V-240V AC, 50/60Hz Power in 12V/7A DC Communication USB, WIFI, Bluetooth I/O 20 extensible I/O interfaces Software DobotStudio Working temperature -10°C~60°C 3 Introduction Sizes Figure 3.9 shows the size of Dobot Magician and Figure 3.10 shows the size of the end mounting hole. Issue V1.7.
Dobot Magician User Guide Figure 3.9 Figure 3.10 Issue V1.7.0 (2019-01-09) 3 Introduction Size of Dobot Magician Size of end mounting hole User Guide 26 Copyright © Yuejiang Technology Co., Ltd.
Dobot Magician User Guide 4 Interface Description Interface Description Interface Board The interfaces of Dobot Magician are located on the back of the base and the Forearm respectively. Figure 4.1 shows the interfaces on the back of the base, and Table 4.1 lists the description. Figure 4.1 Interfaces in the base Table 4.1 Interface Description No. Description 1 Reset key: Reset MCU program During resetting, the LED indicator on the base turns yellow.
Dobot Magician User Guide Table 4.
Dobot Magician User Guide 4 Interface Description LED Indicator The LED indicator is located on the base, Table 4.4 lists the status description. Table 4.
4 Interface Description Dobot Magician User Guide Table 4.5 Multiplex I/O Description I/O addressing Voltage Level Output PWM Level Input ADC 18 3.3V √ - - - 19 3.3V - - √ - 20 3.3V - - √ - 4.3.1.2 Multiplexed Peripheral Interface Description Figure 4.4 shows the peripheral interface on the base, and Table 4.6 lists the multiplexed I/O description. Figure 4.4 Issue V1.7.0 (2019-01-09) Peripheral Interface User Guide 30 Copyright © Yuejiang Technology Co., Ltd.
4 Interface Description Dobot Magician User Guide Table 4.6 Multiplexed I/O Description I/O addressing Voltage Level Output PWM Level Input ADC 10 5V √ - - - 11 3.3V √ √ - - 12 3.3V - - √ - 13 5V √ - - - 14 3.3V √ √ √ - 15 3.3V √ - √ √ 16 12V √ - - - 17 12V √ - - - Multiplexed Forearm I/O Interface Description Figure 4.5 shows the peripheral interface on the Forearm, Table 4.7 lists the multiplexed I/O description. Figure 4.5 Issue V1.7.
4 Interface Description Dobot Magician User Guide Table 4.7 Multiplexed I/O description I/O addressing Voltage Level Output PWM Level Input ADC 1 3.3V √ - √ √ 2 12V √ - - - 3 12V √ - - - 4 3.3V √ √ - - 5 3.3V - - √ - 6 3.3V √ √ - - 7 3.3V - - √ - 8 3.3V √ √ - - 9 3.3V √ - √ √ Issue V1.7.0 (2019-01-09) User Guide 32 Copyright © Yuejiang Technology Co., Ltd.
Dobot Magician User Guide 5 Operation Operation Introduction to the DobotStudio Function Modules You can use the DobotStudio to control the Dobot Magician to accomplish multiple functions such as Teaching & Playback, Write & Draw, Blockly graphic programming, and Script control, as shown in Figure 5.1. For details, see Table 5.1. Figure 5.1 The function modules on the DobotStudio page Table 5.
Dobot Magician User Guide 5 Operation You can also set the Dobot Magician by clicking Setting on the DobotStudio page, for example, implement general settings, base calibration, manual levelling, and auto levelling, as shown in Figure 5.2. For details, see Table 5.2. Figure 5.2 The General Setting page Table 5.
Dobot Magician User Guide 5 Operation Items Description Write Draw Set the Write & Draw function, such as speed, Junction velocity, linear acceleration, acceleration, pen up offset and pen down position. Leap Motion Set the parameters such as speed, scale, and performance for hand gesture control. Mouse Set the parameters such as speed, scale, and performance for mouse control.
Dobot Magician User Guide 5 Operation Items Description Home Set the Dobot Magician back to its home position to get a correct reference position When the Dobot Magician is moving, if its movement is hindered by an obstacle or the stepper motors lost steps, perform the homing operation Emergency Stop Stop the robotic arm if an emergency occurs View the version information such as DobotStudio version, firmware version, and hardware version Switch system language With the Operation Panel on the DobotS
Dobot Magician User Guide 5 Operation Items Description Joint jogging Jog the Dobot Magician by clicking J1+/-, J2+/-, J3+/-, or J4+/- in the Joint coordinate system Linear control When the linear rail is enabled (see Table 5.3), click L+/- to move the robotic arm along the rail.
Dobot Magician User Guide Figure 5.7 Connect the air pump to the Dobot Magician Figure 5.8 Issue V1.7.0 (2019-01-09) 5 Operation Install a suction cup kit User Guide 38 Copyright © Yuejiang Technology Co., Ltd.
Dobot Magician User Guide Figure 5.9 Issue V1.7.0 (2019-01-09) 5 Operation Install an air tube User Guide 39 Copyright © Yuejiang Technology Co., Ltd.
Dobot Magician User Guide Figure 5.10 5 Operation Connect the servo’s GP3 cable to the GP3 connector Installing a Gripper Kit An air pump should be used with the gripper kit, as shown in Figure 5.11, to open or close the gripper. Figure 5.11 Issue V1.7.0 (2019-01-09) A gripper kit User Guide 40 Copyright © Yuejiang Technology Co., Ltd.
Dobot Magician User Guide 5 Operation Procedure Figure 5.12 Dismantle the suction cup Figure 5.13 Issue V1.7.0 (2019-01-09) Install a gripper kit User Guide 41 Copyright © Yuejiang Technology Co., Ltd.
Dobot Magician User Guide Figure 5.14 5 Operation The effect of the gripper kit installation Teaching & Playback Page The Teaching & Playback page is shown in Figure 5.15. To access it, select Connect > Teaching & Playback on the DobotStudio page. Figure 5.15 The Teaching & Playback page In both Easy and Pro modes, you can switch between Easy and Pro modes, set loop, speed percentage, and acceleration percentage, as shown in Figure 5.16. Figure 5.16 Issue V1.7.
Dobot Magician User Guide Table 5.6 Items 5 Operation Set Easy/Pro, Loop, Speed and acceleration (Acc) Description Click this slider to switch between Easy and Pro modes.
Dobot Magician User Guide Items Description Pause time Set the pause time for a save point 5 Operation In both Easy and Pro modes, you can edit a highlighted save point such as copy, paste, cut, switch between motion modes, modify name and coordinates, as shown in Figure 5.18. Figure 5.18 Table 5.
Dobot Magician User Guide Figure 5.19 Table 5.9 5 Operation The Pro mode of the Teaching & Playback function The Pro mode of the Teaching & Playback function No. Description 1 StepRun: run a save point each time in the Save points list. Before clicking StepRun, please select a saved point. 2 Download: download the Save points list to the Dobot Magician for working in offline mode. For details, see 5.
Dobot Magician User Guide 5 Operation Procedure NOTICE Note the following rules when saving points to prevent the robotic arm from working outside its normal workspace. Any two points cannot coincide. The three points cannot be in the same straight line. The arc trajectory cannot exceed the Dobot Magician’s normal workspace. For example the points A, B, and C are on the arc. Point A is the start point; Point B is the second point; Point C is the end point, as shown in Figure 5.20. Figure 5.
Dobot Magician User Guide 5 Operation 3. Set the jogging speed percentage to 50 on the Operation Panel. 4. Jog the Dobot Magician in the Cartesian or Joint coordinate system to move the robotic arm to a location called position A. 5. Click +Point to save the coordinate corresponding to the position A, as shown in Figure 5.22. Figure 5.22 Save the start position A Select cirPoint to save the second point in the Save Point area.
Dobot Magician User Guide Figure 5.23 5 Operation Save the second position B and the end position C Set the percentage of both speed and acceleration for playback, for example 50. Set Loop to 2. Click Start. The Dobot Magicin perfrom the sequence of ARC trajectory as taught from its memory system, moving from positions A through C, as shown in . Figure 5.
5 Operation Dobot Magician User Guide A suction cup kit has been installed. For details, see 5.2.1 Installing a Suction Cup Kit. Procedure Figure 5.25 Choose SuctionCup as the end-effector The Teaching & Playback page is displayed. NOTE After reading the beginner guide of the DobotStudio, click to close it. 1. Put a small cube on the work surface near the suction cup kit. 2. Select the MOVJ motion mode in the Save Point area. 3. Click Issue V1.7.
Dobot Magician User Guide Figure 5.26 4. 5 Operation Display the Operation Panel Set the jogging speed percentage to 50 on the Operation Panel. NOTE To change the jogging speed, select Setting > Jog to set the speed and acceleration of the joints, linear rail, or the Cartesian coordinate system, as shown in Figure 5.27. Figure 5.27 Issue V1.7.0 (2019-01-09) Adjust the jogging speed User Guide 50 Copyright © Yuejiang Technology Co., Ltd.
Dobot Magician User Guide 5 Operation NOTICE Regarding the jogging speed and acceleration in the Joint coordinate system and Cartesian coordinate system, we recommend that it should be less than 500mm/s if loaded and that less than 800mm/s if not loaded. 5. Jog the Dobot Magician in the Cartesian or Joint coordinate system to move the suction cup close enough to the small cube for picking-up. For example, the suction cup reaches this location called position A. 6.
Dobot Magician User Guide Figure 5.29 5 Operation Jump parameters Jogging the Dobot Magician in the Cartesian or Joint coordinate system to move the small cube to the end position B as required. Unselect SucktionCup to turn off the air pump to release the small cube. Click +Point to save the coordinate corresponding to the position B, as shown in Figure 5.30. Figure 5.30 Save the end position B NOTE To change the speed and acceleration of playback, select Setting > Playback > Issue V1.7.
5 Operation Dobot Magician User Guide JointParam/CoordinateParm to adjust the speed and acceleration of the Cartesian or Joint coordinate system, as shown in Figure 5.31. For details, see Table 5.10. Figure 5.31 Set the speed and acceleration of the playback Table 5.
Dobot Magician User Guide Figure 5.32 5 Operation Move the small cube in the JUMP motion mode Working in Offline Mode Offline mode allows the Dobot Magician to perform the points in the Save points list previously downloaded from the DobotStudio without keeping the USB connection established. Prerequisites The Dobot Magician has been powered on. The Dobot Magician has been connected to the DobotStudio. The points have been saved.
Dobot Magician User Guide Figure 5.33 5 Operation Click Download When the process bar at the bottom of the DobotStudio page shows 100% and then disappears, it means that the download is complete, as shown in Figure 5.34. Figure 5.34 Issue V1.7.0 (2019-01-09) The process bar at the bottom of the DobotStudio page User Guide 55 Copyright © Yuejiang Technology Co., Ltd.
Dobot Magician User Guide 5 Operation NOTICE Before using offline mode, Dobot Magician needs to be reset by clicking Home to make Dobot Magician more accurate. For the details please refer to Appendix A Dobot Magician Homing Operation If press down Key button for long time, Dobot Magician will execute homing operation directly. Writing and Drawing Figure 5.35 shows the process of writing and drawing. Figure 5.
Dobot Magician User Guide Figure 5.36 5 Operation Install a writing and drawing kit NOTE To change to a new pen, unfasten the four M3*5 set screws in the pen holder with a 1.5mm hexagon wrench, as shown in Figure 5.37. Figure 5.37 Change to a new pen Connecting the DobotStudio If the current firmware of the Dobot Magician is the 3D Printing firmware instead of the Dobot firmware, the Select tool dialog box is displayed, asking if you want to switch to the Dobot firmware.
Dobot Magician User Guide 5 Operation The dialog box is displayed. Figure 5.38 Select the DobotStudio to upgrade the Dobot firmware Click OK, as shown in Figure 5.39. The Dobot firmware upgrade window is displayed. Figure 5.39 Confirm the firmware upgrade Click Confirm to upgrade the Dobot firmware, as shown in Figure 5.40. When the upgrade process bar shows 100%, and a short beep sound is heard, it means that the firmware is upgraded successfully, as shown in Figure 5.41.
Dobot Magician User Guide Figure 5.41 5 Operation The firmware upgrade is successful WARNING During the firmware upgrade, do not stop it. Otherwise, errors occur. Figure 5.42 Issue V1.7.0 (2019-01-09) Click Write & Draw User Guide 59 Copyright © Yuejiang Technology Co., Ltd.
Dobot Magician User Guide Figure 5.43 5 Operation Choose Pen as the end-effector Importing Image Files and Setting Writing Parameters When performing a write & draw task, a built-in or custom image file is required. Only a PLT or SVG image can be used. The built-in file is located in the directory Installation Directory \DobotStudio\config\prefab\system\source. Prerequisites A PLT or SVG image file has been created. Procedure Figure 5.44 Click Write & Draw NOTICE Issue V1.7.
Dobot Magician User Guide 5 Operation The imported image should be placed within the annular area on the Write & Draw page, as shown in Figure 5.45. If not, the robotic arm reaches its limited position and cannot draw or write. In this case, the image is highlighted with a red border, as shown in Figure 5.46. Figure 5.45 Figure 5.
Dobot Magician User Guide Figure 5.47 Issue V1.7.0 (2019-01-09) 5 Operation Open a PLT or SVG system image file User Guide 62 Copyright © Yuejiang Technology Co., Ltd.
Dobot Magician User Guide Click a shape in the Input Shapes area, as shown in Figure 5.48. Figure 5.48 Insert a system image file Click Input Texts on the Write & Draw page to input texts, and set its style, and then click OK to display the text on the annular area, as shown in Figure 5.49. Figure 5.49 5 Operation Input text Click Open to import an image file such as BMP, JEPG, or PNG to convert this image to its corresponding SVG file that the DobotStudio supports, as shown in Figure 5.50.
Dobot Magician User Guide Figure 5.50 Figure 5.51 5 Operation Import an image Convert an image to SVG NOTICE After image is converted to SVG,if there are single colors and fewer lines in image, you need to adjust threshold, otherwise picture can’t be uploaded to DobotStudio. Figure 5.52 Issue V1.7.0 (2019-01-09) Error tip User Guide 64 Copyright © Yuejiang Technology Co., Ltd.
Dobot Magician User Guide 5 Operation Click Setting on the Write & Draw page, as shown in Figure 5.53. Figure 5.53 Click Setting Click Write & Draw to set the Dobot Magician’s Velocity (mm/s), junction velocity (JunctionVel: mm/s), PlanAcc (mm/s2), acceleration (Acc: mm/s2), PenUpOffset (mm), PenDown (mm), as shown in Figure 5.54. NOTE We recommend to set the Velocity in the range of 0mm/s to 500mm/s and to adjust the acceleration between 0mm/s2 and 500mm/s2. Figure 5.54 Issue V1.7.
Dobot Magician User Guide 5 Operation Adjust the Position of the Pen Nib Procedure Press and hold the unlock button on the Forearm to move the Dobot Magician to raise and lower the pen nib until it slightly squeezes the paper. You can also jog the robotic arm in the Cartesian or Joint coordinate system to slowly pull the Z axis down to a suitable vertical position for writing, as shown in Figure 5.55. Figure 5.
Dobot Magician User Guide Figure 5.57 5 Operation Lock the height of writing NOTE The value of the Z axis is the PenDown parameter. This parameter can be set by selecting Setting > Write Draw > PenDown on the Write & Draw page, as shown in Figure 5.58. If the effect of writing is not satisfactory, slightly raise and lower the height of the writing and drawing kit or directly change the value of PenDown. Issue V1.7.0 (2019-01-09) User Guide 67 Copyright © Yuejiang Technology Co., Ltd.
Dobot Magician User Guide Figure 5.58 5 Operation The PenDown parameter The Dobot Magician automatically moves above the position (PenDown) of the start point of the text. Click Start to start writing on the paper. When writing, click Pause to pause the writing and Stop to halt the writing. Performing Laser Engraving Tasks Figure 5.59 shows the process of laser engraving. Figure 5.59 The process of laser engraving NOTICE The LaserEngraving is different is from the grayscale engraving.
Dobot Magician User Guide 5 Operation A laser kit includes a laser. For detailed steps, see below. Figure 5.60 Issue V1.7.0 (2019-01-09) Fasten the laser with clamp fixing screw User Guide 69 Copyright © Yuejiang Technology Co., Ltd.
Dobot Magician User Guide Figure 5.61 5 Operation Connect the laser to the SW4 and GP5 connectors Connecting the DobotStudio If the current firmware of the Dobot Magician is the 3D Printing firmware instead of the Dobot firmware, the Select tool dialog box is displayed, asking if you want to switch to the Dobot firmware. In this case, perform the following steps to switch to this firmware. Select DobotStudio to upgrade the Dobot firmware, as shown in Figure 5.62. The Question dialog box is displayed.
Dobot Magician User Guide 5 Operation Click OK, as shown in Figure 5.63. The Dobot firmware upgrade window is displayed. Figure 5.63 Confirm the firmware upgrade Click Confirm to upgrade the Dobot firmware, as shown in Figure 5.64. When the upgrade process bar shows 100% and a short beep sound is heard, it means that the firmware is upgraded successfully, as shown in Figure 5.65. In this case, the LED indicator turns from red to green. Then click Complete to exit. Figure 5.64 Issue V1.7.
Dobot Magician User Guide Figure 5.65 5 Operation The firmware upgrade is successful WARNING During the firmware upgrade, do not stop it. Otherwise, errors occur. Figure 5.66 Issue V1.7.0 (2019-01-09) Click Write & Draw User Guide 72 Copyright © Yuejiang Technology Co., Ltd.
Dobot Magician User Guide Figure 5.67 5 Operation Choose Laser as the end-effector Importing Image Files and Setting Engraving Parameters When performing a laser-engraving task, a built-in or a custom image file is required. Only a PLT or SVG image can be used. The built-in image file is located in the directory: Installation Directory\DobotStudio\config\prefab\system\source. Prerequisites A PLT or SVG image file has been created. Procedure Figure 5.
Dobot Magician User Guide 5 Operation cannot engrave on an object. In this case, the image is highlighted with a red border, as shown in Figure 5.70. Figure 5.69 Figure 5.70 The PLT or SVG image is located within the annular area The PLT or SVG image is located outside the annular area Click Open on the Write & Draw page to import a built-in PLT or SVG image file from the DobotStudio installation directory InstallatonDirectory\DobotStudio\config\prefab\system\source, as shown in Figure 5.71.
Dobot Magician User Guide Figure 5.71 Open a PLT or SVG file Click a shape in the Input Shapes area to directly import a system image file, as shown in Figure 5.72. Figure 5.72 5 Operation Insert a system image file Click Input Texts on the Write & Draw page to input texts, and set its style, and then click OK to display the text on the annular area, as shown in Figure 5.73. Issue V1.7.0 (2019-01-09) User Guide 75 Copyright © Yuejiang Technology Co., Ltd.
Dobot Magician User Guide Figure 5.73 5 Operation Input text Click Open to import an image file such as BMP, JEPG, or PNG to convert this image to its corresponding SVG file that the DobotStudio supports, as shown in Figure 5.74. Once this image is imported, the SVG Converter dialog box is displayed, as shown in Figure 5.75.
Dobot Magician User Guide 5 Operation Figure 5.75 Convert Bitmap to SVG Click Setting on the Write & Draw page, as shown in Figure 5.76. Figure 5.76 Click Setting Click Write & Draw to set the Dobot Magician’s Velocity (mm/s), junction velocity (JunctionVel: mm/s), PlanAcc (mm/s2), acceleration (Acc: mm/s2), PenUpOffset (mm), PenDown (mm), as shown in Figure 5.77. NOTE We recommend to set the Velocity in the range of 0mm/s to 500mm/s and to adjust the acceleration between 0mm/s2 and 500mm/s2.
Dobot Magician User Guide Figure 5.77 5 Operation Setting the parameters of the Write & Draw function Adjust the Laser Focus and Start to Grave Procedure Figure 5.78 Issue V1.7.0 (2019-01-09) Choose Laser as the end-effector User Guide 78 Copyright © Yuejiang Technology Co., Ltd.
Dobot Magician User Guide Figure 5.79 5 Operation Turn on the laser Danger When using a laser, wear lasing protective eyeglass. Never aim the laser at a person’s eye and clothes or stare at the laser from within the beam. In the central laser focus, a high temperature heat is created and can burn materials such as papers and wooden boards. Never aim the laser at a person and their clothes. Do not allow the children to play with the Dobot Magician.
Dobot Magician User Guide Figure 5.81 5 Operation Adjust the laser focus The point marked by a red box, as shown in Figure 5.82, corresponds to the position of the end-effector of the Dobot Magician. This point changes its position only within the annular area when the robotic arm moves. Figure 5.
Dobot Magician User Guide Figure 5.83 5 Operation Lock the height of engraving NOTE The value of the Z axis is the PenDown parameter. This parameter can be set by selecting Setting > Write Draw > PenDown on the Write & Draw page, as shown in Figure 5.84. If the effect of engraving is not satisfactory, slightly raise and lower the height of the laser kit or directly change the value of PenDown. Figure 5.84 Issue V1.7.
Dobot Magician User Guide 5 Operation The Dobot Magician automatically moves above the position (PenUpOffset) of the start point of the laser-engraving. When engraving, click Pause to pause the engraving and Stop to halt the engraving. Figure 5.85 shows the effect of the laser-engraving. Figure 5.85 The effect of the laser-engraving Engraving a Grayscale Image Figure 5.86 shows the process of engraving a grayscale image. Issue V1.7.0 (2019-01-09) User Guide 82 Copyright © Yuejiang Technology Co.
Dobot Magician User Guide Figure 5.86 5 Operation The process of engraving a grayscale image Installing a Grayscale-engraving Kit Both grayscale-engraving and laser-engraving use the laser kit as the end-effector. For the installation method, see 5.5.1 Installing a Laser Kit. Connecting the DobotStudio If the current firmware of the Dobot Magician is the 3D Printing firmware instead of the Dobot firmware, the Select tool dialog box is displayed, asking if you want to switch to the Dobot firmware.
Dobot Magician User Guide Figure 5.87 5 Operation Select the DobotStudio to upgrade the Dobot firmware Click OK, as shown in Figure 5.88. The Dobot firmware upgrade window is displayed. Figure 5.88 Confirm the firmware upgrade Click Confirm to upgrade the Dobot firmware, as shown in Figure 5.89. When the upgrade process bar shows 100%, and a short beep sound is heard, it means that the firmware is upgraded successfully, as shown in Figure 5.90. In this case, the LED indicator turns from red to green.
Dobot Magician User Guide Figure 5.90 5 Operation The firmware upgrade is successful WARNING During the firmware upgrade, do not stop it. Otherwise, errors occur. Issue V1.7.0 (2019-01-09) User Guide 85 Copyright © Yuejiang Technology Co., Ltd.
Dobot Magician User Guide Figure 5.91 5 Operation Click LaserEngraving Importing Image Files and Setting Engraving Parameters Prerequisites An image file has been created. You can also import system image, the importing path is Installation Directory\DobotStudio\attachment\grbrMode\source. Procedure NOTICE The imported image should be placed within the annular area on the LaserEngraving page, as shown in Figure 5.92.
Dobot Magician User Guide Figure 5.92 Figure 5.93 The image file is located within the annular area The image file is located outside the annular area Figure 5.94 Issue V1.7.0 (2019-01-09) 5 Operation Choose Laser as the end-effector User Guide 87 Copyright © Yuejiang Technology Co., Ltd.
Dobot Magician User Guide Figure 5.95 Import an image file Figure 5.96 Figure 5.97 Issue V1.7.0 (2019-01-09) 5 Operation System image Set the grayscale range, laser power range, and border User Guide 88 Copyright © Yuejiang Technology Co., Ltd.
Dobot Magician User Guide 5 Operation Table 5.11 Laser engraving parameters Items Description Grayscale range Set the grayscale range Range: 0 - 255 Default value: 20 - 240 Laser power range Set the laser power range Range: 2 - 100 Default value: 20 - 90 Border Set the border width. Unit: pixel Range: 0 - 50 Default value: 4 Click Setting on the LaserEngraving page.
Dobot Magician User Guide 5 Operation Danger When using a laser, wear lasing protective eyeglass. Never aim the laser at a person’s eye and clothes or stare at the laser from within the beam. In the central laser focus, a high-temperature heat is created and can burn materials such as papers and wooden boards. Never aim the laser at a person and their clothes. Do not allow the children to play with the Dobot Magician.
Dobot Magician User Guide Figure 5.100 5 Operation Unselect the Laser NOTICE If you cannot set the laser to be at its minimum focus, it’s probably because the focal length is long. To shorten the focal length, slightly turn the sliver lens screw (as shown in Figure 5.101) on the bottom of the laser kit. Figure 5.101 Adjust the focus The point marked by a red box, as shown in Figure 5.102, corresponds to the position of the laser kit of the Dobot Magician.
Dobot Magician User Guide Figure 5.102 5 Operation The point corresponding to the laser kit of the robotic arm Figure 5.103 Lock the height of engraving NOTE The value of Z axis is the PenDown parameter. This parameter can be set by selecting Setting > LaserEngraving > PenDown, as shown in Figure 5.104. If the effect of engraving is not satisfactory, slightly raise and lower the height of the laser kit or directly change the value of PenDown. Issue V1.7.
Dobot Magician User Guide Figure 5.104 5 Operation Set the PenDown parameters The Dobot Magician automatically moves above the position of the start point of the laser-engraving. When engraving, click Pause to pause the engraving and Stop to halt the engraving. Figure 5.105 shows the effect of the laser-engraving. Figure 5.105 The effect of laser-engraving Controlling with your Hand Gesture Issue V1.7.0 (2019-01-09) User Guide 93 Copyright © Yuejiang Technology Co., Ltd.
Dobot Magician User Guide 5 Operation You can use the LeapMotion function module of the DobotStudio to perform tasks, for example, grab or suck an object with your hand gesture. Installing a Leap Motion Controller Prerequisites The Leap Motion controller (a hand gesture controller) has been obtained. The Leap Motion driver software has been obtained. Download the Windows version, as shown in Figure 5.106, from the https://www.leapmotion.com/setup/desktop/windows. Figure 5.
Dobot Magician User Guide Figure 5.108 5 Operation The Leap Motion Installation Interface Leap Motion Demo You can move or sort an object with the LeapMotion function. This topic introduces how to move a small cube with a hand gesture. Prerequisites The Dobot Magician is powered on and connected to your computer. The suction cup kit has been installed. For details, see 5.2.1 Installing a Suction Cup Kit. Procedure Figure 5.109 Issue V1.7.
Dobot Magician User Guide Figure 5.110 Figure 5.111 Table 5.12 Items Issue V1.7.0 (2019-01-09) 5 Operation Click Setting Set the parameters of the Leap Motion function Set the parameters of the Leap Motion function Description User Guide 96 Copyright © Yuejiang Technology Co., Ltd.
Dobot Magician User Guide Speed 5 Operation The velocity percentage of the Dobot Magician: Unit: % Value range: 1 - 100 Default value: 50 Scale The scale of the Dobot Magician: Unit: % Value range: 1 - 100 Default value: 100 High performance/Low performance Choose a performance mode suitable for your computer. Select the Low performance (default) for the low configuration computer to prevent video delay Figure 5.
Dobot Magician User Guide Hand gesture Robotic arm’s movement Move your palm up, down, front, back, right, or left The robotic arm moves accordingly Clench your fist Control the air pump to suck air Unclench your fist Turn off the air pump 5 Operation Controlling with your Mouse You can use the Mouse function module of the DobotStudio to perform tasks, for example, grab or suck an object with your mouse. This topic introduces how to move a small cube with a mouse.
Dobot Magician User Guide Figure 5.114 5 Operation Choose SuctionCup as the end-effector Figure 5.115 Click Setting Click Mouse, as shown in Figure 5.116. Set the parameters, as shown in of mouse control Table 5.14, and click OK. Issue V1.7.0 (2019-01-09) User Guide 99 Copyright © Yuejiang Technology Co., Ltd.
Dobot Magician User Guide Figure 5.116 Table 5.14 5 Operation Set the parameters of mouse control Set the parameters of mouse control Parameters Description Speed The velocity percentage of the Dobot Magician: Unit: % Value range: 1 - 100 Default value: 50 Scale The scale of the Dobot Magician: Unit: % Value range: 1 - 100 Default value: 100 High performance/Low performance Choose a performance mode suitable for your computer.
Dobot Magician User Guide 5 Operation limited position. In this case, drag the mouse to into the annular area. Figure 5.117 Move the robotic arm in the red annular area NOTE For details on how to use the mouse to control the robotic arm on the Mouse page, see Table 5.15. Table 5.
Dobot Magician User Guide 5 Operation After installing 3D printing kit, you can import 3D module into the 3D printing software for 3D printing. Figure 5.118 shows the 3D printing process. Figure 5.118 3D printing process During 3D printing, the 3D printing control software is required. You can use Repetier Host or Cura software for 3D printing. Reptier-Host: Reptier-Host can slice with the third party slicing (such as CuraEngine, Slic3r, etc), check and modify G-Code, control 3D printing manually.
Dobot Magician User Guide 5 Operation Figure 5.119 3D printing kit Procedure Issue V1.7.0 (2019-01-09) User Guide 103 Copyright © Yuejiang Technology Co., Ltd.
Dobot Magician User Guide Figure 5.120 Figure 5.121 5 Operation Push down the filament Connect extruder and hot end NOTICE Please make sure that the PTFE tube has been pushed down to the bottom of the hot end. Otherwise, it will cause abnormal discharge. Issue V1.7.0 (2019-01-09) User Guide 104 Copyright © Yuejiang Technology Co., Ltd.
Dobot Magician User Guide Figure 5.122 Issue V1.7.0 (2019-01-09) 5 Operation Fix hot end User Guide 105 Copyright © Yuejiang Technology Co., Ltd.
Dobot Magician User Guide Figure 5.123 Connect hot end to the Forearm Figure 5.124 Issue V1.7.0 (2019-01-09) 5 Operation Connect with extruder User Guide 106 Copyright © Yuejiang Technology Co., Ltd.
Dobot Magician User Guide Figure 5.125 5 Operation Place filament and extruder to the Filament holder Operating Repetier Host Repeiter Host has been built into DobotStudio. After burning 3D printing firmware, the Repetier Host page will be displayed automatically. Prerequisites The 3D printing model has been prepared. The printing platform has been prepared and please place it in the workspace of the Dobot Magician. Dobot Magician has been powered on.
Dobot Magician User Guide Figure 5.126 5 Operation Burn firmware After burning 3D printing firmware, the Repetier Host page is displayed automatically, as shown in Figure 5.127. If the LED indicator on the base turns red, it indicates that the connection of the 3D printing kit is abnormal. WARNING Please DO NOT operate or turn off Dobot Magician when burning firmware, to avoid machine damage. Figure 5.127 Issue V1.7.
Dobot Magician User Guide 5 Operation NOTICE If the current firmware is set for 3D printing when operating 3D printing, you can click Connect directly on the DobotStudio page. And then Click OK on the Select tool page to switch to Repetier Host, as shown in Figure 5.128. Figure 5.128 Switch into 3D printing automatically 5.9.2.2 Performing 3D Printing Procedure Printing parameters only need to be set for the first time. Click Printer Settings on the top right corner of the Pepetier Host page.
Dobot Magician User Guide Figure 5.129 5 Operation Connection setting Click Apply. Unselect the corresponding options on the Printer tab as shown in the red box of, Figure 5.130 and the other parameters are set by default. Then, click Apply. Issue V1.7.0 (2019-01-09) User Guide 110 Copyright © Yuejiang Technology Co., Ltd.
Dobot Magician User Guide Figure 5.130 5 Operation Unselect options Set the corresponding parameters on the Extruder tab as shown in the red box of Figure 5.131, the other parameters are set by default. Then, Click Apply. Issue V1.7.0 (2019-01-09) User Guide 111 Copyright © Yuejiang Technology Co., Ltd.
Dobot Magician User Guide Figure 5.131 5 Operation Extruder settings Set the corresponding parameters on the Printer Shape tab as shown in the red box of Figure 5.132, the other parameters are set by default. Then, Click Apply. Issue V1.7.0 (2019-01-09) User Guide 112 Copyright © Yuejiang Technology Co., Ltd.
Dobot Magician User Guide Figure 5.132 5 Operation Printer shape settings Click OK After the connection is successful, the current heating temperature will be shown on the below of the Repetier Host page, as shown in Figure 5.133. Figure 5.133 Issue V1.7.0 (2019-01-09) Connect to Dobot Magician User Guide 113 Copyright © Yuejiang Technology Co., Ltd.
Dobot Magician User Guide 5 Operation Before printing, you need to test the extruder to check whether the melted filament flows from the nozzle of the extruder. The temperature of the extruder should be above 170℃. Dobot Magician will not start 3D printing until the filament is in the melting state. So you need to heat the extruder first. Set the heating temperature to 200℃ on the Manual Control tab of the Repetier Host page and click , as shown in Figure 5.134.
Dobot Magician User Guide Figure 5.135 5 Operation Extrude filament If the melted filament flows from the nozzle of the extruder, the extruder is working properly. NOTICE If the filament extrusion is in the opposite direction. Please remove the filament, and turn the extruder around, then re-push down the filament. NOTE During printing, if the distance from Dobot Magician to the printing platform is too large or too small to paste the first layer, it can lead to the nozzle blockage.
Dobot Magician User Guide 5 Operation Also, you can press the Key button on the bace of the base to get the current coordinates. Figure 5.136 Input M415 NOTE If you cannot find the G-Code command window, please click EASY to close Easy Mode, as shown in Figure 5.137. Figure 5.137 Issue V1.7.0 (2019-01-09) Easy mode User Guide 116 Copyright © Yuejiang Technology Co., Ltd.
Dobot Magician User Guide Figure 5.138 5 Operation Import 3D printing Model After importing the model, you can center, zoom, or rotate the model on the Object Placement page, as shown in Figure 5.139. Figure 5.139 Issue V1.7.0 (2019-01-09) Model operation User Guide 117 Copyright © Yuejiang Technology Co., Ltd.
Dobot Magician User Guide 5 Operation You need to set the slicing parameters before first printing. Select Slic3r from Slicer on the Slicer tab of the Repetier Host page, and click Configuration, as shown in Figure 5.140. Figure 5.140 Select slicer The Slic3r page is displayed, as shown in Figure 5.141. Issue V1.7.0 (2019-01-09) User Guide 118 Copyright © Yuejiang Technology Co., Ltd.
Dobot Magician User Guide Figure 5.141 5 Operation Slic3r page Set the slicing parameters on the Slic3r page. The 3D printing effect depends on the slice parameters. This topic provides a configuration sample, you can select File > Load Config on the Slic3r page to import it directly for printing. The path of the configuration sample is directory\DobotStudio\attachment, as shown in Figure 5.142. Figure 5.142 Installation Configuration sample Dobot-2.0-Vase.
Dobot Magician User Guide 5 Operation is used for the filling, the filling rate is 20%. Save the Printing Settings, Filament Settings and Printer Settings tabs respectively after importing configuration sample, as shown in Figure 5.143. Figure 5.143 Save configuration file Click Slici with Slic3r on the Slicer tab of the Repetier Host page, as shown in Figure 5.144. Figure 5.144 Click Issue V1.7.0 (2019-01-09) Start to slice on the top left corner of the Repetier Host page to print.
Dobot Magician User Guide Figure 5.145 5 Operation Start printing Here we choose vase mode to print, and the product after printing as shown in Figure 5.146. Figure 5.146 Issue V1.7.0 (2019-01-09) The product of printing User Guide 121 Copyright © Yuejiang Technology Co., Ltd.
Dobot Magician User Guide 5 Operation Operating Cura If you need to use Cura software for 3D printing, please launch the Cura software after burning firmware. Prerequisites Slice software Cura has been installed. The download path is https://ultimaker.com/en/products/ultimaker-cura-software/list. Please download the recommended version V14.07. The way how to install and use is not descripted in this topic. The 3D printing model has been prepared.
Dobot Magician User Guide 5 Operation After burning 3D printing firmware, if the LED indicator on the base turns red, it indicates that the connection of the 3D printing kit is abnormal. WARNING Please DO NOT operate or turn off Dobot Magician when burning firmware, to avoid machine damage. 5.9.3.2 Performing 3D Printing Procedure Select Machine > settings on the Cura page. The Machine settings page is displayed.
Dobot Magician User Guide Parameter Description GCode Flavor The style of GCode 5 Operation Please select RepRap Marlin/Sprinter Build area shape Build the area shape Please select Circular Serial port Serial port Please select the corresponding serial port Baudrate Baud rate Please set to 115200 Set slice parameters, and select File > Open Profile to import these parameters, as shown in Figure 5.149. Figure 5.149 Import slice parameters The 3D printing effect depends on the slice parameters.
Dobot Magician User Guide Figure 5.150 5 Operation Configuration sample Dobot-2.0-Vase-Cura.ini is used for printing a thin-walled vase, while Dobot2.0-Cura.ini is used for the filling, the filling rate is 20%. Click , the Open 3D model page is displayed, and select the 3D printing model prepared. The format of 3D model is STL. You can design 3D model and transform it into STL format. After importing the model, click the model itself, you can center, zoom or rotate, and so on, as shown in Figure 5.
Dobot Magician User Guide 5 Operation The printing window is displayed and the current printing temperature is shown on the top corner of the window, as shown in Figure 5.152. Figure 5.152 Printing window Set Temperature to 200 and press down Enter to heat the extruder. The temperature of the extruder should be above 170℃. Dobot Maigicain will not start 3D printing until the filament is in the melting state. So you need to heat the extruder first.
Dobot Magician User Guide Figure 5.153 5 Operation Click feedstock extruder If the melted filament flows from the nozzle of the extruder, the extruder is working properly. NOTICE If the filament extrusion is in the opposite direction, please remove the filament, and turn the extruder around, then re-push down the filament. NOTE During printing, if the distance from Dobot Magician to the printing platform is too large or too small to paste the first layer, it can lead to the nozzle blockage.
Dobot Magician User Guide Figure 5.154 5 Operation Input command M415 Calibration Base Calibration The base Encoder has been calibrated before being shipped out. Generally, the J1-coordinate is 0° after homing, where the homing point is the system default. Namely, the Forearm is located at the middle in front of the base. If the J1-coordinate is not 0° (error range: 1°-3°) after homing, you need to re-calibrate the base Encoder. Prerequisites The writing and drawing kit has been installed.
Dobot Magician User Guide Figure 5.155 5 Operation Location of Dobot Magician This step is used for observing the nib position on the calibration board when moving J1-axis in Step 5, to improve calibration accuracy. Click Teaching&Playback on the DobotStudio page. The Teaching&Playback page is displayed. Press the Unlock key on the Forearm and drag Dobot Magician to make the nib contact the surface of the calibration board, then release the Unlock key.
Dobot Magician User Guide 5 Operation Dobot will start homing. Please ensure that there are no obstacles in the workspace during homing. If the speed is too fast when moving J1-axis, you can drag Speed slider to adjust speed. Figure 5.157 Issue V1.7.0 (2019-01-09) Move J1-axis User Guide 130 Copyright © Yuejiang Technology Co., Ltd.
Dobot Magician User Guide Figure 5.158 5 Operation Nib position You can check the J1-coordinate on the Operation Panel page, as shown in Figure 5.159. Issue V1.7.0 (2019-01-09) User Guide 131 Copyright © Yuejiang Technology Co., Ltd.
Dobot Magician User Guide Figure 5.159 5 Operation J1-coordinate Sensor Calibration The angle sensors of the Forearm and Rear Arm have been calibrated before being shipped out. Generally, the Z-coordinate will remain the same when moving Dobot Magician in the same horizontal plane. If changed, you need to recalibrate the angle sensors by manual levelling or auto levelling to improve the positioning accuracy.
Dobot Magician User Guide Dobot Magician has been powered on. Dobot Magician has been connected to DobotStudio successfully. The sensor calibration board has been prepared. 5 Operation Procedure Figure 5.160 Location of Dobot Magician The Manual Levelling page is displayed. NOTICE Please remove all end-effectors from Dobot Magician before calibrating Issue V1.7.0 (2019-01-09) User Guide 133 Copyright © Yuejiang Technology Co., Ltd.
Dobot Magician User Guide Figure 5.161 Get the angle sensor coefficients Figure 5.162 Issue V1.7.0 (2019-01-09) 5 Operation Set precisions User Guide 134 Copyright © Yuejiang Technology Co., Ltd.
Dobot Magician User Guide 5 Operation Install the writing and drawing kit. For details, please see 5.4.1 Installing a Writing and drawing kit. Press the Unlock key on the Forearm and drag Dobot Magician to make the nib near the A3 point on the calibration board, then release the Unlock key. Click coordinate buttons on the Manual Levelling page (as shown in Figure 5.163) to make the nib align to the center of A3 point on the calibration board, as shown in Figure 5.164.
Dobot Magician User Guide Figure 5.164 5 Operation Nib position NOTICE Please DO NOT drag Dobot Magician in this step, to avoid manual levelling failure. If the speed is too fast when clicking coordinate buttons, you can drag Speed slider to adjust speed. Issue V1.7.0 (2019-01-09) User Guide 136 Copyright © Yuejiang Technology Co., Ltd.
Dobot Magician User Guide Figure 5.165 Figure 5.166 5 Operation Fine-tune page Nib position on the second calibrated point The distance between the two calibrated points on the Calibration board is 80mm, so please keep the default value in this step. Issue V1.7.0 (2019-01-09) User Guide 137 Copyright © Yuejiang Technology Co., Ltd.
Dobot Magician User Guide Figure 5.167 5 Operation Set the distance between the two calibrated points The result is shown as Figure 5.168. Figure 5.168 Calibrating result 5.10.2.2 Auto Levelling Prerequisites Issue V1.7.0 (2019-01-09) User Guide 138 Copyright © Yuejiang Technology Co., Ltd.
Dobot Magician User Guide Dobot Magician has been connected to a PC via USB cable. Dobot Magician has been connected to the power adapter. The auto-levelling tool has been obtained, as shown in Figure 5.169. Figure 5.169 5 Operation Auto-levelling tool Procedure NOTICE Please ensure that the platform is flat. Or, the auto levelling will be failed. Issue V1.7.0 (2019-01-09) User Guide 139 Copyright © Yuejiang Technology Co., Ltd.
Dobot Magician User Guide Figure 5.170 Figure 5.171 Issue V1.7.0 (2019-01-09) 5 Operation Fix auto-levelling tool Insert the cable of the auto-levelling User Guide 140 Copyright © Yuejiang Technology Co., Ltd.
Dobot Magician User Guide 5 Operation NOTICE Please ensure that there are no obstacles in the workspace during auto levelling. Figure 5.172 Auto levelling page NOTE If the auto levelling is failed, please check if the platform is flat and try again. Issue V1.7.0 (2019-01-09) User Guide 141 Copyright © Yuejiang Technology Co., Ltd.
Dobot Magician User Guide Figure 5.173 5 Operation Auto levelling result Homing Dobot Magician has been calibrated before being shipped out. If the Dobot Magician has been hit or the motor has lost step, leading data abnormal, you need to operate homing to improve the positioning accuracy. Prerequisites Dobot Magician has been powered on. Dobot Magician has been connected to DobotStudio successfully. Procedure Click Home on the DobotStudio page, as shown in Figure 5.174.
Dobot Magician User Guide 5 Operation Also, the homing point can be use-defined, you can select a saved point on the Teachong&Playback page and right-click SetHome to set this saved point as the homing point, as shown in Figure 5.175. Figure 5.175 Set homing point Connecting with WIFI Kit You can connect Dobot Magician to a PC via WIFI kit without USB cable, making Dobot Magician and PC in the same WLAN. Figure 5.176 shows the WIFI kit. Figure 5.
Dobot Magician User Guide 5 Operation The WIFI name and password have been obtained and must be the same as that of PC. Procedure Figure 5.177 Connect with WIFI kit NOTICE Please turn off the Dobot Magician completely first before connecting or disconnecting external equipment. Or, it causes serious damage to your device After turning on, there are two short beep sounds and the blue LED indicator on the WIFI module is on. The Set Dobot Wi-Fi page is displayed.
Dobot Magician User Guide Figure 5.178 Table 5.17 Parameter Description SSID Set WIFI name 5 Operation Set WIFI Parameter description The WIFI name and password have been obtained and must be the same as that of PC Password Set WIFI password Dynamic Host Configuration Whether to select DHCP Protocol (DHCP) Yes: Only set SSID and Password No: Only set IPAddress, Netmask and Gateway IPAddress Set the IP address of Dobot Magician.
Dobot Magician User Guide 5 Operation About 5 seconds later, the green LED indicator on the WIFI module is on, indicating that the Dobot Magician has been connected with WLAN, as shown in Figure 5.179. Figure 5.179 Figure 5.180 Status of LED indicator IP address of Dobot Magician After the connection is successful, you can control Dobot Magician without USB cable. Connecting with Bluetooth Kit Dobot Magician can be connected to smart phone with Bluetooth. Figure 5.181 shows the Bluetooth kit.
Dobot Magician User Guide Figure 5.181 5 Operation Bluetooth kit Prerequisites Dobot Magician has been connected to the power adapter. The DobotStudio APP has been downloaded. Procedure Issue V1.7.0 (2019-01-09) User Guide 147 Copyright © Yuejiang Technology Co., Ltd.
Dobot Magician User Guide Figure 5.182 5 Operation Connect with Bluetooth kit NOTICE Please turn off the Dobot Magician completely first before connecting or disconnecting external equipment. Or, it causes serious damage to your device. After turning on, there are three short beep sounds and the blue LED indicator on the Bluetooth module is on and the green one is blinking. Turn on the Bluetooth and launch DobotStudio APP on your phone. And click Connect to connect with Dobot Magician.
Dobot Magician User Guide Dobot Magician has been powered on. Dobot Magician has been connected to DobotStudio successfully. 5 Operation Procedure The Blockly page is displayed. Figure 5.183 Blockly graphic programming Table 5.18 lists the description of blockly module. Table 5.18 Blockly description No. Description 1 The selection area of blockly module, including logistic, loop, math, and Dobot API. You can program by dragging them to the window.
Dobot Magician User Guide 5 Operation Scripting You can control Dobot Magician over scripting. Dobot Magician supports various API, such as velocity/acceleration setting, motion mode setting, and I/O configuration, which uses Python language for secondary development. For details about the Dotob Magician API interface and function description, please see Dobot Magician API Description. The download path is https://www.dobot.cc/downloadcenter.html?sub_cat=72#sub-download.
Dobot Magician User Guide 5 Operation The Saving Scrip File page is displayed. The running log will be displayed on the lower pane of the Script page for checking. Operating Stick Controller Kit Dobot Magician can be controlled by stick controller kit without DobotStudio. Figure 5.185 shows the stick controller kit. From left to right: Stick controller, USB Host module, USB cable (used for charging stick controller), Transceiver. Figure 5.
Dobot Magician User Guide Figure 5.186 5 Operation Connect with USB Host module NOTICE Please turn off the Dobot Magician completely first before connecting or disconnecting external equipment. Or, it causes serious damage to your device. The red LED indicator on the middle of the stick controller is blinking, indicating that the Dobot Magician can be controlled by the stick controller. Issue V1.7.0 (2019-01-09) User Guide 152 Copyright © Yuejiang Technology Co., Ltd.
5 Operation Dobot Magician User Guide Figure 5.187 Power button of the stick controller Table 5.19 lists the functions of buttons on the stick controller. Table 5.
5 Operation Dobot Magician User Guide Button Function positive/negative direction Joint coordinate system mode: Dobot Magician along J2-axis positive/negative direction rotates Right stick: Front/back in the Cartesian coordinate system mode: Dobot along Z-axis in the positive/negative direction Magician moves Joint coordinate system mode: Dobot Magician along J3-axis positive/negative direction rotates Right stick: Left/right in the Cartesian coordinate system mode: Dobot Magici
Dobot Magician User Guide Figure 5.188 Table 5.20 5 Operation Sliding rail kit Sliding rail kit description No. Description 1 Tool kit 2 Screws 3 Plate a 4 Plate c 5 Sliding rail (with wire set and plate b) Installing sliding rail Procedure Issue V1.7.0 (2019-01-09) User Guide 155 Copyright © Yuejiang Technology Co., Ltd.
Dobot Magician User Guide Figure 5.189 Issue V1.7.0 (2019-01-09) 5 Operation Fix plate a User Guide 156 Copyright © Yuejiang Technology Co., Ltd.
Dobot Magician User Guide Figure 5.190 Fixed position with screws Figure 5.191 Issue V1.7.0 (2019-01-09) 5 Operation Connect with wire set User Guide 157 Copyright © Yuejiang Technology Co., Ltd.
Dobot Magician User Guide 5 Operation Fix the plate c on the plate a with two M3*8 hexagon socket head cap screws, as shown in Figure 5.192. Figure 5.192 Fix plate c Fix the air pump on the plate c, as shown in Figure 5.193. And connect the air pump to Dobot Magician. For details, please see 5.2.1 Installing a Suction Cup Kit. Figure 5.193 Issue V1.7.0 (2019-01-09) Fix air pump User Guide 158 Copyright © Yuejiang Technology Co., Ltd.
Dobot Magician User Guide Figure 5.194 Figure 5.195 5 Operation Connect V2 Sliding rail to V2 Dobot Magician Interfaces on the other end of the wire set Figure 5.196 shows the connection between the sliding rail and the wire set. Issue V1.7.0 (2019-01-09) User Guide 159 Copyright © Yuejiang Technology Co., Ltd.
Dobot Magician User Guide Figure 5.196 5 Operation Connect sliding rail and wire set Sliding Rail Parameter Description Table 5.21 Parameter Sliding rail parameter description Description Maximum payload 5kg Maximum Distance 1000mm Maximum speed 150mm/s Maximum acceleration 150mm/s2 Repeated positioning accuracy 0.01mm Absolute positioning accuracy 0.25mm Demo Description This topic describes how to use the V2 version of sliding rail for writing.
Dobot Magician User Guide 5 Operation a Writing and drawing kit. Procedure Figure 5.197 Select New Linear Rail Now, you can click L+, L- to make Dobot Magician move to the left or right. The sliding block moves to its homing point and then Dobot Magician rotates back to its homing point. For details about teaching and playback, please see 5.2 Performing Teaching & Playback Tasks. Click Teaching&Playback on the DobotStudio page. The Teaching&Playback page is displayed.
Dobot Magician User Guide 5 Operation The saved points list is as shown in Figure 5.198. Figure 5.198 Save points L indicates the position where Dobot Magician is located on the sliding rail, and the speed and acceleration can be set on the Setting > Playback page. Click Exit to close Teaching&Playback page. The Write&Draw page is displayed, as shown in Figure 5.199. For details about writing and drawing, please see 5.4 Writing and Drawing. Figure 5.199 Write&Draw page The rectangle in Figure 5.
Dobot Magician User Guide Figure 5.200 Figure 5.201 5 Operation Input text Set trigger point If the trigger points are set after the first letter a and the letter c, as shown in Figure 5.202. Issue V1.7.0 (2019-01-09) User Guide 163 Copyright © Yuejiang Technology Co., Ltd.
Dobot Magician User Guide Figure 5.202 5 Operation Trigger lines Dobot Magician starts writing. Take the first trigger point as an example, after writing the first letter a, the saved points list on the Teaching&Playback page is triggered, and Dobot Magician moves to the set position to perform the related operations according to the saved points list. Then, Dobot Magician continues to write. Multiplexed I/O Demo The addresses of the I/O interfaces in Dobot Magician are unified.
5 Operation Dobot Magician User Guide Level Output Normally, air pump can be controlled by the I/O interfaces. The I/O 11 controls its intake (High level) and outtake (Low level) and the I/O 16 controls its start-stop. Table 5.22 lists the multiplexed descriptions of I/O 11 and I/O 16. Table 5.22 Multiplexed I/O description I/O addressing Voltage Level Output PWM Level Input ADC 11 3.
Dobot Magician User Guide Figure 5.205 5 Operation Select end-effector NOTICE Normally, If SuctionCup or Gripper is selected from the end-effector drop-down list after the air pump has been connected, the air pump will be controlled by the system. In this topic, we use I/O interfaces to control the air pump, so SuctionCup and Gripper cannot be selected, to avoid conflict. Figure 5.206 Switch advanced function “The saved point is displayed on the Teaching&Playback page, as shown in Figure 5.207.
Dobot Magician User Guide Figure 5.207 5 Operation Saved point The air pump is humming with intake. The saved point is displayed on the Teaching&Playback page, as shown in Figure 5.208. Figure 5.208 Saved point Level Input This topic also takes I/O 12 as an example. Issue V1.7.0 (2019-01-09) User Guide 167 Copyright © Yuejiang Technology Co., Ltd.
5 Operation Dobot Magician User Guide Table 5.23 Multiplexed I/O description I/O addressing Voltage Level Output PWM Level Input ADC 12 3.3V - - √ - Prerequisites Dobot Magician has been powered on. Dobot Magician has been connected to DobotStudio successfully. The saved points list has been existed on the Teaching&Playback page. Procedure Figure 5.209 Switch advanced function Figure 5.210 Issue V1.7.
5 Operation Dobot Magician User Guide PWM OUTPUT This topic also takes I/O 11 as an example. Table 5.24 Multiplexed I/O description I/O addressing Voltage Level Output PWM Level Input ADC 11 3.3V √ √ - - Prerequisites Dobot Magician has been powered on. Dobot Magician has been connected to DobotStudio successfully. Procedure Figure 5.212 Saved point The EIO Setting page is displayed, as shown in Figure 5.213. Issue V1.7.
Dobot Magician User Guide Figure 5.213 Issue V1.7.0 (2019-01-09) 5 Operation EIO setting User Guide 170 Copyright © Yuejiang Technology Co., Ltd.
Dobot Magician User Guide 5 Operation Appendix A Dobot Magician Homing Operation Homing Procedure: 1. Turn on Dobot Maigcian, wait for about 20 seconds after green light is on, and then click Home on Dobot Studio page to make Dobot Magician execute homing operation. 2. Blue light will flash during homing, and Dobot Magician will execute homing operation. Do not operate the Dobot until the green light is on. 3. Save points and download them to Dobot Magician. Click OK to wait downloading finished.